Stop Mud-Clogged Aerator Tines: Quick Fixes That Work
Lead Turfgrass & Lawn Care Specialist at Totally Green Lawn · Certified Turfgrass Specialist (CTS), Master Gardener, B.S. in Agronomy & Turf Science · 14+ years in residential turf management, organic fertilization, and weed science
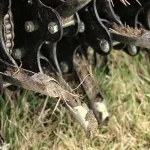
You're halfway across the lawn, tines sunk into the soil, and they come up packed solid with mud instead of clean plugs. The weight drags. The cores won't drop.
You stop, jam a screwdriver into each tine, and the whole job takes three times as long as it should. If that's your Saturday morning, here's the good news: a clogged manual core aerator is almost always a soil-moisture problem, not a tool problem. Manufacturer specifications indicate most hollow tines are designed to penetrate and eject cleanly in soils that hold shape when squeezed but crumble under light pressure, the same standard the turfgrass programs at Penn State Extension use in their lawn-care guidance.
The fix isn't buying a better aerator. It's matching your timing, your prep, and your technique to what your soil is actually doing. We've broken the whole thing into a simple workflow so you can stop fighting mud and start pulling real plugs.
As of 2026, the core principles haven't changed, but more homeowners are catching on to pre-watering windows that cut clogging nearly in half.
Quick Answer
Stop manual core aerator tines from clogging by aerating when soil is moist, not wet. Water the lawn one to two days before. Lift the tool straight up after each step.
Clear tines every few plugs. Avoid working soggy or bone-dry soil.
Why Your Manual Core Aerator Keeps Clogging (and What's Actually Causing It)
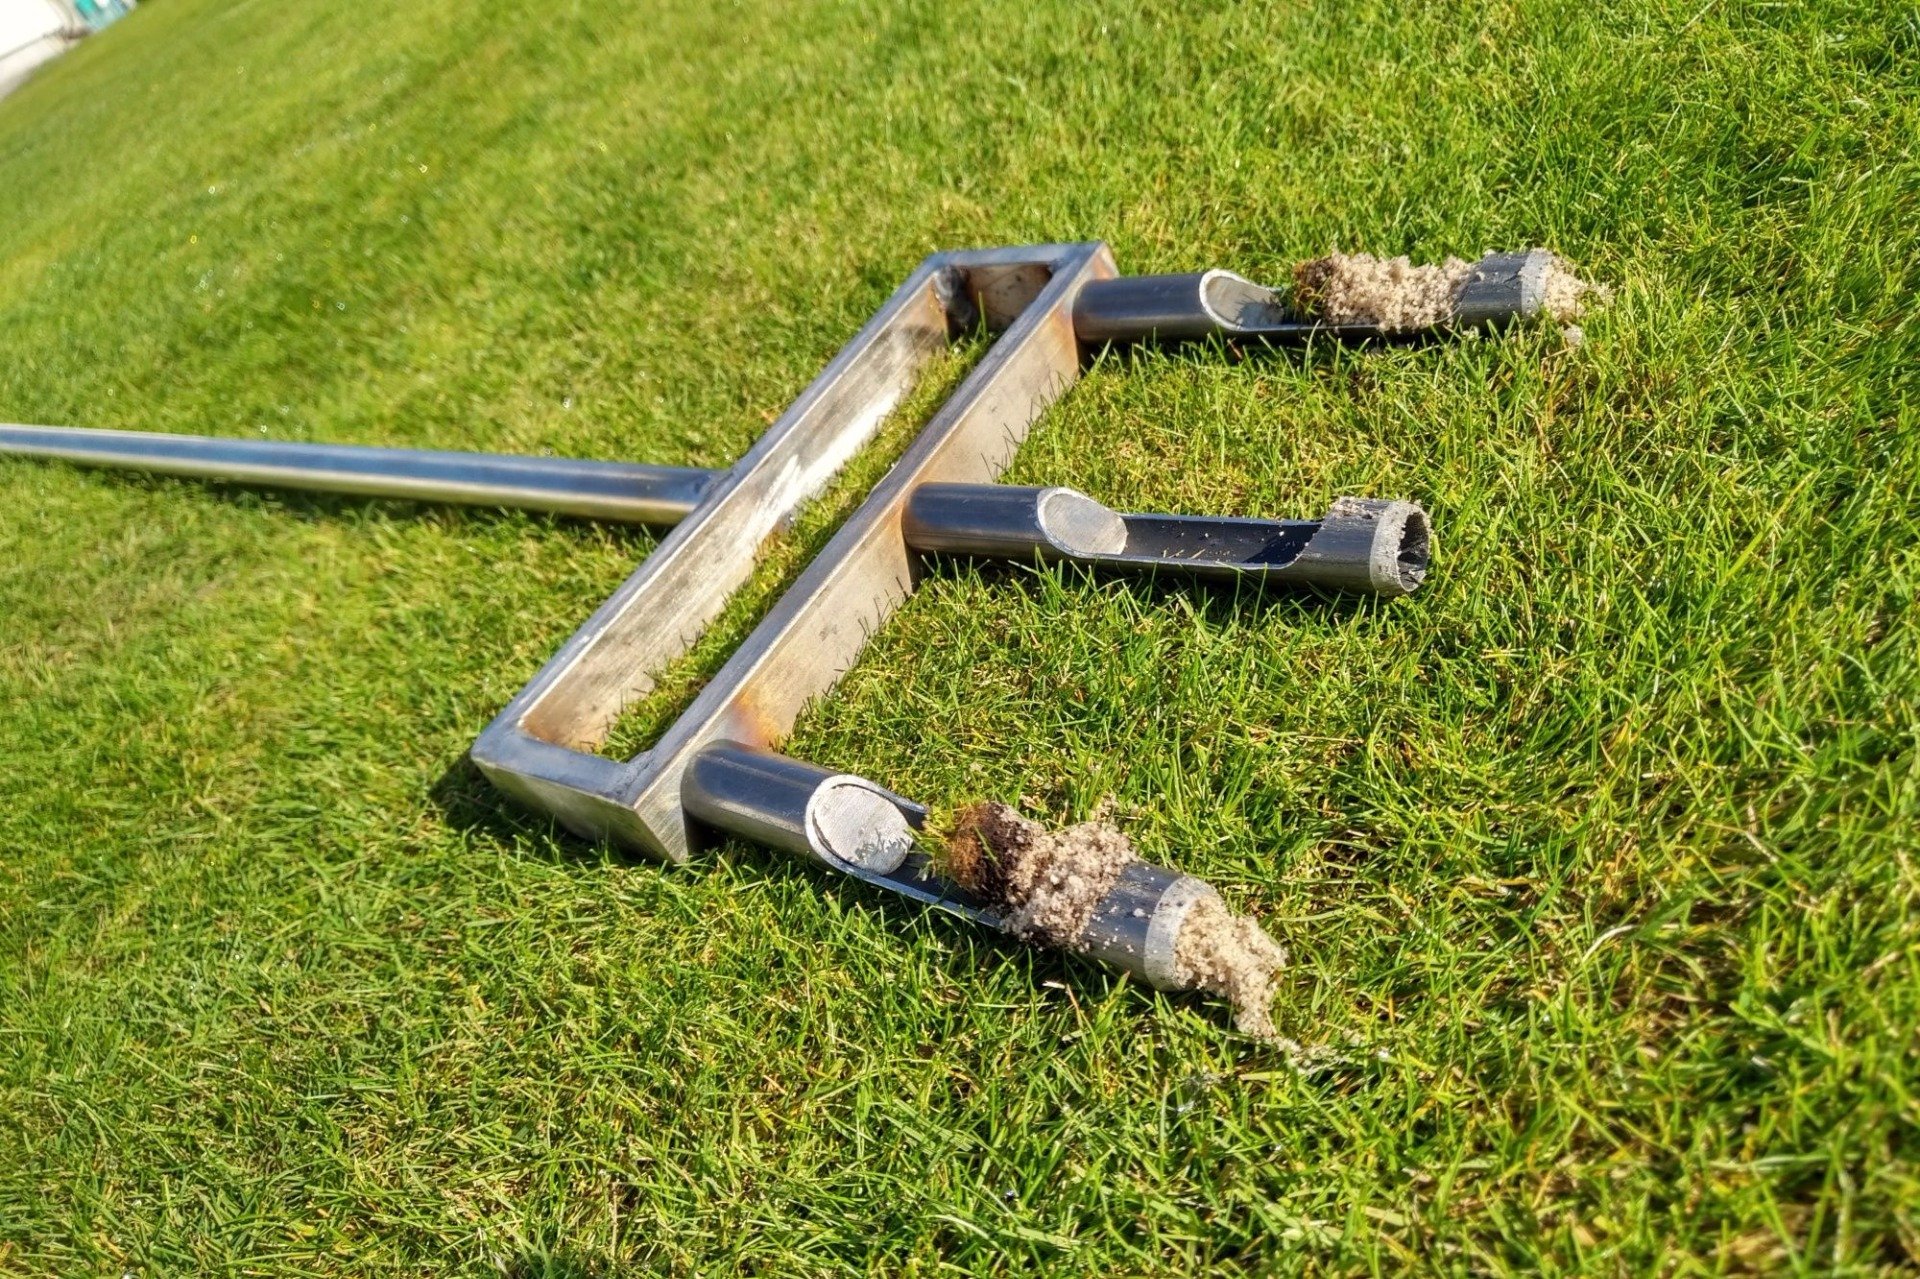
Clogging isn't random. It happens because one of three things is off: the soil is too wet, the soil is too dry, or the tines can't release the core once it forms. Each one looks the same at first glance (mud packed in the tines) but the fix is different.
Here's the thing most people miss: a hollow tine doesn't "scoop" mud. It cuts a clean cylinder of soil, which should slide out as the tool lifts. When it doesn't, something is interfering with that release.
The three usual suspects:
- Soil too wet. Water fills the pore space inside the tine and turns the core into a vacuum-sealed plug. It stays put, adds weight, and blocks the next plug.
- Soil too dry. Hard, dry ground resists penetration. The tine scrapes instead of cutting, packing dust and clay into a cement-like plug.
- Thatch or debris layer. A thick thatch mat (over 1/2 inch) stops the tine before it reaches clean soil, so it only ever pulls dead fibers and damp topmatter.
Per the USDA's soil health guidance, healthy soil structure is defined by pore space that allows air, water, and roots to move freely. A clogged tine is a sign that structure has broken down, usually from compaction, and the tool is reacting to that. Knowing which cause you're dealing with is what unlocks the right fix.
That's what the next section covers.
The Three Soil Conditions That Decide Your Fix
Before you change a single thing about your technique, figure out which soil condition you're actually working with. The diagnostic takes 30 seconds and saves an hour of frustration.
Is your soil too wet?
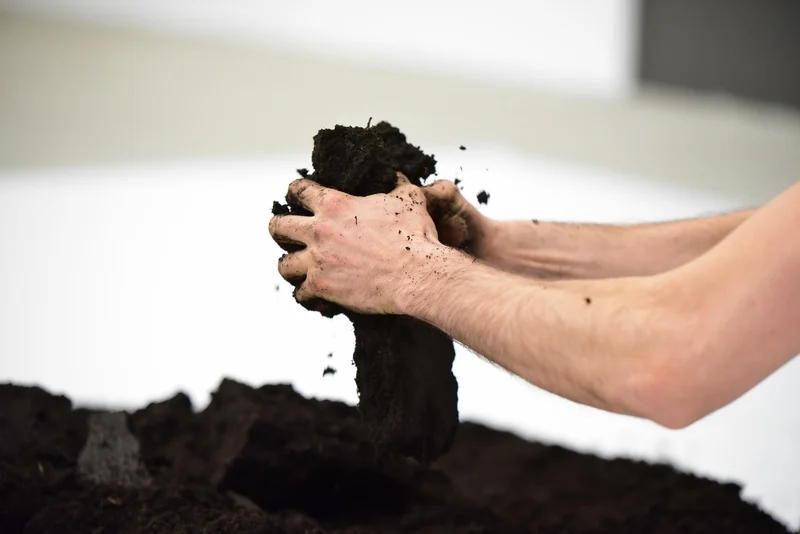
Pick up a handful from the lawn a few inches down. Squeeze it hard. If water streams out, or if the ball stays molded like clay pottery when you let go, it's too wet.
Walking on the lawn and seeing water pool or footprints stay compressed for more than a few seconds is another giveaway. Wait 24 to 48 hours and retest.
Is your soil too dry?
Same squeeze test, different result. If the soil crumbles immediately and won't hold any shape at all, it's too dry. Dry soil packs into tines like dust into a vacuum.
A deep watering 24 hours before aerating usually fixes this, as long as you don't overdo it.
Is the moisture just right?
The soil holds its shape when squeezed but breaks apart cleanly when you poke it. It should feel like a wrung-out sponge, damp but not slick. This is your window.
Aerate now and the cores will slide out with minimal sticking.
| Condition | Squeeze Test Result | What Happens in Tines | Your Move |
|---|---|---|---|
| Too wet | Water runs out, ball stays molded | Plugs vacuum-seal inside tine | Wait 1–2 days, retest |
| Just right | Holds shape, crumbles when poked | Cores cut and drop clean | Aerate now |
| Too dry | Crumbles instantly, no shape | Tines pack with dust and clay | Water 1 inch, wait 24 hours |
That single test tells you which branch of the workflow to follow. Most clogged-aerator headaches come from people working in the "too wet" column because they watered the night before and called it good.
Step-by-Step Workflow: Stop Clogging Before, During, and After Aerating
Once you know your soil condition, the rest is just following the right sequence. We've broken it into three phases: prep, action, and cleanup. Skip a phase and clogging usually comes back.
Phase 1: Prep (1 to 2 days before aerating)
- Water the lawn if it's dry. Apply about 1 inch of water the day before, enough to soak 4 to 6 inches deep. Sandy soils drain fast, so check again the morning of.
- Mow shorter than usual. Cut to about 1.5 to 2 inches. Short grass gives tines a clean path and exposes the soil surface so you can see what you're doing.
- Dethatch if the layer is over 1/2 inch. A thick thatch mat is the most common hidden cause of clogging. Use a thatch rake or power dethatcher and remove the debris before you aerate.
- Mark sprinkler heads, valve boxes, and shallow utility lines. One misstep on a sprinkler can turn this into a much bigger project. Flags or spray paint work fine.
- Do the squeeze test the morning of. Confirm the soil is in the "just right" range before you start.
Phase 2: During aeration
- Step straight down, no rocking. Place the foot plate flat, press straight down with your body weight, and pull straight back up. Rocking or twisting packs mud into the tine.
- Lift fully between steps. Don't drag the aerator across the lawn. The cores need gravity to fall out.
- Clear tines every 8 to 10 plugs. A quick knock against the foot plate or a stiff brush clears buildup before it compounds. Doing it every step is overkill, but waiting until they're packed solid costs time.
- Work in straight lines. Overlap slightly on each pass, like mowing. Random patterns leave un-aerated strips you'll have to redo.
- Stop if clogging returns mid-job. Don't push through. Set the tool down, clear all tines, and retest the soil. If it's gotten wetter (morning dew, unexpected rain), pause and wait.
Phase 3: After aerating
- Leave the cores on the lawn. They'll break down in 1 to 3 weeks and feed the soil. Raking them up wastes free organic matter.
- Clean the tines thoroughly. Knock off loose soil, then rinse. Dry completely to prevent rust.
- Lightly oil the tines. A thin coat of camellia oil or 3-in-1 oil keeps moisture out and prevents seizing between tine and head.
- Store indoors. Even a covered shed is better than leaving the tool outside. Steel tines and moisture are a bad combo.
The prep phase is where 80% of clogging problems get solved. Skipping the squeeze test or watering wrong is almost always the root cause.

Mistakes That Make Clogging Worse (and How to Reverse Them)
Most of the clogging problems we see in user feedback come from the same handful of mistakes. None of them are tool defects. All of them are fixable once you spot them.
- Aerating the day after heavy rain. The soil looks fine on top and is saturated underneath. Wait until the squeeze test passes.
- Forcing the tool into hard ground. If the tine won't sink with normal foot pressure, the soil is too dry. Water and wait. Stomping on the aerator bends tines and packs soil harder.
- Skipping the thatch check. A spongy lawn that gives underfoot usually has a thick thatch layer. Aerating through it just pulls fibrous plugs that jam the tines.
- Using a spike aerator on clay. Spikes compact clay further. On clay-heavy soil, hollow tines are the only manual option that works.
- Cleaning tines with water and leaving them wet. Rust forms within days and roughens the inside of the tine, which makes the next clog worse. Always dry and oil.
- Aerating at the wrong time of year. Cool-season grasses (Kentucky bluegrass, fescue, rye) aerate best in early fall. Warm-season grasses (Bermuda, zoysia, St. Augustine) prefer late spring through early summer. Aerating during stress periods weakens the lawn and slows core ejection.
If you've been making more than one of these mistakes, fix them all at once. The compounding effect is usually what turns a minor clogging issue into a "I hate this tool" problem.
Pro Tips for Clean Tines and a Healthier Lawn
A few habits separate the people who dread aerating from the people who breeze through it. These are the ones our research keeps turning up in extension-service guides and verified buyer feedback.
- Aerate after a light rain, not a heavy one. A half inch the night before beats two inches three days before. Less water, more uniform moisture.
- Top-dress with compost after aerating. It falls into the holes, feeds microbes, and helps the next round of plugs eject cleanly.
- Sharpen tines once a season. A dull tine tears instead of cuts, and torn plugs stick harder. A bench grinder or file works. Just keep the original bevel.
- Use a wetting agent on hydrophobic soil. If water beads off the lawn, add a surfactant a week before aerating. It spreads moisture evenly and prevents the dry-patch clogging cycle.
- Rent a pro model for one-time big jobs. Homeowner-grade manual aerators have thinner tines. A rental unit has heavier steel. For a 5,000+ sq ft lawn, the rental pays for itself in time and frustration.
If clogging still happens after all of this, the tines are probably worn. Replaceable tine heads are available for most step-on models and cost less than a new tool.
FAQ
How wet is too wet to use a manual core aerator?
If a squeezed handful of soil stays molded or releases water, it's too wet. Wait 24 to 48 hours, then retest. The soil should hold its shape briefly but crumble when poked.
Can I use a manual core aerator on clay soil?
Yes, hollow tines work on clay better than spike aerators do. Water clay 24 hours before aerating, but don't soak it. Clay compacts easily when over-saturated, which makes clogging worse.
How often should I clean tines while aerating?
Every 8 to 10 plugs is a good rhythm. A quick knock against the foot plate or a stiff brush clears buildup before it compounds. Waiting until tines are fully packed costs more time.
Do manual core aerators work better than spike aerators?
For clogging prevention and actual soil relief, yes. Hollow tines remove a core, which relieves compaction directly. Spikes push soil aside and can worsen compaction in clay-heavy lawns.
When is the best time of year to aerate to reduce clogging?
Early fall for cool-season grasses and late spring for warm-season grasses. Soil moisture is usually more consistent then, and the grass recovers quickly, which helps break down the cores left on the lawn.
What can I put on tines to keep mud from sticking?
A thin coat of camellia oil or 3-in-1 oil after cleaning. Some users report success with a light spray of cooking spray before starting, though oiling after cleaning is the more durable fix.
Final Takeaway
Clogging comes down to soil moisture, plain and simple. Test the soil before you start. Water only if it's dry.
Step straight, lift fully, and clear tines every few plugs. Those four habits solve the problem for most lawns.
If you've worked through the workflow and the tines still won't release, the tines themselves are likely the issue. Inspect for bends, dulling, or internal rust. Replaceable tine heads cost a fraction of a new aerator and bring most tools back to like-new performance.
A manual core aerator is one of the best tools a homeowner can own. It's quiet, it lasts decades, and it does what machines do without the noise, fuel, or storage hassle. Once you match your timing and technique to your soil, the plugs pull clean, the job moves fast, and your lawn gets the air and water it needs to thrive.
🧪 Agronomist Recommended: Soil pH Testing & Aeration Gear
Healthy root systems require balanced soil chemistry and loose structure. Our field testing recommends calibrated digital testers and biological aerators:
- Digital Soil pH & Moisture Tester:Check Digital Lawn Soil pH Testers on Amazon →
- Liquid Soil Aerator & Penetrant:Check Liquid Soil Aerators & Conditioners on Amazon →
*FTC Disclosure: As an Amazon Associate, Totally Green Lawn earns from qualifying purchases.*

Similar Posts