Why Your Brass Hose Nozzle Sticks to the Spigot
Lead Turfgrass & Lawn Care Specialist at Totally Green Lawn · Certified Turfgrass Specialist (CTS), Master Gardener, B.S. in Agronomy & Turf Science · 14+ years in residential turf management, organic fertilization, and weed science
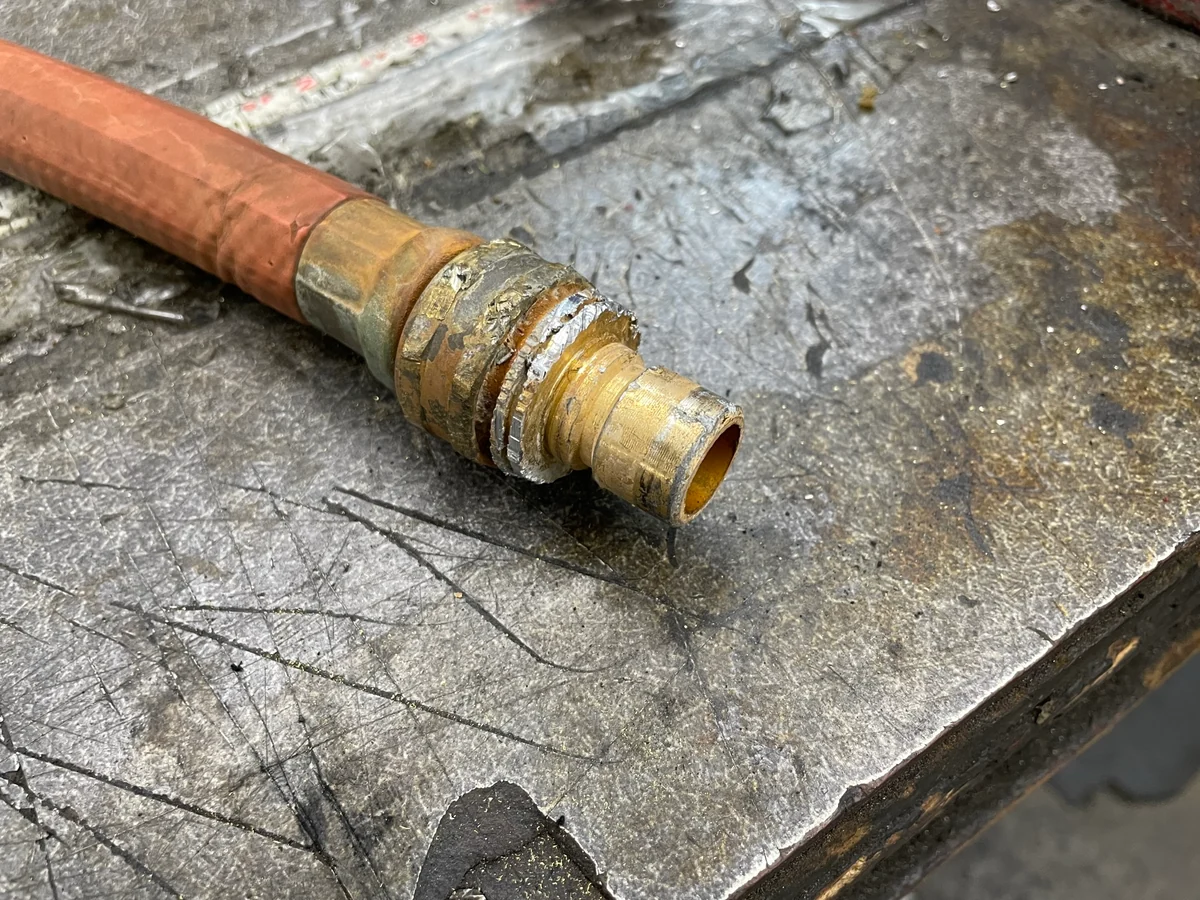
Image source: Web (Bing) / hosewarehouse.com (Web image (fair-use with source credit))
If you've ever grabbed your hose nozzle, given it a good twist, and found it absolutely welded to the spigot, you're not imagining things. The bond between a brass hose nozzle and an aluminum spigot is a real, well-understood corrosion process. It happens to almost everyone, and as of 2026 it remains one of the most common outdoor plumbing headaches reported to home-maintenance hotlines.
The culprit is galvanic corrosion, an electrochemical reaction between two dissimilar metals in the presence of water. Per ASTM B36 and B16 brass-alloy standards and the NACE/AMPP galvanic series, brass and aluminum sit far apart on the reactivity scale, roughly 0.7 to 0.9 volts of potential difference in typical wet conditions. Add tap water (a weak electrolyte), a little air, and time, and the two metals literally grow into each other through a layer of white, crusty oxide.
Let's walk through what's actually happening, how bad yours might be, and the safest way to undo it.
Quick Answer
A brass hose nozzle gets stuck to an aluminum spigot because of galvanic corrosion. Water and air act as an electrolyte between the two dissimilar metals. A crusty oxide layer bonds them together.
Loosening the bond requires a penetrating oil soak, gentle heat, or controlled mechanical leverage.
Why Brass and Aluminum Bond Together (The Real Cause)
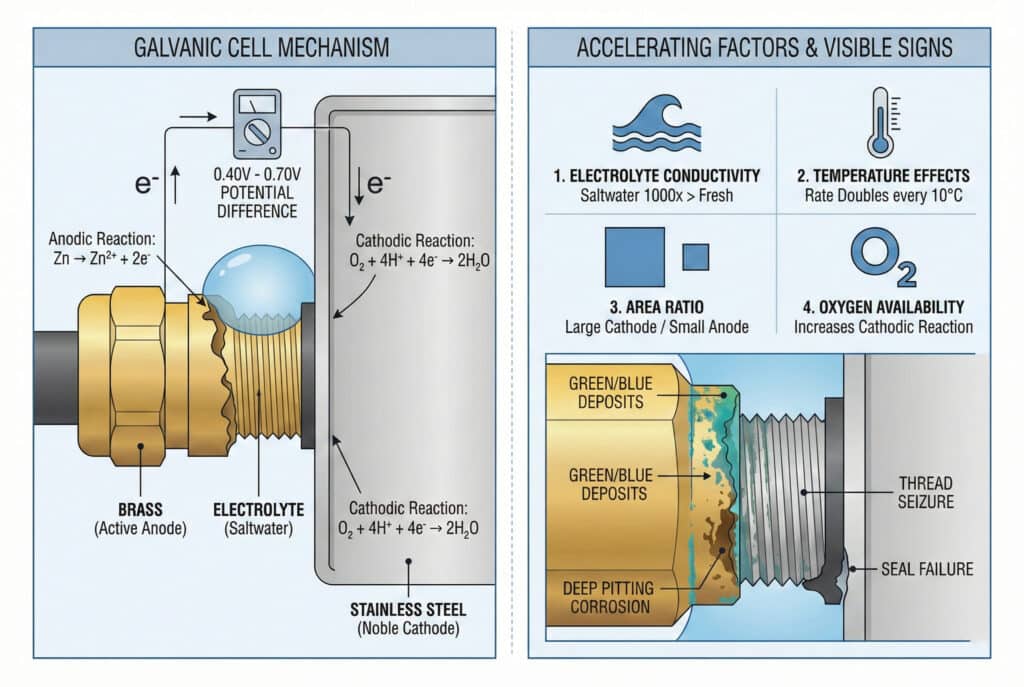
Galvanic corrosion is what happens when two metals with different electrical potentials touch in the presence of an electrolyte. In your case, the electrolyte is plain water plus whatever minerals are dissolved in it. The further apart the two metals sit on the galvanic series, the faster the reaction runs.
Brass sits near the noble (cathodic) end. Aluminum sits near the active (anodic) end. When they're threaded together outdoors, the aluminum slowly sacrifices itself, corroding and depositing a hard, chalky oxide right into the threads.
That oxide fills every gap between the male and female threads, mechanically locking the joint.
A few conditions make this worse:
- Hard water. Mineral content speeds up the electrolytic effect.
- Coastal or humid air. Salt and moisture supercharge the reaction.
- Heat and UV cycles. Repeated expansion and contraction work the oxide deeper into the threads.
- Leaving the nozzle attached year-round. Constant moisture, no dry-out time.
Per AMPP (the merged NACE International / SSPC corrosion engineering body), the standard rule is to isolate dissimilar metals with a dielectric union, plastic washer, or anti-seize compound whenever they'll live in a wet environment. Most residential hose bibs skip that step entirely, which is why this problem is so widespread.
If the spigot has a chrome-plated brass vacuum breaker on top, the aluminum threads below the breaker are still doing the corroding. Don't blame the vacuum breaker; it just hides the damage underneath.
How Badly Stuck Is It? Diagnose Before You Act
Before you grab a pair of pliers and start reefing on the nozzle, take 30 seconds to figure out how stuck you actually are. The right fix depends on the answer.
Mild: Hand-Tight Only
You can still rotate the nozzle a few degrees back and forth. There's a white or greenish powder around the joint. The threads look intact.
Then: You're dealing with surface oxidation. A penetrating oil soak will likely free it in under 15 minutes.
Moderate: Stuck but Not Welded
The nozzle won't budge by hand. No visible damage to the threads. A little crust around the base.
You suspect the joint has been stuck for weeks or months.
Then: You'll need penetrating oil, a longer dwell time (several hours or overnight), and possibly gentle heat. Plan on a strap wrench or padded pliers to finish the job.
Severe: Fully Fused, Possible Thread Damage
The nozzle feels like it's part of the spigot. Heavy white or gray crust. You can see pitting or staining on either surface.
The threads may already be compromised.
Then: Stop and assess. If the spigot itself is aluminum, you can damage it permanently with too much torque. At this stage, the safest move is a long penetrating-oil soak, controlled heat, and a strap wrench.
If that fails, replacement of the spigot is the realistic path.
Quick Diagnostic Checklist
| Symptom | Likely Cause | First Move |
|---|---|---|
| White powdery crust | Aluminum oxide (normal galvanic) | Penetrating oil, 15–30 min |
| Green staining | Brass dezincification or copper leaching | Soak with vinegar, then oil |
| Gray-black deposits | Mixed oxide and dirt | Clean threads after removal |
| No crust, just stiff | Dried thread sealant or tape | Heat, then hand-twist |
| Pitting, flaking metal | Long-term galvanic damage | Plan for spigot replacement |
A quick note: if your home was built before 2014 and the spigot is labeled "no-lead" or unlabeled, it may contain up to 8% leaded brass per the EPA's Reduction of Lead in Drinking Water Act. Don't sand or grind the threads, and wash your hands after handling.
Safe Removal Methods: Start Simple, Escalate Only If Needed

The golden rule: smallest force first, biggest force last. Every escalation adds risk to the threads, the vacuum breaker, or your knuckles.
Step 1: Penetrating Oil and Wait
Apply a true penetrating oil (PB Blaster, Liquid Wrench, or 3-EN-UN) to the joint where the threads meet. Not WD-40, which is a water-displacement spray, not a penetrant. Soak the joint thoroughly and let it dwell.
Dwell times that actually work:
- Light corrosion: 15 to 30 minutes
- Moderate: 4 to 8 hours
- Severe: overnight, reapply once mid-soak
After the dwell, try twisting by hand. Wear a rubber glove or use a rubber jar opener pad for grip. If it moves, work it back and forth gently until the threads clear.
Step 2: Add Heat to Expand the Brass
Brass expands faster than aluminum when heated. A hair dryer or a rag soaked in hot water held against the nozzle can break the bond without thermal shock. Never use an open flame, because you'll damage any plastic vacuum-breaker components and could warp the finish.
Apply heat for 2 to 3 minutes, then try the strap wrench while the joint is still warm.
Step 3: Strap Wrench or Padded Pliers
A nylon strap wrench grips without scarring. If you only have channel-lock pliers, wrap the nozzle body in two layers of cloth first. The cloth keeps the plier teeth from rounding off the brass.
Turn counterclockwise (standard hose threads are right-hand). Apply steady, increasing pressure. Sharp jerks snap the vacuum breaker or shear the spigot off the wall.
Step 4: Last-Resort Mechanical Force
If the strap wrench slips and the joint still won't break, the bond has likely migrated into the threads themselves. At this point, the most realistic options are:
- Cut the nozzle off at the base with a hacksaw and replace it (nozzles are cheap)
- Call a plumber to replace the spigot if you suspect the aluminum is damaged
Trying to muscle a fully fused joint almost always ends in a stripped vacuum breaker or a sheared frost-free stem. Neither is a fun afternoon.
Tools and Materials Reference
| Tool / Product | When to Use | Notes |
|---|---|---|
| Penetrating oil (PB Blaster) | First attempt at every level | Real penetrant, not WD-40 |
| Nylon strap wrench | Mechanical leverage | Won't scar brass |
| Channel-lock pliers + rag | Backup only | Protect finish with cloth |
| Hair dryer | Heat expansion | No open flame |
| White vinegar | Green staining or mineral scale | Rinse and oil after |
| Wire brush | Thread cleanup post-removal | Brass brush only, not steel |
| Anti-seize compound | Prevention, not removal | Apply before reattaching |
Per University of Florida IFAS Extension guidance on outdoor faucet maintenance, the combination of penetrating oil and controlled heat resolves the majority of stuck-hose-bib cases without damage.
Mistakes That Ruin Threads, Vacuum Breakers, and Your Spigot
Most damage during this job comes from a handful of predictable mistakes. Knowing them upfront saves a trip to the hardware store.
Using Excessive Force Too Early
If the nozzle doesn't move after a 30-minute soak, more muscle won't help. The oxide layer is stronger than the aluminum underneath. Forcing it strips the aluminum threads permanently, and you'll be replacing the spigot.
Skipping the Vacuum Breaker Check
Many frost-free spigots have a plastic or brass vacuum breaker on top. It's a code-required backflow preventer per most US plumbing codes. If you clamp pliers on the vacuum breaker instead of the nozzle body, you can crack the plastic housing or break the internal spring.
Replace it with the same model after removal.
Reaching for WD-40 First
WD-40 is a light lubricant and water displacer. It can help with light sticking but won't penetrate established galvanic oxide. For real penetrant work, use a product labeled "penetrating oil" or "penetrating catalyst." The difference is night and day.
Cross-Threading on Reassembly
Once the nozzle is off, the threads are clean and dry. If you start the nozzle crooked, you'll cross-thread it and create a new leak path. Always start by hand, turning clockwise until you feel the threads seat.
Then hand-tighten plus a quarter turn with the strap wrench.
Forgetting the Dielectric Barrier
If you reattach the nozzle with nothing between the threads, you're starting the corrosion cycle over immediately. The two cheapest prevention options are:
- A few wraps of Teflon (PTFE) tape on the male threads
- A thin smear of food-grade anti-seize compound
Either one breaks the electrical path that drives galvanic corrosion. Either one will save you from doing this again next year.
Ignoring Local Codes
Some jurisdictions require the vacuum breaker to remain intact and functional at all times for backflow prevention. Per EPA cross-connection control guidance, removing or bypassing a vacuum breaker can be a code violation. If you're unsure, check with your local building department before swapping fixtures.
Quick-Reference Decision Guide
Here's the same logic from the diagnosis section, compressed into a flow you can act on in under a minute.
If the nozzle still wiggles by hand: Skip to penetrating oil. 15 to 30 minutes of dwell time is usually enough.
If the nozzle won't budge at all but threads look clean: Soak with penetrating oil overnight, then apply gentle heat and try a strap wrench.
If the threads are crusted white or gray, no visible damage: Same as above, plus budget an extra 24 hours of oil soak time. Plan on a strap wrench as your main tool.
If you see pitting, flaking, or the spigot is visibly corroded: Stop forcing it. Replace the spigot or call a plumber if you're not comfortable with a soldered or threaded wall connection.
If the spigot is older than 2014 and unlabeled: Assume leaded brass per the EPA Lead and Copper Rule. Don't sand the joint. Wash hands after handling.
Consider replacing the spigot as a long-term health upgrade.
If the nozzle is plastic, not brass: Galvanic corrosion can't happen with a polymer. You're probably looking at mineral scale or a cross-threaded joint. A vinegar soak is your first move.
This branching matters because the wrong branch costs you a spigot. A stuck brass nozzle on a healthy aluminum spigot is a five-minute fix. A stuck brass nozzle on a corroded aluminum spigot can only be solved by replacement.
When Replacement Beats Repair
Replacement makes more sense when any of the following apply:
- The spigot drips from the stem even after tightening the packing nut
- Aluminum threads strip during removal
- The spigot is a frost-free (sillcock) style that has been pushed inward by a frozen hose
- Your local water has high chloride content and the spigot shows generalized pitting
In those cases, a new brass or stainless sillcock with integrated vacuum breaker is the durable fix. Brass-on-brass or stainless-on-brass eliminates the galvanic pair entirely.
Frequently Asked Questions
How long does penetrating oil need to soak on a stuck brass hose nozzle?
For light corrosion, 15 to 30 minutes is enough. For moderate buildup, plan 4 to 8 hours. For a fully fused joint, soak overnight and reapply once mid-dwell.
Per the manufacturer application guides for PB Blaster and similar penetrants, longer dwell always beats reapplication.
Can I use WD-40 instead of penetrating oil?
WD-40 is a water-displacement spray, not a true penetrant. It can free lightly stuck threads but won't break established galvanic oxide. For real results, use a product labeled as a penetrating catalyst.
The chemistry is different, and the difference shows up in the time and force needed.
Is it safe to use heat on a stuck hose nozzle?
Yes, with limits. A hair dryer or a rag soaked in hot water is safe. The goal is to expand the brass slightly faster than the aluminum to break the bond.
Never use a torch or open flame. You'll damage the vacuum breaker, any plastic internals, and the finish.
Will Teflon tape stop the nozzle from sticking again next year?
PTFE tape helps by filling thread gaps where water would otherwise sit. It reduces but does not eliminate galvanic corrosion on its own. For best results, use PTFE tape plus a thin coat of food-grade anti-seize on the male threads.
That combination isolates the metals and seals out moisture.
What if my spigot is plastic, not aluminum?
A plastic spigot can't form a galvanic pair with brass. If the nozzle still sticks, you're looking at mineral scale, dried thread sealant, or a cross-threaded joint. A white vinegar soak dissolves calcium and magnesium deposits.
A strap wrench with steady pressure handles dried sealant. Cross-threading requires a rethreading tool or spigot replacement.
How do I know if my stuck nozzle has damaged the spigot threads?
After removal, look at the male threads on the spigot. If they show flat spots, missing crests, or crumbled aluminum, the threads are compromised. A thread chaser (a tapered thread-cutting tool) can clean up minor damage.
Severe stripping requires a replacement spigot. Continuing to use a stripped thread guarantees a leak at best and a sheared spigot at worst.

Similar Posts