Find Buried Sprinkler Wire Breaks Without Digging
Lead Turfgrass & Lawn Care Specialist at Totally Green Lawn · Certified Turfgrass Specialist (CTS), Master Gardener, B.S. in Agronomy & Turf Science · 14+ years in residential turf management, organic fertilization, and weed science
A dead sprinkler zone almost always traces back to one of two things: a bad solenoid or a break in the wire between the controller and the valve. If you can hear the controller click and the fuse isn't blown, the wire is the prime suspect. The good news is that learning how to find buried sprinkler wire break without digging is mostly a process of elimination, and the right tool will let you pinpoint the break to within a few inches in most yards.
Most residential irrigation wire is 18 AWG, direct-burial polyethylene, run at depths between 6 and 12 inches, and carries 24V AC from the controller to each valve solenoid. A typical healthy solenoid measures between 20 and 60 ohms of resistance. Anything reading open (OL) or shorted to ground (under about 5 ohms) is a fault, and that's what you'll be chasing with the tools and workflow below.
As of 2026, the same diagnostic method that's worked for two decades still works; the locators just got cheaper and easier to use.
Quick Answer
To find a buried sprinkler wire break without digging, start by isolating the bad zone at the controller. Disconnect the field wires and run a continuity test with a multimeter. If the reading is open or shorted to ground, attach a tone generator to the faulty wire.
Trace the signal with a handheld receiver. Mark the spot where the signal drops off. That drop-off point is the break.
Start at the Controller: The First Five Minutes
Before you spend a dollar on a wire tracer, you need to confirm the wire is actually the problem. Most "dead zone" calls I walk homeowners through start and end at the controller, because the controller is the only spot where you can quickly see what's happening on every wire at once.
Run the Built-In Test First
Stand at the controller and manually run every zone from the test or manual menu. Make a quick list of which zones work and which don't.
- One dead zone: usually a bad solenoid, a bad splice, or a broken wire on that single run.
- Multiple dead zones sharing one common wire: the common is the suspect, not the individual hot wires.
- All zones dead: the transformer, the fuse, or the controller itself is the problem. Stop here and fix the power issue first.
This single test tells you whether to keep reading or go chase a $15 fuse.
Check the Fuse and Transformer
Most residential controllers have a 1A or 1.5A slow-blow fuse on the transformer board. A shorted field wire blows that fuse, and the symptom looks identical to a broken wire. Pull the fuse and look at it.
If it's blown, replace it with the exact same rating, then disconnect all field wires from the common and station terminals before you re-test. If the new fuse blows with no wires attached, the controller is bad. If it holds, the fault is out in the yard, and you're back on track.
With the controller's manual, you can also measure the transformer output. Manufacturer specs confirm a healthy 24V AC reading across the common and station terminals when a zone is calling.
Disconnect the Wires and Look for Obvious Damage
Power the controller down. Pull the field wires off their terminals. Look at the copper.
Green, black, or chalky white strands mean corrosion right at the controller, which is a fault even if the rest of the run is fine. Trim back to bright copper before testing further.
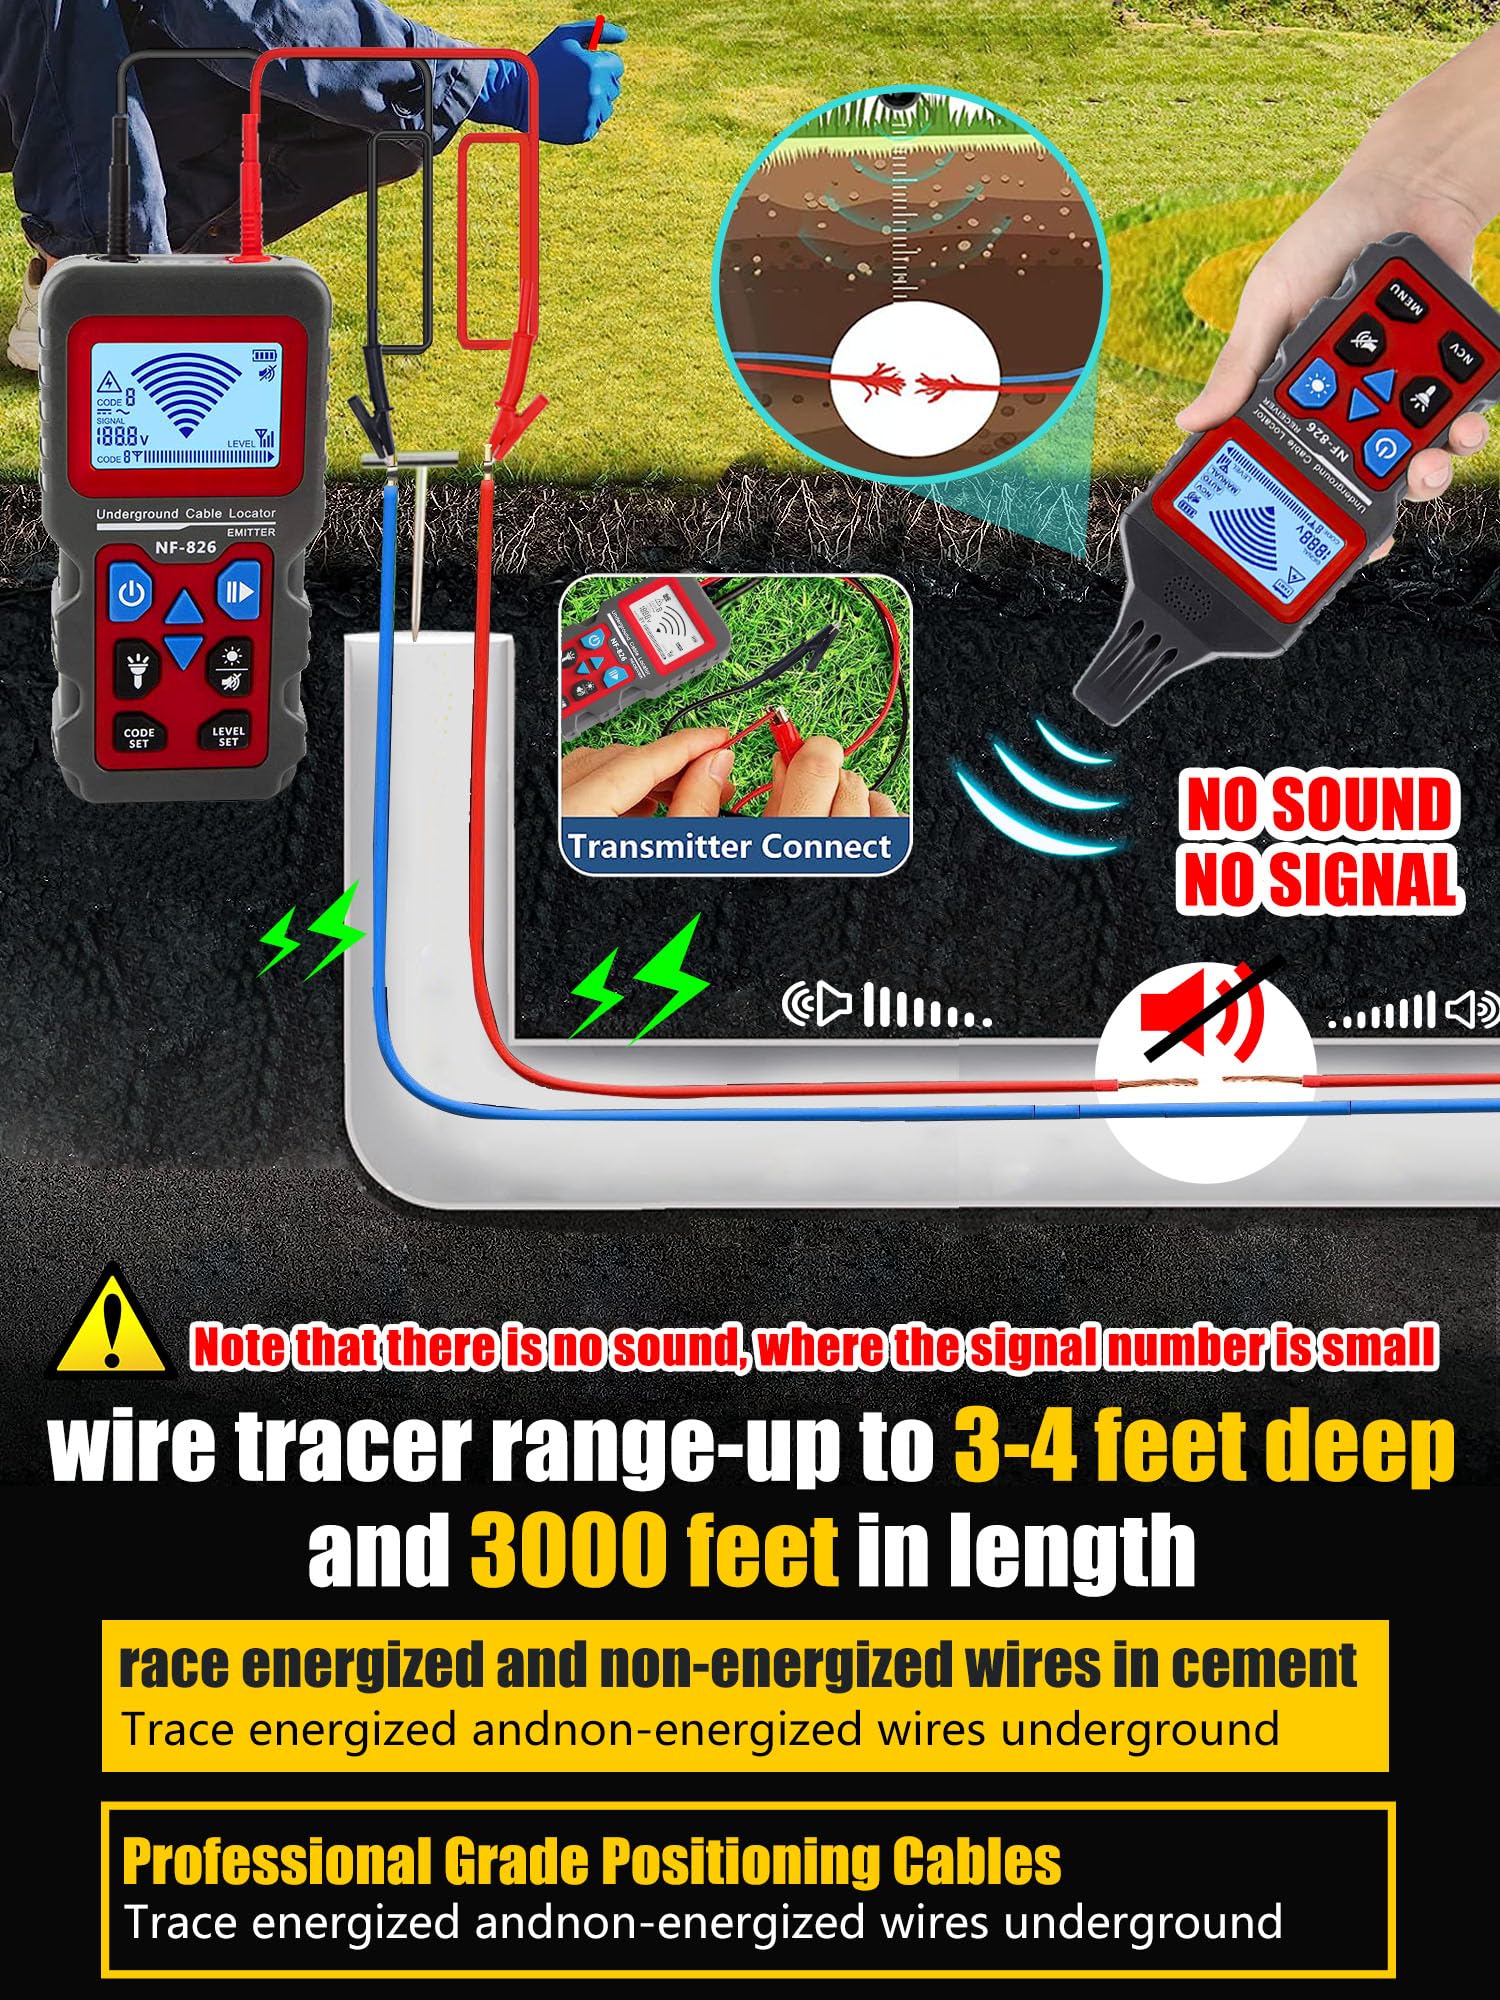
Image source: Bing (Web (fair-use with source credit))
Tools That Actually Find a Buried Sprinkler Wire Break
You can get through the first 80% of this job with a $20 multimeter. The last 20%, the actual "no-dig" part, requires a tool that puts a signal on the wire and a receiver that follows it. Here's the realistic tool kit, ranked by how often you'll actually need each item.
The Multimeter (You Probably Own One)
Every irrigation tech starts with a digital multimeter. Set it to resistance (ohms) for continuity and short-to-ground tests.
- Across the two conductors of a single zone wire: a healthy reading is 20 to 60 ohms (the solenoid). OL means open. Zero means shorted.
- Between each conductor and a known ground (a metal rod, a copper pipe, the grounding bar): any reading under about 5 ohms is a short to ground.
- Reverse the leads and test again. Soil moisture can give you a phantom reading one way and a clean reading the other way. If both directions show low resistance, the fault is real.
If the multimeter test confirms a fault, you've proven the wire is bad. You haven't found the location yet, and that's where the next tool comes in.
The Tone Generator and Inductive Receiver
This is the actual "no-dig" tool. A tone generator puts a 33 kHz (roughly) audio signal on the wire. The receiver, held over the ground, hears that signal through a few feet of soil and traces the path.
The two flavors you'll see:
- Cheap "wire tracer" kits: work in dry, sandy, open soil at shallow depths. Struggle in clay or near other utilities.
- Pro valve locators (Armadillo, Greenlee, Tempo 501K-style): stronger signal, better depth (often 4 to 6 feet), and tighter pinpointing. Worth renting or buying if you have a large yard, multiple breaks, or rocky soil.
Manufacturer specifications indicate pro-grade units can pinpoint faults to within a few inches at typical 8 to 12 inch burial depths in normal soil. In our research, that's the difference between digging a 6 inch exploratory hole and digging a hole right on top of the splice that blew apart three years ago.
What You Don't Need Yet
Skip the ground-penetrating radar rental. Skip the "wire finding app" on your phone. Skip the $30 plastic coil locator from the big-box store that mostly finds the metal valve box you already know about.
Those are tools for a different problem. Your problem is a known wire, with a confirmed fault, that you need to follow from the controller to the break.
| Tool | What It Tells You | When You Need It |
|---|---|---|
| Multimeter | Whether the wire is faulty | Always, first |
| Tone generator + receiver | Where the wire is buried and where it stops | Every "no-dig" location |
| Pro valve locator | Same, with better depth and accuracy | Deep runs, clay soil, multiple faults |
| Wire stripper + DBY/DBR connectors | How to fix the break once you find it | After you dig one small hole |
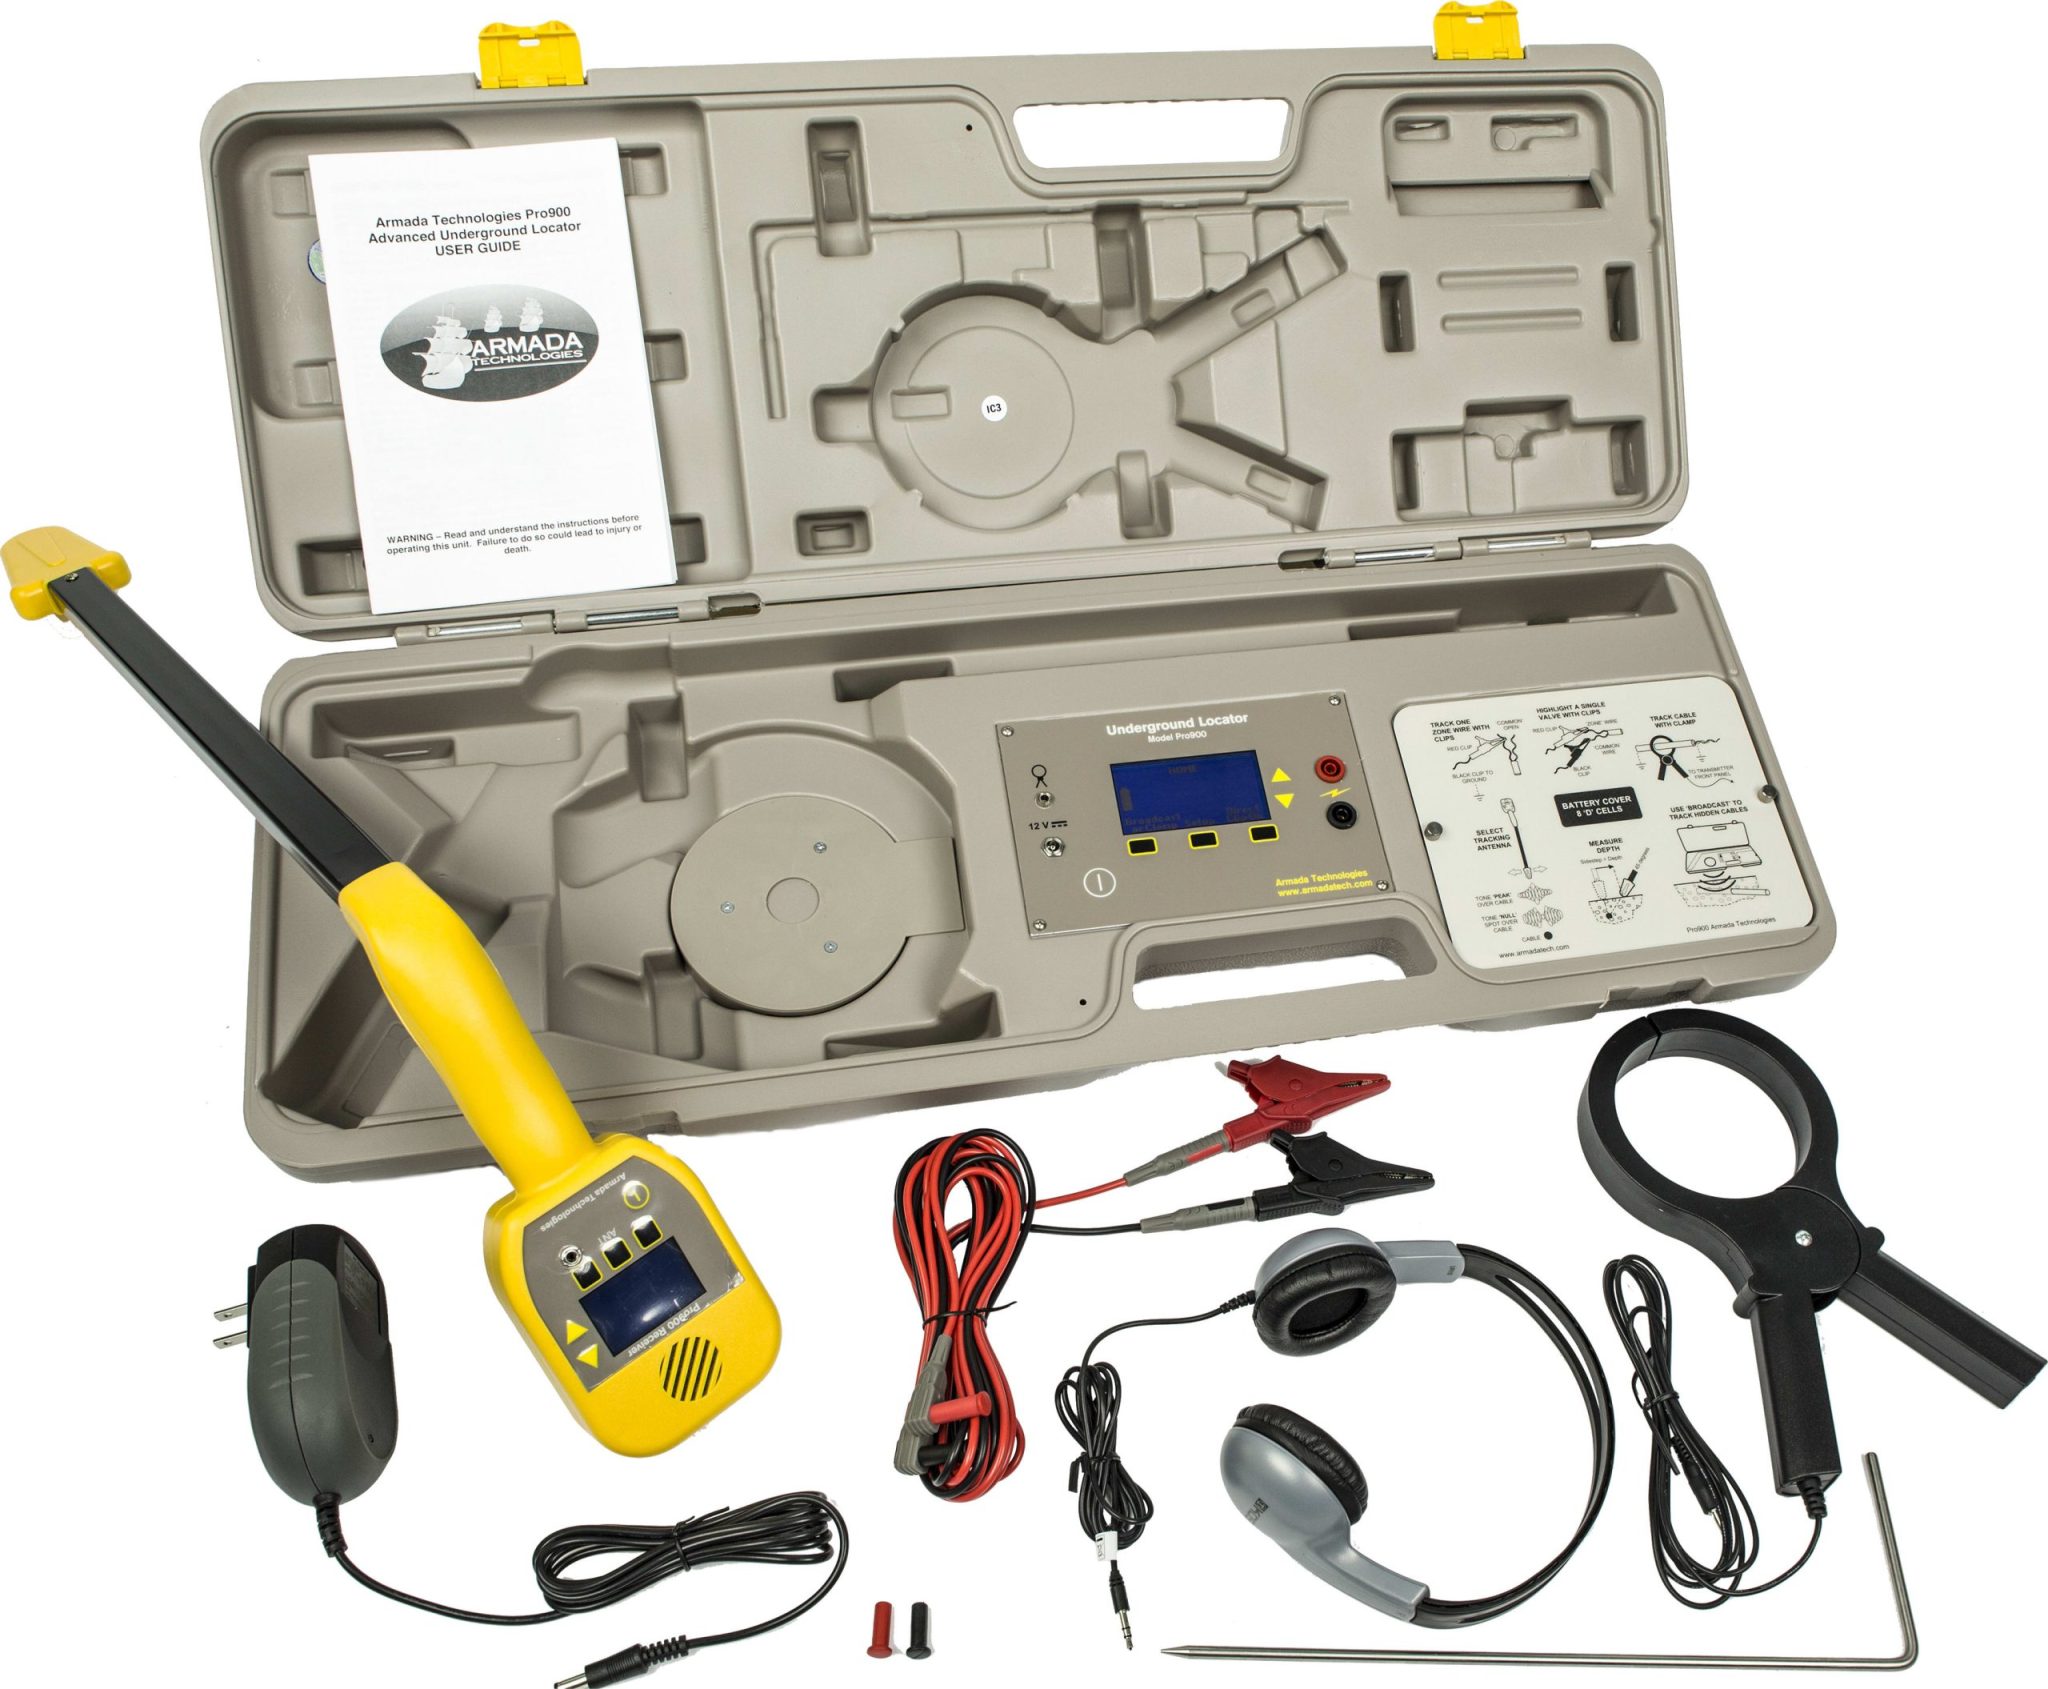
Image source: Bing (Web (fair-use with source credit))
Follow the Branching Workflow to Pinpoint the Break
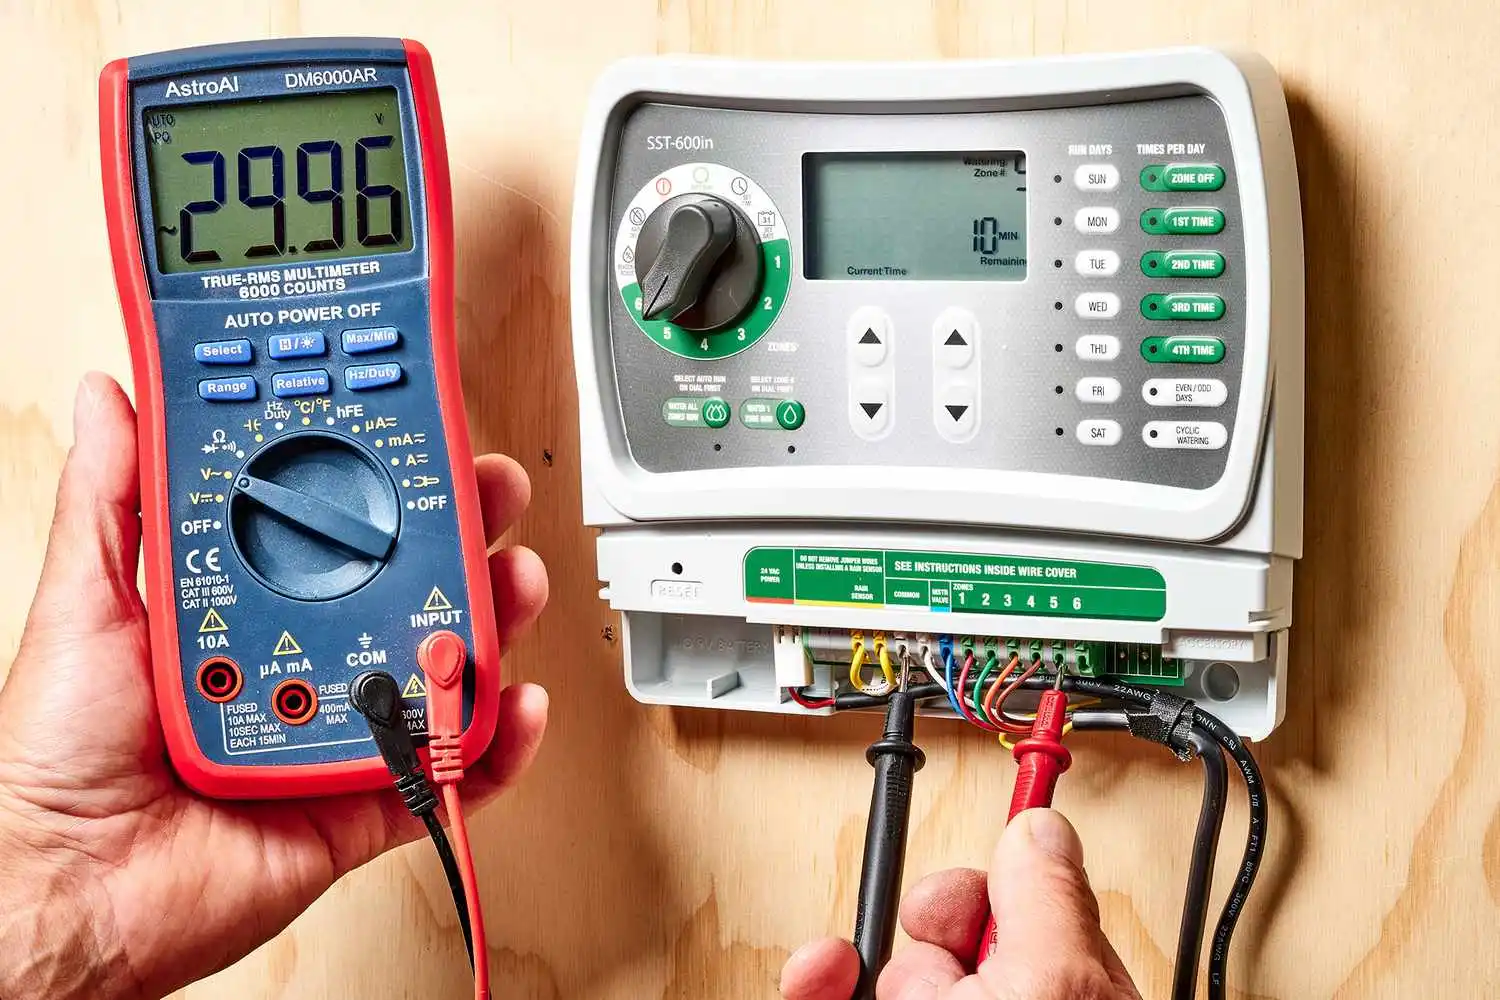
Image source: Bing (Web (fair-use with source credit))
This is the decision tree in plain English. Each step either resolves the issue or sends you to the next one. Don't skip ahead.
The whole point of "without digging" is that the cheap steps eliminate the expensive ones.
Step 1: Identify the Faulty Conductor
With the wires still disconnected at the controller, label the common and the suspect station wire. Test between them.
- If the reading is OL (open), the break is a clean snap somewhere along the run.
- If the reading is under 5 ohms to ground, the wire is shorted to earth, often through a wet splice or a chewed section.
- If the reading is around 20 to 60 ohms, the wire and solenoid are actually fine. The fault is at the controller or in a splice, not the run.
This single test decides the rest of your plan.
Step 2: Tone the Wire
Clip the tone generator's red lead to the faulty conductor. Clip the black lead to a known ground (a metal water pipe, a grounding rod, or even a 2 foot piece of rebar driven into wet soil). Turn the generator on.
Now grab the receiver, switch it to "trace" mode, and walk the suspected path of the wire. In aggregate user reviews, the consistent tip is to keep the receiver about 6 to 12 inches off the ground and move slowly, sweeping side to side. The signal is loudest directly over the wire.
Step 3: Follow the Signal Until It Drops
Keep walking. Mark your path with landscape flags or spray paint every few feet so you don't lose it.
At some point, the signal will fade or vanish. That's your break.
- A clean drop-off means the wire is cut. The signal can't jump the gap.
- A sudden loss with no signal beyond usually means a severed conductor.
- A gradual fade with weak signal continuing can mean a partial short, often at a corroded splice. Mark the start of the fade, not the end.
Step 4: Verify Before You Dig
Don't dig yet. Walk back to the controller and swap the tone generator leads to the other conductor of the same cable. Trace that one.
If the second conductor traces a parallel path and also drops off at a different point, you have two faults. If both drop at the same spot, you've confirmed a single localized break.
For extra confidence, switch the multimeter back to resistance and read between the tone generator and a ground rod at the suspected break. You'll often see the resistance climb sharply right at the fault.
Step 5: Excavate Only the Confirmed Spot
Call 811 (or your local Call Before You Dig service) before any excavation. Even if you're only digging a 12 inch hole, other utilities share the same trench in many yards.
Dig down carefully. In most residential yards, you'll find the wire at 6 to 12 inches. Cut out the damaged section, strip back to bright copper on both sides, and splice with DBY or DBR waterproof connectors.
Per UL listings, only direct-burial rated connectors and wire should be used for these repairs. Wrap the splice in the grease cap that comes with the connector. Bury it.
Test the zone from the controller.
Image source: Bing (Web (fair-use with source credit))
Common Mistakes That Send People Digging in the Wrong Spot
Most failed "no-dig" attempts come down to one of these errors. Skip them and you save yourself an afternoon.
Toning Without Isolating the Fault
If you put a tone on a wire that still has a healthy solenoid at the end, you'll trace the whole wire and the signal will keep going. You'll think the break is wherever you got tired. Always confirm the fault with a multimeter first.
Using a Grounded Reference That Isn't Ground
The black lead of the tone generator needs a real ground. Clip it to a painted metal valve box lid and you'll get a weak, wandering signal. Drive a rebar into damp soil or clip to a copper pipe.
Per the Common Ground Alliance's Call Before You Dig guidance, confirming a true earth ground is what gives the receiver a stable reference.
Tracing the Wrong Conductor
In a multi-strand cable, the common and the hot wires run parallel. They look identical in the ground. If you tone the common by accident, you'll trace the entire system, not the broken zone.
Label your wires at the controller before you disconnect anything.
Ignoring Soil Conditions
Dry, sandy, or rocky soil attenuates the signal faster than moist, loamy soil. If your yard is bone-dry, soak the suspected path with a hose 20 minutes before tracing. The water conducts the signal better.
Aggregate reviews of locator users consistently mention this trick for summer tracing in the Southwest.
Forgetting That Other Utilities Exist
Low-voltage landscape lighting, dog fence wire, and even low-voltage doorbell runs are often in the same trench as irrigation wire. The receiver will pick them up too. Cross-reference against any as-built diagram, or call 811 before you dig so you know exactly what's down there.
When to Call a Pro and When to Skip the Tools Entirely
There are a few situations where the right move is to skip the locator and either DIY a different way or hand the job to an irrigation service. The cheapest fix is sometimes the one you don't do.
The Break Is Under Concrete or a Mature Tree
If the tone drops off right under a driveway, patio, or a tree you can't lose, a wire tracer tells you what you already know. The fix now is to abandon the old run and pull a new wire around the obstacle. Most residential runs cost $200 to $600 in labor to replace, less than jackhammering concrete or killing a $2,000 tree.
You Don't Own a Locator and Won't Reuse It
A pro-grade locator runs $300 to $900. For a single break, that math doesn't work. Rent one from a tool rental shop, or hire a tech who already has one.
Aggregate service-call data suggests irrigation specialists charge $125 to $250 to locate and mark a fault, which often beats buying tools you'll use once.
The Whole System Is Old and Corroded
If your controller, wire, and valves are all 20+ years old, one break usually means more are coming. The smart play is a full rewire of the affected zone rather than chasing breaks for the next three summers.
Expert Tips, Specs, and Costs You Should Know
A few specific numbers make the difference between a confident repair and a guess. These are the ones to keep in your back pocket.
Normal vs Faulty Resistance Readings
| Reading | Meaning | Next Step |
|---|---|---|
| 20 to 60 ohms across the two conductors | Healthy solenoid, healthy wire | Look elsewhere for the fault |
| OL (open) | Broken wire, bad splice, or dead solenoid | Tone the wire to locate the break |
| Under 5 ohms to ground | Wire shorted to earth, often a wet splice | Tone and look for splices first |
| 0 ohms across conductors | Direct short between the two wires | Look for a nick or chewed section |
Burial Depths and Wire Specs
Most residential irrigation wire is 18 AWG, direct-burial polyethylene, run at 6 to 12 inches. In regions with deep frost lines, code can require 18 inches. Manufacturer specs from Rain Bird and Hunter confirm 24V AC is the standard operating voltage for residential valves, which is why the system is safe to work on with the power on, though I still recommend powering down before touching the terminals.
Cost Ranges to Set Expectations
- Multimeter: $20 to $50, and you'll use it for everything.
- Tone generator kit: $50 to $200 for consumer, $300 to $900 for pro.
- Waterproof splice kit (DBY or DBR connectors): about $5 per splice.
- Full zone rewire by a pro: $200 to $600 per zone, depending on length and obstacles.
- Single service call to locate and mark a fault: $125 to $250 in most markets.
The Two Tricks That Save the Most Time
First, soak the suspected path with water 20 minutes before tracing. Moist soil conducts the tone signal measurably better, especially in clay or sandy yards. Second, tone both conductors of the cable.
If both drop at the same spot, the cable was physically severed, usually by an edger or aerator. If they drop at different spots, you have two separate faults and need to find both before the zone will run cleanly.
Sprinkler Wire Break FAQs
How deep is sprinkler wire usually buried?
Most residential irrigation wire is buried 6 to 12 inches deep. In cold climates with deep frost lines, code may require 18 inches. The Irrigation Association's installation best practices recommend matching local frost depth plus a few inches of cover.
Can I find a sprinkler wire break without any special tools?
Partially. A multimeter will tell you whether the wire is broken. It will not tell you where.
To pinpoint the location without digging, you need a tone generator and receiver, also called a wire tracer or valve locator.
How long does it take to find a buried wire break?
In a typical residential yard with good soil and a working locator, expect 15 to 60 minutes from "fault confirmed" to "hole dug." Add another 30 to 60 minutes for a clean splice and backfill.
What does a bad solenoid read on a multimeter?
A healthy solenoid reads 20 to 60 ohms. A reading of OL (open) means the solenoid coil is broken. A reading near 0 ohms means the coil is shorted.
Either way, replace the solenoid, not the wire.
Will a sprinkler wire break get worse if I ignore it?
Yes, but slowly. Water in the broken section corrodes the copper. Splices near the break also degrade.
A single break left for a season often becomes two or three. Fixing it now is cheaper than chasing a chain of faults next summer.
Can rodents really chew through irrigation wire?
Absolutely. In regions with active gopher, mole, or vole populations, rodent damage is one of the top three causes of irrigation wire faults. If your breaks keep recurring in the same area, consider rerouting the wire or installing it in PVC conduit for that section.

Similar Posts