Winter Hose Storage: Prevent Freezing Damage in 5 Steps
Lead Turfgrass & Lawn Care Specialist at Totally Green Lawn · Certified Turfgrass Specialist (CTS), Master Gardener, B.S. in Agronomy & Turf Science · 14+ years in residential turf management, organic fertilization, and weed science
Most people learn how to store a garden hose in winter without freezing the hard way: a split coupling in March, a cracked spigot, a soggy garage floor. Water expands roughly 9% when it freezes, and that pressure cracks fittings, splits hoses, and bursts the pipes just behind your outdoor faucet. The fix is mostly discipline, timing, and knowing which steps actually matter for your climate.
The good news: this isn't complicated. Complete the process before your first hard frost, drain the line fully, and protect the spigot separately. The sections below walk through the decision tree, the step-by-step, and the mistakes that cost homeowners an average of $150 to $400 per outdoor faucet replacement.
As of 2026, the University of Minnesota Extension and other northern university extensions still recommend the same core sequence: disconnect, drain, store indoors, and insulate the faucet.
Quick Answer
Drain the garden hose completely before temperatures drop below freezing. Disconnect it from the spigot. Coil it in large loops.
Store it indoors in a garage, basement, or shed. Cover the outdoor spigot with an insulated cover. Shut off the interior supply valve to the outdoor faucet if your home has one.
The Real Risk: Why a Garden Hose Freezes Harder Than You'd Think
A garden hose isn't just an inconvenience when it freezes. It's a pressure bomb attached to your plumbing. The physics are unforgiving.
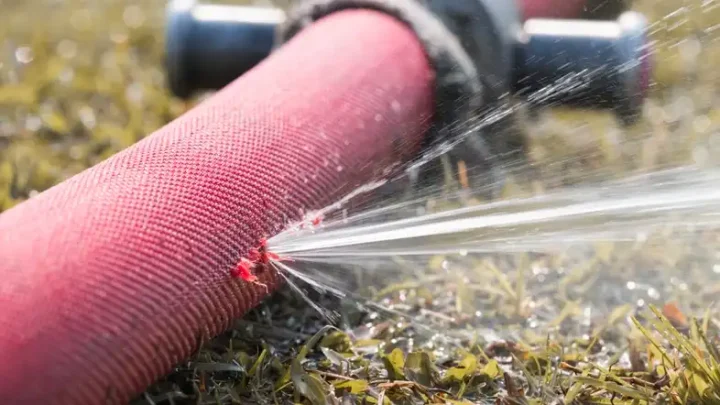
When water turns to ice, it expands by about 9%, and the rigid walls of a hose or pipe have nowhere for that expansion to go. Something gives. Usually it's a fitting, a coupling, or the solder joint behind the spigot.
Most homeowners focus on the hose itself and forget the bigger liability. The hose bib, the outdoor faucet that the hose screws onto, contains a short column of water between the valve seat and the outside wall. If that water freezes, the casting can crack.
Replacement runs $150 to $400 once you add a plumber's labor. And if the freeze damages the pipe inside the wall, you're looking at opening up drywall.
The actual failure points
Manufacturer specifications and university extension guidance consistently flag three weak spots:
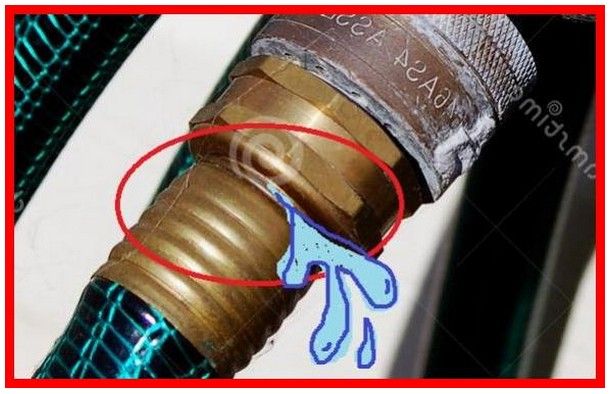
- The hose coupling, where brass or plastic threads split under ice pressure
- The vacuum breaker on frost-proof faucets, a small plastic piece that cracks easily
- The pipe just inside the exterior wall, especially on homes built before 1990
The hose itself usually survives a freeze better than people think. Vinyl and rubber can flex slightly. Brass fittings fail first.
What temperature actually triggers damage
Pipes and hoses begin to fail once temperatures drop below 20°F (-7°C) for several hours. But the real threshold is sustained freezing. A single overnight dip to 28°F rarely causes damage.
Three nights in a row at 18°F almost always does. NOAA frost date data for USDA zones 3 through 7 shows first hard freezes arriving between mid-October and mid-November, depending on region.
Your Winter Storage Plan Starts With One Question: What's Your Setup?
There's no single right way to winterize a hose because homes and climates differ. The method that works in Atlanta will fail in Minneapolis. The setup matters as much as the temperature.
Use this decision tree to figure out what to actually do.
If you live in USDA zones 3–5 (cold winters, deep frost line)
You need the full treatment. Disconnect and drain the hose. Store it indoors.
Shut off the interior supply valve to the outdoor faucet if your home has one, then open the outside spigot to drain the line. Install a foam or insulated cover on the spigot as a backup.
If you live in zones 6–7 (moderate winters, occasional hard freezes)
Disconnect and drain the hose. Store it indoors or in an insulated shed. Leave the interior supply valve open unless forecasts call for sustained sub-20°F temperatures.
A foam faucet cover is usually enough protection.
If you live in zones 8–10 (mild winters, rare freezes)
You can leave the hose connected year-round if you want, but drain it before any forecast freeze. Most years, you won't need to do anything. The risk is the surprise cold snap, which hits the South every few years.
Does your home have a frost-free hydrant or hose bib?
Modern homes (post-1995) often have frost-free hose bibs. These have a long stem that shuts water off inside the heated wall, not at the outside faucet. If you have one, you still need to disconnect the hose in winter, since a connected hose prevents the stem from draining properly.
Frost-free doesn't mean frost-proof.
Do you have an interior shutoff valve for the outdoor faucet?
This is the single most important feature for cold-climate protection. If your basement or crawlspace has a valve labeled "outdoor" or "hose bib," close it in fall. Then walk outside and open the spigot to drain the line.
Water left in the pipe between the shutoff and the outside faucet can still freeze, but the volume is small and usually safe for one winter if you add a foam cover.
How to Winterize the Hose Step by Step (Drain, Coil, Store)
The actual process takes about 15 minutes per hose. Don't rush it. Rushing is what causes cracked couplings and missed water pockets.
Step 1: Disconnect the hose from the spigot
Do this before your first sustained freeze, not after. Once temperatures drop below freezing overnight, the hose can be frozen to the spigot. Trying to force it off can damage the vacuum breaker.
If it's stuck, pour warm (not boiling) water on the coupling until it releases.
Step 2: Drain every drop of water
Walk the hose to the highest point of your yard and let gravity do the work. Drag the female end down to the lowest point and let it empty. For stubborn pockets, lift the hose in sections and shake it gently.
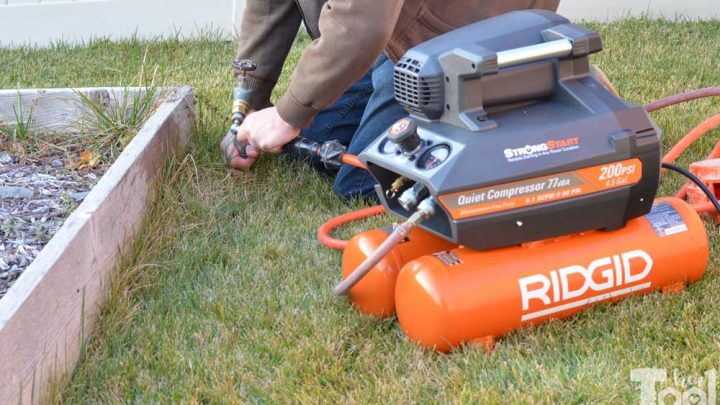
If you have a long hose (100 feet or more) and you want it bone-dry, you can blow it out with compressed air. Keep pressure under 50 PSI. Higher pressure can rupture the hose wall.
Hold the nozzle end away from your face. Don't overthink this step. A few drops of water won't hurt anything if the hose is stored in a heated space.
Step 3: Straighten and inspect the hose
Lay the hose flat on the driveway. Look for bulges, cracks, soft spots, and leaking couplings. A hose with visible damage can be repaired, but a hose that's been through several winters of freeze-thaw cycles is living on borrowed time.
If the rubber feels stiff or gummy, replace it.
Step 4: Coil in large loops, not tight circles
Tight coils create kinks that weaken the hose wall over time. Coil in loops about 18 to 24 inches in diameter. Some people prefer a figure-8 pattern, which prevents twists and tangles.
Either works. Just don't wind it like a garden hose retractor at 200 PSI of tension.
Step 5: Store in a climate-controlled space
A garage, basement, or insulated shed is ideal. Unheated sheds work in zones 6 and warmer. In zones 3 to 5, unheated sheds can still get cold enough to freeze a damp hose, which defeats the purpose.
The goal is to keep the hose above freezing and out of direct sunlight. UV exposure degrades both rubber and vinyl over time.
Tools and time required
| Item | Purpose | Notes |
|---|---|---|
| Hose itself | The asset | Vinyl, rubber, or hybrid |
| Bucket or drain spot | Catch residual water | Driveway, lawn, floor drain |
| Hose reel, hanger, or pot | Storage | See comparison below |
| Foam faucet cover | Spigot protection | R-3 to R-5 insulation value |
| Optional: compressed air | Full drain | Under 50 PSI |
Total time: 15 to 30 minutes per hose. Hardest part is dragging it to the storage spot.
What to Do With the Outdoor Spigot (This Is Where Most People Mess Up)
People obsess over the hose and forget the faucet. The faucet is the more expensive thing to damage. A new hose is $30 to $80.
A new outdoor faucet with installation runs $150 to $400.
If you have an interior shutoff valve
This is the gold standard. Find the valve in your basement, crawlspace, or utility room. It's usually near the front wall, labeled or on a pipe that runs directly outside.
Turn it clockwise until it stops. Then go outside and open the spigot. Let it drain for 30 seconds.
Leave the spigot slightly open over winter, about a quarter turn. This lets any trapped water expand without cracking the casting.
If you don't have an interior shutoff valve
You have two options. The first is to install one, which costs $200 to $500 with a plumber. Worth it if you live in zones 3 to 5.
The second is to rely on a heavy-duty foam faucet cover, rated to R-5 or higher. These slip over the spigot and insulate it from ambient air. They work surprisingly well in zones 6 and 7, and they buy you a few degrees of margin in colder zones.
If you have a frost-free hydrant
Disconnect the hose. That's it. Frost-free hydrants are designed to drain themselves when the hose is removed.
The valve seat is 8 to 18 inches inside the heated wall, depending on the bury depth. A connected hose defeats the drainage and turns a frost-free design into a regular faucet.

Image source: Bing (Web (fair-use with source credit))
What NOT to do
- Don't leave the hose connected "just for one more weekend" through December. That one weekend is when the first hard freeze hits.
- Don't use a towel and plastic bag as a DIY cover. It traps moisture against the metal and accelerates corrosion.
- Don't rely on heat tape unless it's UL-listed and installed per the manufacturer's instructions. Improper heat tape is a fire hazard.
Storage Options Compared: Reel, Pot, Hanger, or Just a Hook
How you store the hose matters less than where you store it. But the right accessory can double a hose's lifespan by preventing kinks, UV damage, and rodent chewing. Here's how the four main options stack up.
| Option | Best for | Cost range | Lifespan impact |
|---|---|---|---|
| Wall-mounted hose reel | Garages, side yards | $30 to $150 | Extends hose life 2 to 3 years |
| Portable hose reel cart | Large yards, gardens | $50 to $200 | Good for heavy rubber hoses |
| Decorative hose pot | Front yards, curb appeal | $40 to $120 | Hides hose, prevents UV damage |
| Wall hook or hanger | Small spaces, rentals | $10 to $30 | Basic, works fine indoors |
Wall-mounted hose reel
The best all-around option for most homeowners. Keeps the hose off the floor, prevents kinks, and makes spring deployment quick. Mount it on a stud in the garage or on an exterior wall.
Stainless steel or powder-coated models last longest. Plastic reels can crack in extreme cold if mounted outside.
Portable hose reel cart
Useful if you have a long hose (100+ feet) or move it around a large property. Heavy rubber hoses (50+ feet) are easier to roll on a cart than to coil by hand. The downside: carts take up floor space and can rust if stored in a damp shed.
Decorative hose pot
A ceramic, resin, or metal container that hides a coiled hose. Great for curb appeal in front yards. The hose still needs to be drained before storage.
Pots can trap moisture, which encourages mold and mildew if the hose is even slightly damp.
Simple hook or hanger
The cheapest option. Works perfectly fine for indoor storage. Just make sure the hook is rated for the hose's weight when full of water.
A 50-foot rubber hose can weigh 10 to 15 pounds.
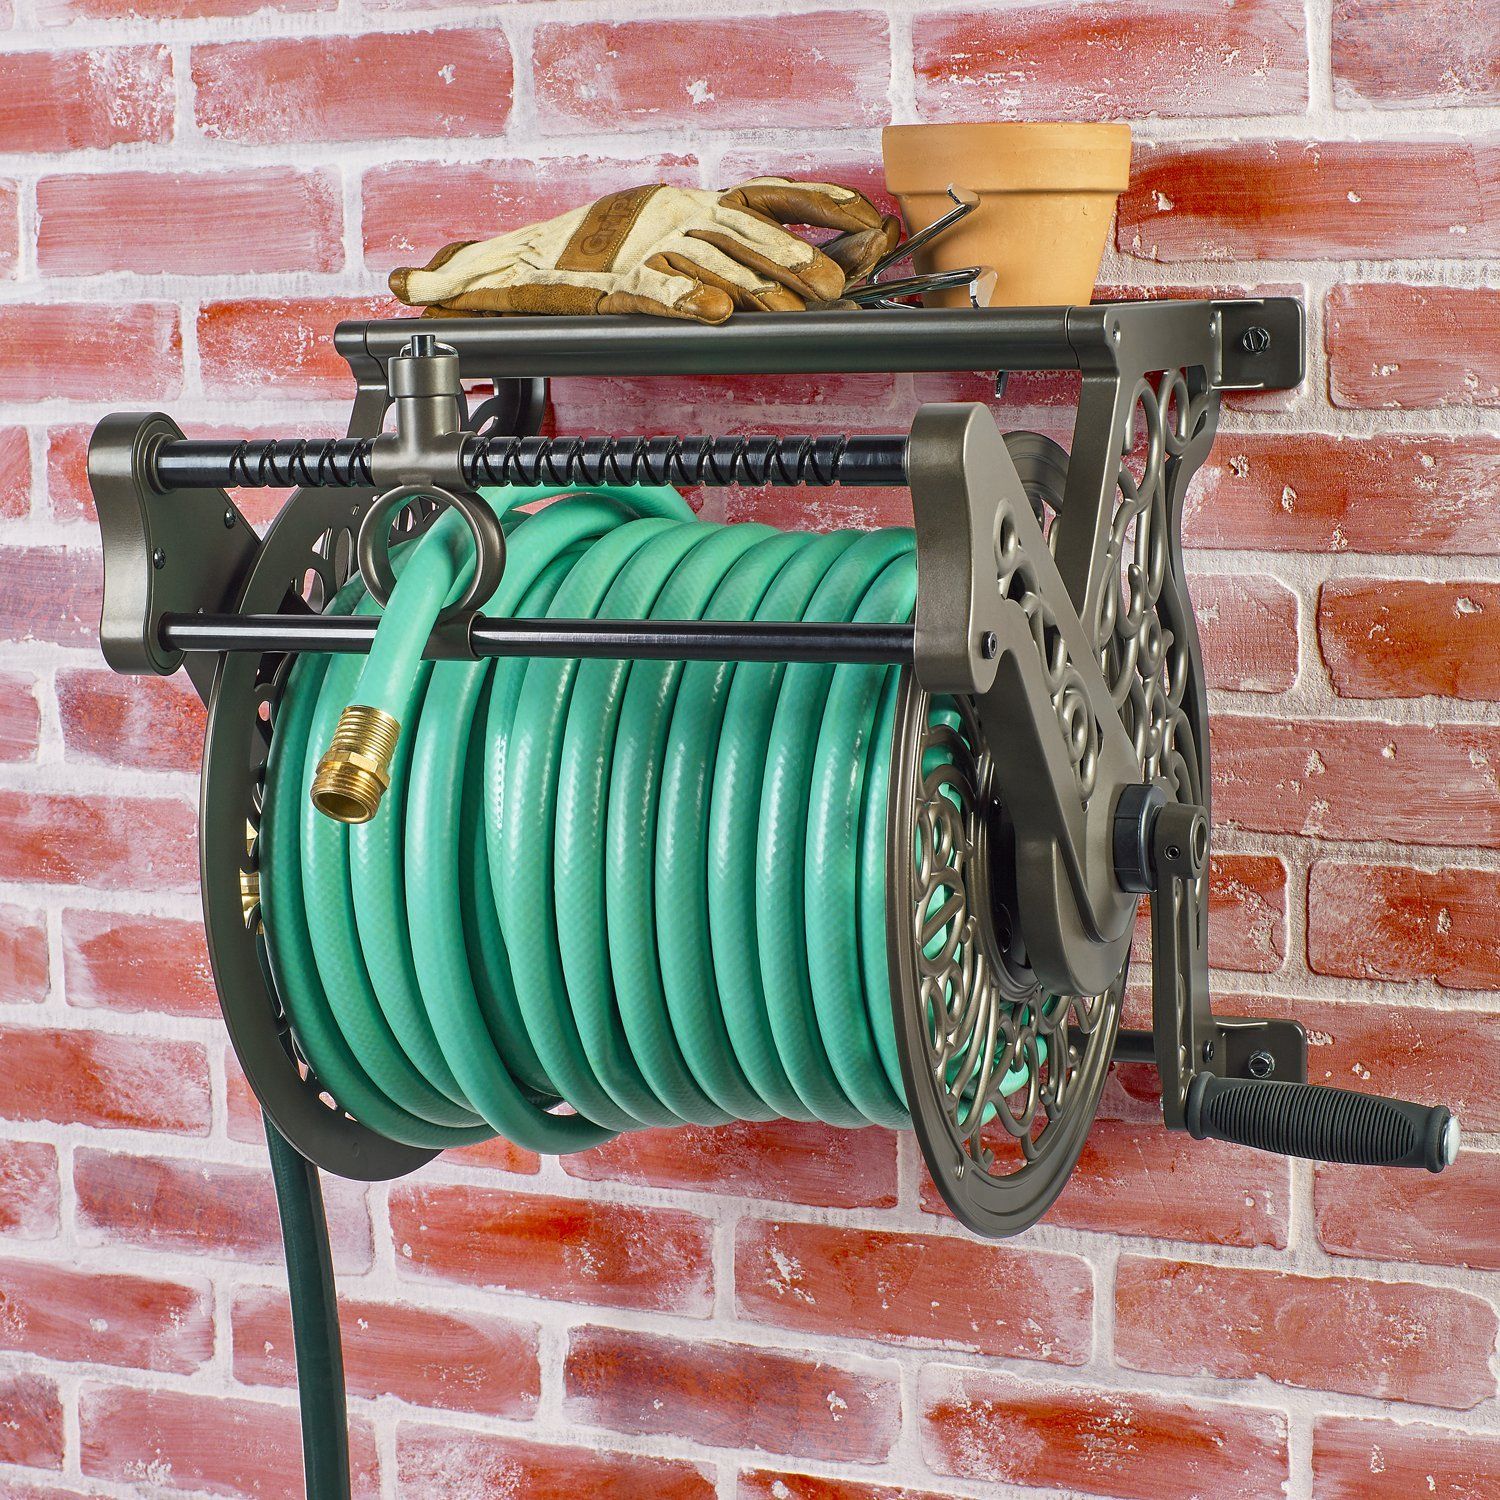
Image source: Bing (Web (fair-use with source credit))
Mistakes That Burst Pipes, Ruin Hoses, and Drain Your Wallet
Most winter hose damage is preventable. It happens because someone skipped a step, misjudged the weather, or made a small assumption that turned into a $300 plumbing bill in March. Here's what consistently goes wrong, and how to avoid it.
The "I'll do it next weekend" trap
The single most common cause of frozen hose damage is procrastination. Homeowners in zones 5 and colder who wait until after the first hard frost find their hose cemented to the spigot. Trying to force it off can shear the vacuum breaker, and any water left inside is already ice.
Mark a calendar reminder for two weeks before your average first frost date. NOAA publishes frost data by ZIP code. The two-week buffer lets you catch the early cold snaps that show up before the "official" date.
Leaving the hose pressurized
Storing a hose with the sprayer nozzle closed traps water inside. Open the nozzle after disconnecting and let gravity drain both ends. A pressurized hose stored in a warm garage won't freeze, but the trapped water can stagnate, grow algae, and degrade the inner lining over time.
Skipping the interior shutoff
Closing the indoor valve and draining the line is the most protective step in the whole process. Skipping it leaves 4 to 10 feet of water-filled pipe between your shutoff and the outside wall. That water is the most likely thing in your plumbing to freeze and burst.
Cramming the hose into a tight bin
Coiling too tight creates permanent kinks that weaken the hose wall. Kinks are where cracks start. Aim for 18 to 24 inch loops.
If your storage container is too small for that diameter, use a wall hook or reel instead of forcing the hose in.
Using incompatible materials
Storing a drinking-water hose (rated NSF/ANSI 61) next to a chemical sprayer hose can cross-contaminate. If you use one hose for gardening and another for the RV, label them. Don't assume you'll remember in spring.
Trusting the foam cover alone
Foam covers are insurance, not a primary defense. They buy you 5 to 10 degrees of margin. If your zone regularly hits 0°F, a foam cover without a closed interior valve is not enough.
Pair the two, or skip the cover entirely and rely on the valve.
Frequently Asked Questions
At what temperature will a garden hose freeze?
A garden hose begins to freeze when ambient temperatures drop below 32°F (0°C) for several hours, but the hose usually survives short dips. Sustained temperatures below 20°F (-7°C) cause fittings to crack and pipes to burst. The risk rises sharply with each additional night below 15°F.
Can I leave my hose connected if I have a frost-free spigot?
No. Frost-free hose bibs only work when the hose is disconnected. A connected hose holds water in the stem and prevents drainage, which defeats the frost-free design.
Disconnect the hose in winter even if the spigot is rated frost-free.
How do I know if my outdoor faucet has an interior shutoff valve?
Look in your basement, crawlspace, or utility room for a valve on a pipe that runs toward an exterior wall. It's often labeled "outdoor" or "hose." Older homes (pre-1980) sometimes lack this valve. If you can't find one, a plumber can install one for $200 to $500, or you can rely on heavy-duty foam covers in milder zones.
Is it okay to store a garden hose outside in winter?
Only in zones 8 through 10 where hard freezes are rare. In zones 7 and colder, outdoor storage leads to cracked fittings, UV damage, and rodent chewing. Indoor storage in a garage, basement, or shed extends hose life from 2 to 3 years to 5 to 7 years on average.
What's the difference between a foam cover and a frost-proof faucet cover?
Standard foam faucet covers are soft, slip-on, and rated to R-3 to R-5. They protect against short cold snaps. Heavy-duty frost-proof covers are thicker, often padded with fiberglass or closed-cell foam, and rated for sustained sub-zero temperatures.
Use the heavy-duty version if your zone sees frequent sub-20°F nights.
Can I use compressed air to blow out a garden hose?
Yes, with caution. Keep pressure under 50 PSI. Higher pressure can rupture the hose wall or blow a coupling apart.
Wear eye protection. Hold the nozzle end away from your face and people. A few drops of water remaining won't damage anything if the hose is stored above freezing.
Quick Decision Guide: What to Do Based on Your Climate and Setup
Here's the short version. Match your zone and setup to the right action.
| Your situation | What to do |
|---|---|
| Zone 3 to 5, interior shutoff present | Close valve, drain line, disconnect hose, cover spigot |
| Zone 3 to 5, no interior shutoff | Install shutoff ($200 to $500) or use heavy-duty cover, disconnect hose |
| Zone 6 to 7, any setup | Disconnect hose, drain, store indoors, light foam cover |
| Zone 8 to 10, rare freezes | Leave hose connected, disconnect before any forecast freeze |
| Frost-free hydrant, all zones | Disconnect hose every winter, no interior valve needed |
| Expandable hose, any zone | Drain fully, store indoors, avoid tight coils |
| RV potable water hose | Drain, sanitize with dilute bleach solution, store indoors |
The one rule that covers every scenario: disconnect the hose before the first sustained freeze. Everything else is optimization. If you do nothing else, do that.
You'll avoid 90% of the winter damage we see in the field. For deeper guidance on your specific region, the University of Minnesota Extension and the EPA WaterSense program both publish region-specific winterization advice worth bookmarking before fall.

Similar Posts