Unclog Your Garden Hose Nozzle with Vinegar: Easy Fix
Lead Turfgrass & Lawn Care Specialist at Totally Green Lawn · Certified Turfgrass Specialist (CTS), Master Gardener, B.S. in Agronomy & Turf Science · 14+ years in residential turf management, organic fertilization, and weed science
If your garden hose nozzle sprays sideways, dribbles, or barely trickles, the fix is probably sitting in your kitchen right now. Learning how to unclog a garden hose nozzle with vinegar takes about 10 minutes of hands-on work, plus a soak time you can let run while you do anything else. Most clogs are mineral buildup, and vinegar dissolves calcium and limescale without the harsh chemicals you'd find in commercial descalers.
Hard water leaves deposits that narrow the nozzle's internal passages, and according to the EPA's water hardness data, more than 85% of US households deal with some level of hard water. That means most outdoor fixtures eventually lose flow as calcium accumulates inside. The good news?
White vinegar is roughly 5% acetic acid, strong enough to break down most scale in under 12 hours, and it costs less than two dollars a bottle.
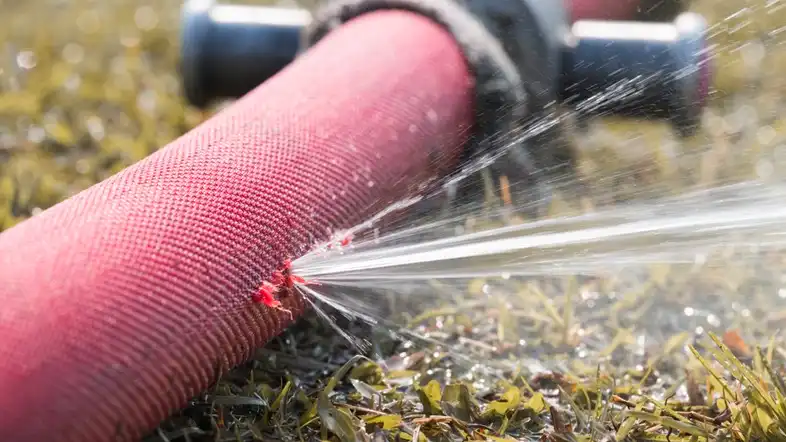
Image source: Bing (Web (fair-use with source credit))
Quick Answer
To unclog a garden hose nozzle with vinegar, remove the nozzle from the hose and soak it in undiluted white vinegar for 30 minutes to overnight. Scrub the spray face with an old toothbrush, flush with clean water, and reassemble. Heavily scaled nozzles may need 8 to 12 hours of soaking or a stronger 6 to 12 percent cleaning vinegar.
Vinegar dissolves calcium and limescale, which cause most clogs.
Why Your Garden Hose Nozzle Clogs (and How to Tell)
Most nozzle clogs fall into two categories, and figuring out which one you have determines your entire approach.
Mineral buildup is the most common culprit. If you see white, chalky, or crusty residue around the spray tip, that's calcium or limescale. Hard water deposits accumulate inside the nozzle's narrow channels, reducing flow and distorting the spray pattern.
You'll notice a steady decline in pressure over weeks or months, not a sudden blockage.
Debris clogs happen fast. A piece of sand, rust flecks from inside an old hose, or a bit of a dried leaf can lodge in the nozzle face. This usually shows up as a sudden drop in flow, uneven spray, or one specific stream shooting sideways.
Quick diagnostic:
- White crust visible? Mineral buildup. Soak it.
- No crust, but flow dropped overnight? Likely debris. Disassemble and clear it.
- Spray pattern is distorted but pressure feels normal? Partial mineral blockage. Soak it.
- No water comes out at all, even at full pressure? Either a seized dial or a fully blocked face. Disassemble first.
If you're in a region with hard water (the US Southwest, parts of the UK, or most of Australia), assume mineral buildup until proven otherwise. The EPA's water hardness database confirms that groundwater hardness varies significantly by region, which directly affects how often your nozzles need cleaning.
Nozzle material also matters. Plastic nozzles handle long vinegar soaks without issue. Brass and zinc alloy models are fine for standard cleaning, but don't leave them submerged for more than 24 hours.
If your nozzle has rubber gaskets or O-rings, keep soak time under two hours, since acetic acid can degrade rubber over time.
What You'll Need: Vinegar, Tools, and Nozzle Anatomy Basics
You probably own most of these already. Here's what to gather before you start.
| Item | What to Use | Why You Need It |
|---|---|---|
| Vinegar | White distilled, 5% acetic acid | Dissolves calcium and limescale |
| Container | Glass jar or plastic tub, deep enough to submerge the nozzle | Holds the vinegar soak |
| Brush | Old toothbrush or small nylon brush | Scrubs loosened scale from spray holes |
| Pick | Wooden toothpick or straightened paperclip | Clears debris from individual holes |
| Cloth | Lint-free rag or microfiber towel | Dries parts before reassembly |
| Optional | Adjustable pliers (with care), small screwdriver | For seized faceplates or stuck dials |
If your clog is severe, swap household white vinegar (5%) for cleaning vinegar (6 to 12% acetic acid). It's sold at most hardware stores and works faster on heavy scale. Don't use apple cider vinegar or balsamic, since they contain sugars and colorants that can stain or gum up the nozzle.
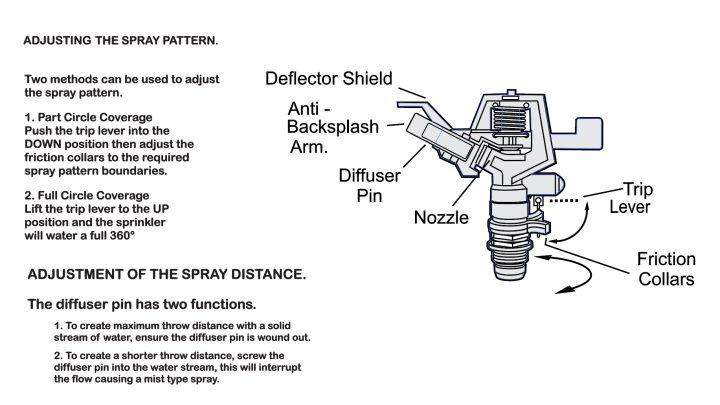
A quick word on nozzle anatomy. Most garden hose nozzles have a removable faceplate (the front piece with the spray holes), a rotating dial or selector ring, and one or more rubber washers. Knowing how yours comes apart saves time.
Manufacturer specs from brands like Dramm, Gilmour, and Melnor all confirm that the faceplate unscrews counterclockwise on most models, but designs vary.
The Step-by-Step Vinegar Method (With Decision Branches)
This is where the decision tree kicks in. Your next move depends on what you found during diagnosis.
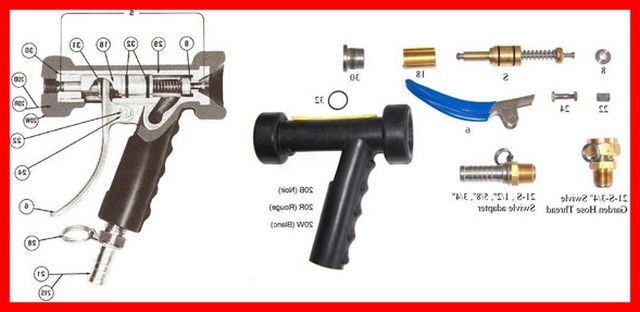
Image source: Bing (Web (fair-use with source credit))
If the clog is light (spray is slightly weak, minor crust visible):
- Unscrew the nozzle from the hose.
- Submerge just the nozzle head in undiluted white vinegar.
- Soak for 30 minutes.
- Scrub the spray face gently with a toothbrush.
- Flush under running water and reattach.
If the clog is moderate (spray pattern is distorted, noticeable crust, pressure loss around 30 to 50%):
- Unscrew the nozzle and remove the faceplate by twisting counterclockwise.
- Take out any rubber washers and set them aside (keep them out of the vinegar).
- Soak the metal and plastic parts in full-strength white vinegar for 1 to 4 hours.
- Use a toothpick to clear each individual spray hole from the outside in.
- Scrub the faceplate's underside where scale hides.
- Rinse all parts, dry the washers, and reassemble.
If the clog is severe (almost no flow, thick white crust, or fully blocked face):
- Disassemble the nozzle completely.
- Soak parts in 6 to 12% cleaning vinegar for 8 to 12 hours, or overnight.
- After soaking, scrub every surface with a toothbrush. Pay attention to the internal channels where the dial rotates.
- Use a straightened paperclip to punch through any remaining blocked holes. Work gently to avoid enlarging the openings.
- Flush each part under hot running water.
- Reassemble and test.
If vinegar alone doesn't work:
- Try a second soak in fresh vinegar. Sometimes one round softens the scale, and a second dissolves the rest.
- For stubborn deposits, warm the vinegar to about 100°F before soaking. Warmer acid works faster, though don't boil it, since high heat can warp plastic nozzles.
- If you're still blocked after 24 total hours of soaking, the nozzle may be physically damaged or corroded internally. At that point, replacement is usually cheaper than further repair.
Per manufacturer care guides from major brands, nozzles should never be soaked longer than 24 hours total, even in diluted solutions, since prolonged acid exposure can pit softer metals and degrade plastic threading.
Vinegar vs. Other Descaling Methods: What Actually Works
Vinegar is the go-to for most homeowners, but it's not the only option. Here's how the common methods stack up.
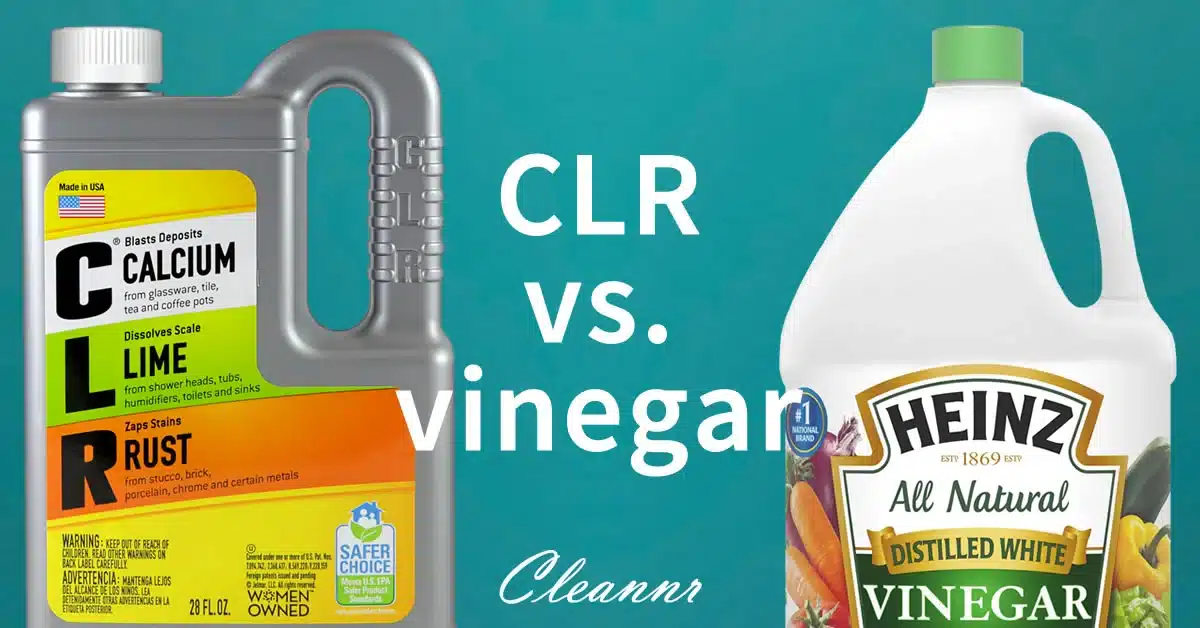
Image source: Bing (Web (fair-use with source credit))
| Method | Best For | Cost | Speed | Safety |
|---|---|---|---|---|
| White vinegar (5%) | Light to moderate scale | ~$1–2 | 1–4 hours | Food-safe, non-toxic |
| Cleaning vinegar (6–12%) | Heavy buildup | ~$3–5 | 30 min–2 hours | Wear gloves |
| CLR (Calcium-Lime-Rust remover) | Very heavy, industrial-grade scale | ~$5–10 | 5–15 min | Chemical, ventilate |
| Lemon juice (citric acid) | Light scale, mild odor alternative | ~$2 | 2–6 hours | Food-safe |
| Baking soda paste | Surface stains, not internal clogs | ~$1 | N/A (scrub only) | Food-safe |
| Boiling water | Organic debris, not mineral scale | Free | Immediate | Burn risk |
Vinegar wins on safety, cost, and availability. CLR works faster on severe buildup but contains sulfamic acid and requires gloves and ventilation. Aggregate reviews of cleaning forums consistently rank vinegar as the first method to try, with CLR as a backup if vinegar fails.
For edible gardens, vinegar is the clear choice, since it's food-safe and breaks down into harmless acetate and water. If you use your hose for watering vegetables, stick with vinegar and flush thoroughly before reuse.
One thing vinegar can't do: repair physical damage. If the nozzle housing is cracked, the dial is stripped, or the spray face is corroded, no amount of soaking will fix it. In that case, replacement is the only real option, and most standard nozzles cost between $8 and $20 as of 2026.
Mistakes That Ruin Nozzles (and How to Avoid Them)
Most nozzle damage happens during cleaning, not during use. A few common errors can turn a simple descaling job into a replacement.
Soaking too long. Vinegar is mild, but it's still an acid. Leaving a nozzle submerged for days can pit zinc alloy parts, swell certain plastics, and destroy rubber gaskets. Stick to the time ranges covered earlier.
If scale is still present after 24 hours, move to a stronger method rather than extending the soak.
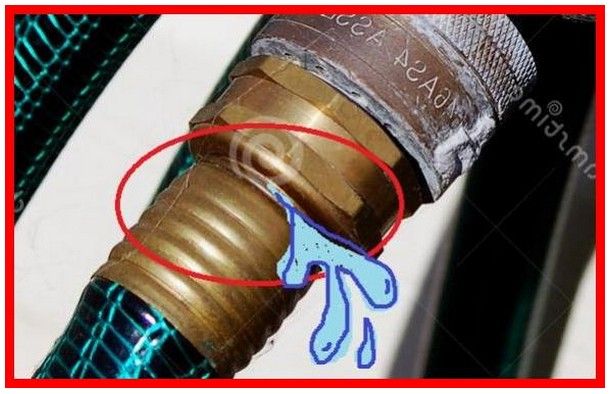
Skipping the gasket check. Many people reassemble without noticing a cracked or swollen washer. Once you put it back together, you'll have a slow leak at the hose connection. Inspect every rubber part before reassembly.
Replace any washer that feels spongy or shows visible wear. Standard hose washers cost pennies at any hardware store.
Using a metal wire to clear holes. A stiff wire or large nail can scratch or enlarge the spray openings. Once a hole is widened, the spray pattern is permanently uneven. Use a wooden toothpick or a plastic pick instead.
If you need something stiffer, a straightened paperclip is gentler than a nail or drill bit.
Mixing vinegar with bleach or ammonia. This is the dangerous one. Combining vinegar with bleach produces chlorine gas. Mixing it with ammonia creates chloramine fumes.
Neither has any place in nozzle cleaning. If you want to disinfect, use a dilute bleach soak separately, then rinse thoroughly before any vinegar step.
Forgetting to flush before reuse. Vinegar residue won't harm most plants, but if you notice a vinegary taste or smell in your water, run the hose for 30 seconds before using it on edible crops. This is mostly a quality issue, not a safety one, but it's worth doing.
Reassembling while wet. Trapped moisture leads to internal corrosion, especially in brass nozzles. Dry every part with a cloth before putting it back together. A few minutes of air-drying on a towel helps even more.
Keeping Your Nozzle Clear: Long-Term Maintenance
Cleaning a clogged nozzle is easy. Keeping it clear is even easier, once you build a few habits.
Drain the hose after every use. Water that sits in the hose migrates back into the nozzle as pressure equalizes. That standing water leaves mineral deposits every time it evaporates. After you turn off the spigot, lift the hose end above the nozzle and let gravity drain the line.
Store the hose and nozzle indoors during winter. Freezing water expands inside the nozzle and can crack plastic housings or split seals. In regions where temperatures drop below 32°F, bring the nozzle inside. This single step prevents the majority of cold-weather nozzle failures.
Install a filter washer. These inexpensive mesh washers (usually under $3 for a pack) sit between the hose and the nozzle and catch sediment before it reaches the spray head. Manufacturer specs from brands like Gilmour and Dramm confirm that filter washers can extend nozzle life by 2 to 5 years in hard water areas.
Clean seasonally. A quick 30-minute vinegar soak at the start and end of the growing season prevents buildup from ever reaching the stage where flow drops noticeably. This is much easier than restoring a fully clogged nozzle.
Consider a hose-end water softener if you're in a very hard water zone. These attach to the spigot and use replaceable cartridges to reduce mineral content. They're not necessary for everyone, but in areas with hardness above 180 ppm (classified as "very hard" by the EPA's water quality standards), they make a noticeable difference.
Replace the nozzle every 3 to 5 years. Even with perfect maintenance, internal wear and seal degradation happen. A new nozzle costs $8 to $20 as of 2026, and it restores full performance without the hassle of repeated deep cleanings.
Quick Answers to Common Questions
Can I use apple cider vinegar instead of white vinegar?
Yes, but it's not ideal. Apple cider vinegar works on light scale, but the sugars and colorants can leave residue in the nozzle. White distilled vinegar is cheaper, cleaner, and more effective.
Stick with white unless that's all you have on hand.
How long does the vinegar soak actually take?
For light buildup, 30 minutes is enough. For moderate scale, plan on 1 to 4 hours. Heavy deposits may need 8 to 12 hours, or an overnight soak.
Don't exceed 24 hours total, since prolonged acid exposure can damage seals and softer metals.
Will vinegar damage my nozzle's rubber parts?
It can, if you soak the rubber gaskets alongside the metal and plastic components. Acetic acid breaks down natural and synthetic rubber over time. Remove all gaskets and O-rings before soaking.
Keep them out of the vinegar, and reassemble them once the other parts are dry.
Can I clean the nozzle without removing it from the hose?
You can, but it's less effective. Pouring vinegar into a small bag, attaching it over the nozzle, and sealing with a rubber band is a common workaround. It works for surface scale but won't dissolve deposits deep inside the nozzle body.
Full removal gives the best results.
Is vinegar safe for hoses used on vegetable gardens?
Yes. White vinegar is food-safe and breaks down into harmless byproducts. Flush the hose for 30 seconds after cleaning to remove any residual taste or smell.
Many organic gardeners use vinegar as their primary garden tool cleaner for this reason.
What if the spray is still uneven after cleaning?
Two possibilities remain. The nozzle face may be physically worn, meaning the holes have enlarged unevenly. Or there's a blockage deeper inside the hose bib or spray wand that vinegar can't reach.
Try a second soak first. If that fails, inspect the wand connection and consider replacing the nozzle.

Similar Posts