Clean a Lawn Mower Carburetor Without Removing It
Lead Turfgrass & Lawn Care Specialist at Totally Green Lawn · Certified Turfgrass Specialist (CTS), Master Gardener, B.S. in Agronomy & Turf Science · 14+ years in residential turf management, organic fertilization, and weed science
Learning how to clean a lawn mower carburetor without removing it is the first move most homeowners make when a mower starts surging, stalling, or refusing to start after a long sit. The good news: a surprising amount of that gunk lives on the surfaces the cleaner can reach, so you can often skip a full teardown.
In our research, the carburetor cleaning method has barely changed since the 1990s, but the fuel has. Today's gas is almost always E10 (10% ethanol) in the US, and ethanol starts breaking down into varnish in about 30 days. That's why mowers that ran fine last fall die the first warm weekend of spring.
The fix usually takes 15 to 30 minutes, a can of spray, and a little patience.
Quick Answer
Yes, you can clean a lawn mower carburetor without removing it. Spray carburetor cleaner into the throat, pilot circuit, and bowl area. Drain the old fuel, refresh with stabilized gas, and re-test.
This works for varnish, light clogs, and rough idle. Full teardown is only needed if the float is stuck or the carb is physically damaged.
What "Clean Without Removing" Actually Means (and When It Works)
The phrase "without removing" means you clean the carburetor in place on the engine. You're dissolving varnish and gum with spray, not pulling the carb off and soaking it in a parts washer. It's the go-to fix for the most common small-engine complaints.
The symptom shortcut
- Won't start after winter storage = classic varnish clog.
- Rough idle, dies at low throttle = pilot jet or idle circuit.
- Surges at full throttle = main jet or fuel flow restriction.
- Floods (smell of raw gas) = stuck float needle.
What in-place cleaning handles well
- Light to moderate varnish
- Stuck choke or throttle plates
- Dirty pilot circuit
- Gummed-up float needle seat (often, not always)
What it usually cannot fix
- Cracked or warped plastic body
- Permanently warped float
- Stripped threads
- A float needle physically worn into its seat (no seal left)
If you're staring at cracked plastic or a visibly bent float, cleaning will only buy you a week or two. A $15, $25 replacement carb is usually the smarter call.
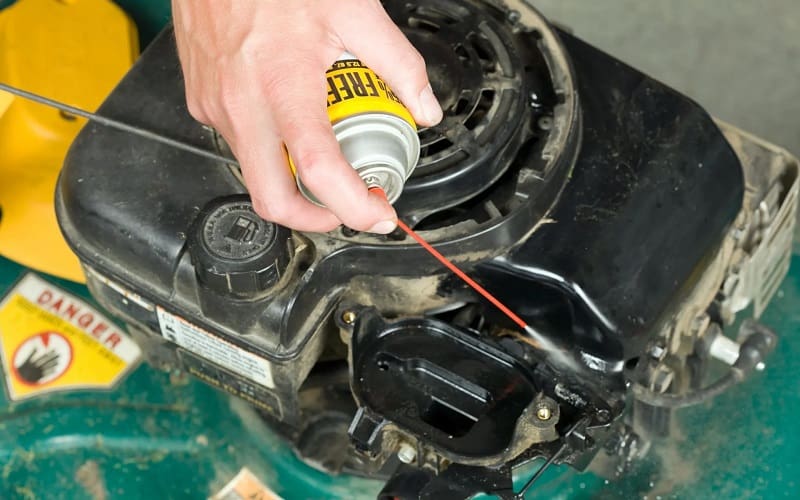
Image source: Bing (Web (fair-use with source credit))
First, Confirm It's Really the Carburetor
Most carb "problems" are actually fuel or air problems. Per manufacturer service guidance from Briggs & Stratton, Honda, and Kohler, you should rule out the easy stuff before spraying anything.
Run the 60-second checklist
- Is there fresh gas in the tank? (Not last year's leftovers.)
- Is the fuel shutoff valve open?
- Is the air filter clean? A clogged filter mimics fuel starvation.
- Is the spark plug dry, or wet with gas? Wet = flooded, dry = no fuel.
- Is there a mouse nest in the air intake? It happens more than people think.
If the plug is dry and you smell no gas
You may have a fuel-side issue upstream of the carb (filter, line, shutoff valve) or a completely blocked main jet. Spray a quick shot of carb cleaner straight into the throat with the air filter off. If the engine fires for 2-3 seconds, you've confirmed fuel delivery is the problem.
The carb is in the chain, but the fix might be simpler than a full clean.
If the plug is wet and flooded
Hold the throttle wide open and crank for 5-10 seconds. Most flooded engines clear this way. Then you can address the flooding cause (usually a stuck float or over-priming).
This step alone saves a lot of people from spraying a perfectly good carburetor.
Identify Your Carburetor Type Before You Start
Not all mower carbs are built the same, and the method changes a little based on what you have. A quick look tells you which branch of the cleaning process to take.
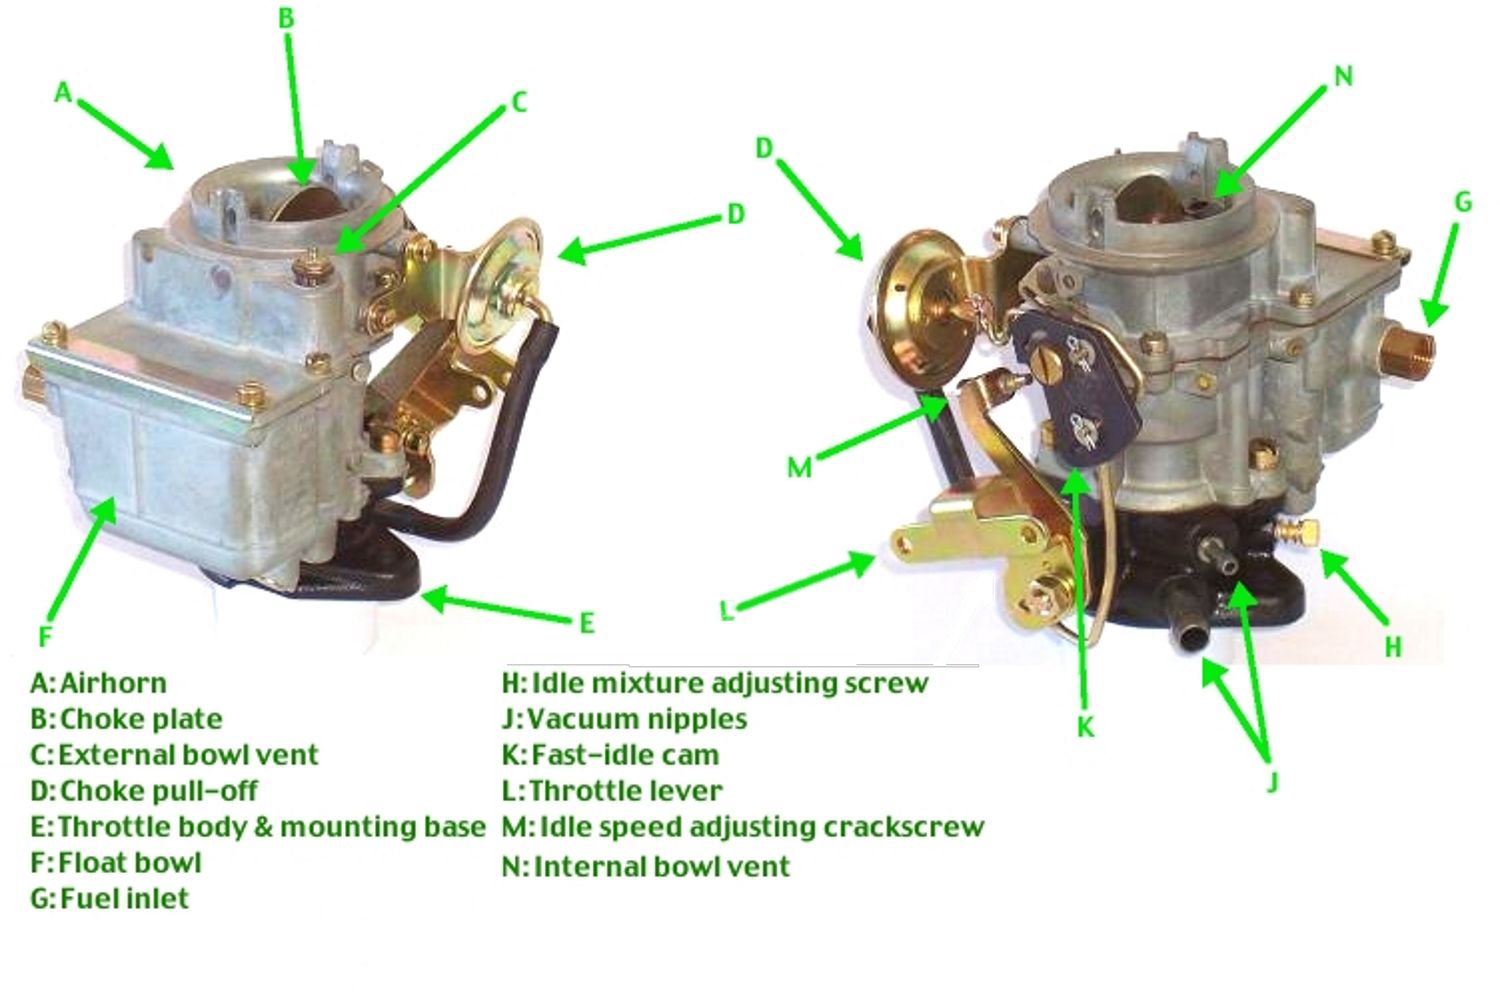
Image source: Bing (Web (fair-use with source credit))
Float-bowl carb
- Has a removable bowl at the bottom held by one bolt or screw.
- Found on most Briggs & Stratton and Honda vertical-shaft engines.
- Easier to drain old fuel through the bowl bolt.
Diaphragm (non-bowl) carb
- Sealed unit, no drainable bowl.
- Common on Tecumseh, older Craftsman, and many small push mowers.
- Cleaning is done entirely through the throat and pilot holes.
Quick visual rule
- Visible bolt at the base = float-bowl.
- Smooth sealed bottom = diaphragm.
Knowing this matters because the diaphragm carb has no bowl to drain, so you rely on the fuel shutoff valve (or pinching the line) to stop fuel flow during cleaning. Without that step, you'll have a face full of gas when the float opens.
The Decision Tree: Which In-Place Method Matches Your Symptom
This is the part most generic guides skip. The right method depends on what the mower is actually doing, not on a single one-size-fits-all process.
If the mower won't start after sitting
- Drain the tank and the bowl.
- Add fresh stabilized fuel.
- Spray carb cleaner into the throat, then into the bowl area if accessible.
- Crank with throttle wide open.
Use this when the issue is stale gas plus light varnish. As of 2026, ethanol-blended fuels are still the dominant cause.
If the mower idles rough or stalls at low throttle
- Locate the pilot jet or low-speed circuit (small hole on the carb throat).
- Spray a short burst directly into it.
- Open and close the throttle 3-4 times to work the cleaner through.
- Reassemble and test at idle.
The pilot circuit is the most common failure point on small engines. It's also the easiest to reach without removing anything.
If the mower surges at full throttle
- Check the air filter and fuel filter first.
- Spray carb cleaner down the main jet path (open the throttle, aim at the high-speed nozzle).
- If surging continues, the main jet is likely restricted. You'll need a stronger dose or a teardown.
If the mower floods immediately
- Tap the carb body gently with a screwdriver handle. The vibration sometimes frees a stuck float needle.
- If tapping doesn't help, hold the float up with a long screwdriver and spray into the seat.
- If it still floods after two attempts, the needle or seat is worn. Replacement is the honest answer.
Quick reference: symptom to method
| Symptom | Most likely cause | In-place fix |
|---|---|---|
| Won't start after winter | Varnish in bowl and jets | Drain, refill, spray throat |
| Rough idle, stalls low | Pilot jet clog | Spray pilot circuit directly |
| Surges at WOT | Main jet partial clog | Spray high-speed nozzle + check filters |
| Floods, smells like gas | Stuck float needle | Tap carb, hold float, spray seat |
| Black smoke, bog | Rich mixture, bad float | Drain bowl, blow out passages |
Use this table as a starting point. If the symptom doesn't match any of these, go back to the 60-second checklist. Most "weird" carb problems are fuel or air, not the carb itself.
Step-by-Step: How to Clean a Lawn Mower Carburetor Without Removing It
This is the core procedure. Follow it in order, and don't skip the safety step at the top.
Tools and materials
| Item | Purpose | Approx. cost |
|---|---|---|
| Carburetor cleaner spray (non-chlorinated) | Dissolves varnish | $4–$8 |
| Screwdriver (Phillips + flat) | Bowl bolt, idle screw | Already on hand |
| Small adjustable wrench | Fuel line, linkage | Already on hand |
| Spark plug socket | Pull the plug to inspect | $5 |
| Fresh fuel + stabilizer | Replaces bad gas | $15 |
| Nitrile gloves + safety glasses | Skin and eye protection | $8 |
| Shop towel or rag | Catch drips | Already on hand |
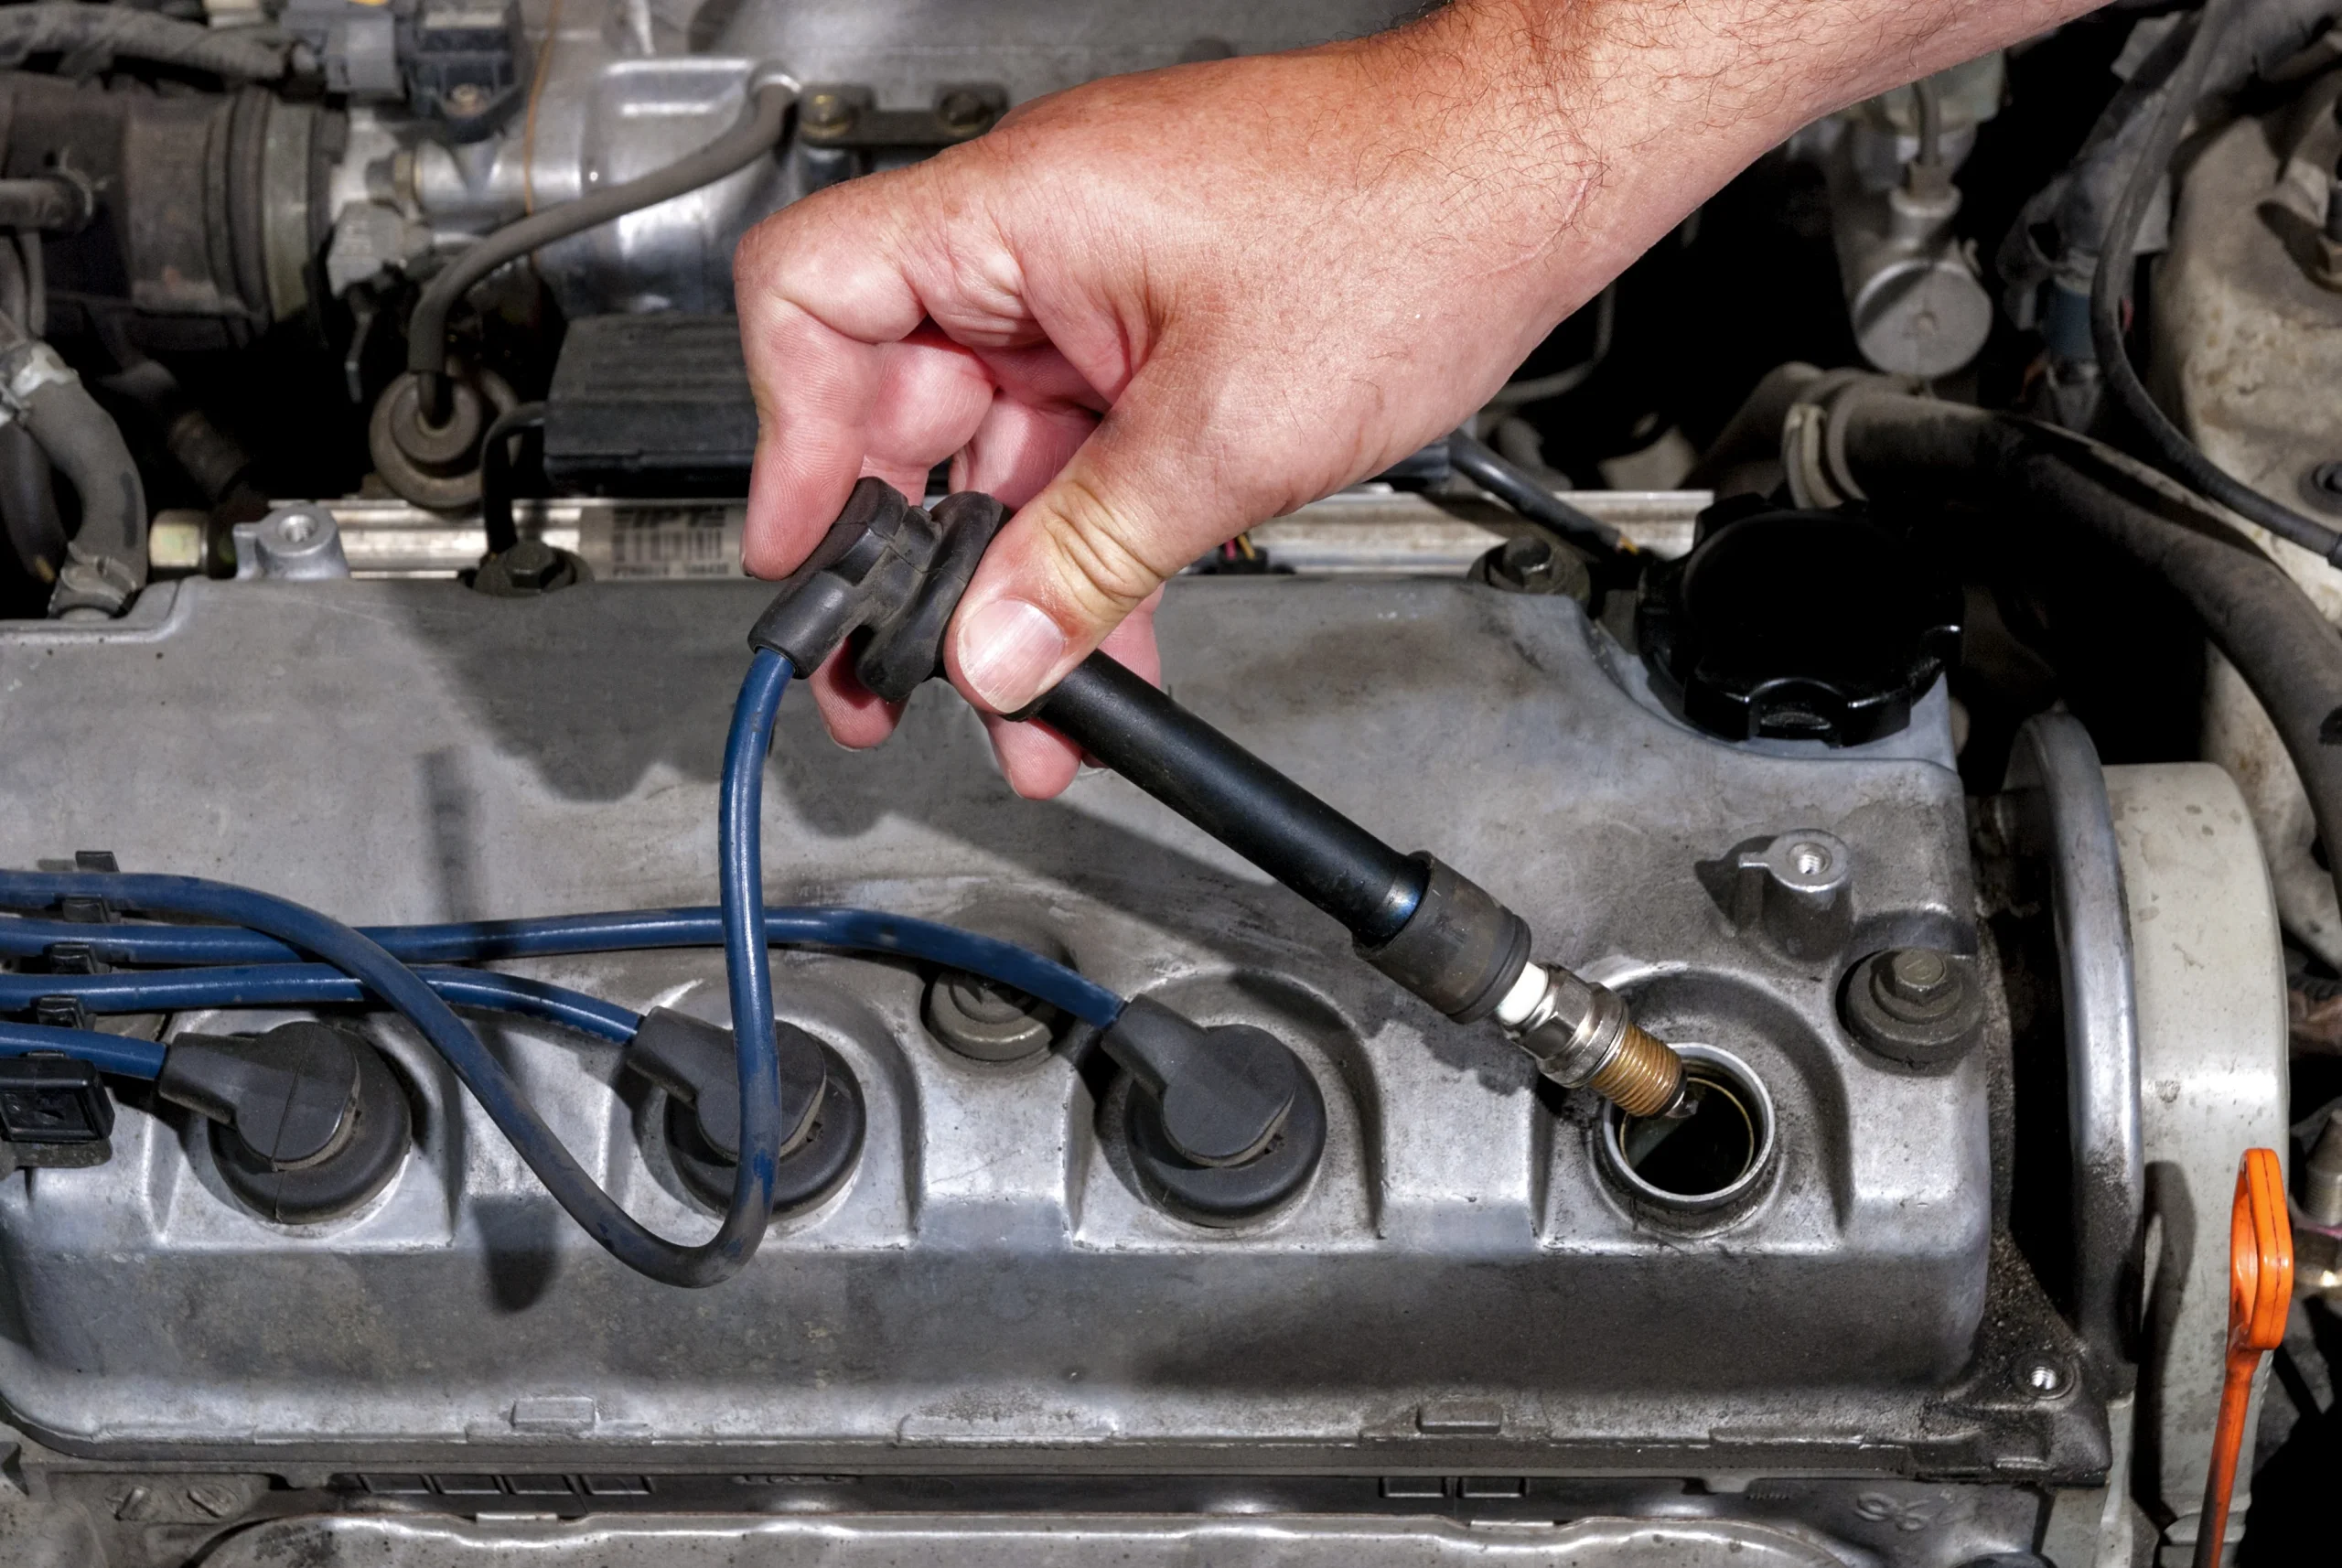
Image source: Bing (Web (fair-use with source credit))
The procedure
- Kill the spark. Pull the spark plug wire and tuck it aside. Crank the engine once or twice to confirm the plug is grounded out. This is the single most skipped safety step, and it matters.
- Close the fuel supply. Turn the fuel shutoff valve to OFF, or pinch the fuel line with pliers cushioned by a rag.
- Open the air filter housing. A 5/16" or 8mm socket usually does it. Set the filter and cover aside.
- Open the throttle. Manually rotate the throttle linkage to wide open. This exposes the plates and gives cleaner direct access to the throat.
- Spray the throat. Short, focused bursts down the venturi. Two seconds on, one second off, repeat four or five times.
- Target the pilot circuit. Find the small holes on the carb throat (idle circuit). Spray a quick shot into each.
- Address the bowl if accessible. On float-bowl carbs, loosen the bowl bolt and let old fuel drain. Spray into the open area. Re-tension the bolt to spec.
- Work the linkage. Open and close the throttle by hand three or four times. You should see cleaner misting through every passage.
- Drain the tank. Empty the old gas into an approved container. Refill with fresh fuel and a dose of stabilizer.
- Re-prime and restart. Press the primer bulb 3-4 times (if equipped), reconnect the spark plug wire, and pull the cord.
What success looks like
A clean idle within 30 seconds of warm-up. Smooth throttle response. No more surging under load.
If you still get the same symptom, repeat the spray cycle once more before assuming the carb needs removal.
For a detailed reference, the EPA small engine emissions guidance outlines approved maintenance practices that preserve factory performance after a clean.
Mistakes That Push You Toward a Full Removal Anyway
Most carb teardowns happen because of avoidable errors during the in-place clean. Here's what tends to go wrong.
Spraying the wrong product
Brake cleaner and acetone-based sprays melt plastic-bodied carbs. Briggs & Stratton's older pulldown carbs and many Honda models have plastic bowls. Use a carb cleaner labeled "safe for plastic" or "non-chlorinated." When in doubt, test a hidden area first.
Skipping the fuel shutoff
If you spray the throat on a running fuel supply, the float will open mid-spray. Gasoline will pour out of every passage, including the air filter housing. You'll also inhale more fumes than you want to.
Over-spraying the pilot circuit
The pilot holes are tiny. A two-second burst is plenty. Five seconds of spray floods the engine, fouls the plug, and doesn't clean any better than the shorter dose.
Cranking the engine dry
A lot of people skip step 1 and crank the mower with the air filter off and the carb cleaner still wet. That washes the cleaner past the rings, contaminates the oil, and can hydrolock a small engine. Always let the cleaner flash off for 2-3 minutes before you crank.
Reusing a "cleaned" air filter
A varnish-soaked filter defeats the whole job. If the filter looks dark, holds dirt, or smells like gas, replace it. They're cheap ($5-10) and they protect the carb you just cleaned.
Ignoring the fuel cap vent
A clogged fuel cap vent creates a vacuum in the tank. The engine runs for a few minutes, then dies as fuel delivery slows. It mimics a clogged carb.
Unscrew the cap. If the engine suddenly runs, that's the fix.
Keeping It Clean After You're Done
The clean only lasts as long as the fuel does. That means fixing the root cause, which is almost always fuel management.
Fill with fresh gas and stabilizer
Stabilized fuel lasts 6-12 months in a stored mower. Without stabilizer, you have 30-60 days before varnish starts forming. Per manufacturer guidance from Briggs & Stratton, Honda, and Kohler, treat every tank if the mower will sit more than 30 days.
Run the mower dry for long storage
If you're putting the mower away for winter, run it until the carb bowl is empty. A drained carb is a clean carb, three months from now.
Use ethanol-aware fuel when possible
True ethanol-free gas (E0) is still sold at marinas and some stations. It doesn't varnish the way E10 does. If your area has it, use it in any small engine that sits for more than two weeks.
Replace the fuel filter yearly
A $3 in-line filter catches debris and water before they reach the carb. Swap it once a season, especially before spring startup.
Re-check the air filter monthly during cutting season
A clean filter keeps abrasive dust out of the carb throat. Most manufacturers recommend checking every 10-25 hours of use. Keep a spare on hand so you can swap and clean at your leisure.
This routine is the difference between a mower that starts on the first pull every spring, and one that needs another round of carb cleaning. Treat the fuel, and the carb takes care of itself.

Similar Posts