Sharpen Lawn Mower Blades with an Angle Grinder Fast
Lead Turfgrass & Lawn Care Specialist at Totally Green Lawn · Certified Turfgrass Specialist (CTS), Master Gardener, B.S. in Agronomy & Turf Science · 14+ years in residential turf management, organic fertilization, and weed science
If your grass looks torn and ragged after a fresh mow, your blade's gone dull, and that's the whole story. Learning how to sharpen lawn mower blades with angle grinder is one of the fastest DIY wins you can do, takes maybe 15 minutes per blade once you've done it a few times, and saves you a trip to the small-engine shop.
The trick is matching the grinder to the blade and not overheating the steel. Factory blade bevels run between 30 and 45 degrees depending on the mower, and per manufacturer specifications, the edge temper matters more than the grind speed. A bench grinder works fine too, but an angle grinder gives you reach, control, and a way to follow the original edge without taking the whole blade off the deck.
Let's walk through when it makes sense, what to grab, and how to do it without wrecking the blade or the spindle.
Quick Answer
Sharpen with a 4 or 4.5 inch angle grinder. Use a 36 or 60 grit flap disc. Follow the original 30 to 45 degree factory bevel.
Take light passes. Keep the blade cool. Balance before reinstalling.
The whole job runs 10 to 20 minutes per blade.
When an Angle Grinder Makes Sense (And When It Doesn't)
An angle grinder is the right call in most homeowner situations, but not all of them. Here's the decision branch we walk through in our research when sizing up a blade.
Go with the angle grinder if:
- The blade is just dull, with light nicks and rounding on the edge.
- You own (or can borrow) a 4 or 4.5 inch grinder. Anything bigger gets clumsy on a 21 inch deck blade.
- The blade is straight, with no bends, deep cracks, or missing chunks.
- You want a sharp edge in one sitting, without a 30 minute drive to the shop.
Skip the grinder and replace the blade if:
- The blade has cracks, especially near the center hole or wing tips. A cracked blade during a mow is a projectile hazard.
- The cutting edge has lost more than a quarter inch of original width from repeated grindings. The steel is too thin to hold a bevel.
- The blade is bent. Lay it on a flat surface and check. A bent blade means a bent spindle, and the grinder won't fix that.
- You're working on a reel mower. Reel blades need a completely different setup, usually a backlapping jig or professional service.
| Condition | Sharpen | Replace |
|---|---|---|
| Light dulling, no nicks | Yes | No |
| Small nicks, edge rounding | Yes | No |
| Deep gouges over 1/8 inch | Maybe (file first) | Often |
| Cracks anywhere | No | Yes |
| Bent or warped | No | Yes |
| Edge worn below safe width | No | Yes |
One more branch worth flagging: riding mower and zero-turn blades are bigger and heavier, often 18 to 22 inches long. They sharpen fine with a 4.5 inch grinder, but you'll do a lot of reaching. A 6 inch grinder with a flap disc covers more edge per pass.
Per current industry guidance from sources like the OSHA grinding safety standards, keep the wheel guard in place no matter the size.
What You Need Before You Start
Pull everything together before you flip the mower. It's a short list, and most of it's already in a basic garage.
- Angle grinder, 4 or 4.5 inch, 10,000 to 11,000 RPM range
- Flap disc (preferred) or grinding wheel, 36 or 60 grit
- Vise or clamp to hold the blade
- Socket wrench or impact wrench for the center bolt (5/8 or 3/4 socket is common)
- Block of wood or a blade removal tool to stop the blade from spinning
- Safety glasses (ANSI Z87.1 rated), hearing protection, work gloves
- Blade balancer (cone style) or a nail in a wall stud for the balance check
- Wire brush or putty knife for cleaning
- Water in a small can for cooling the edge
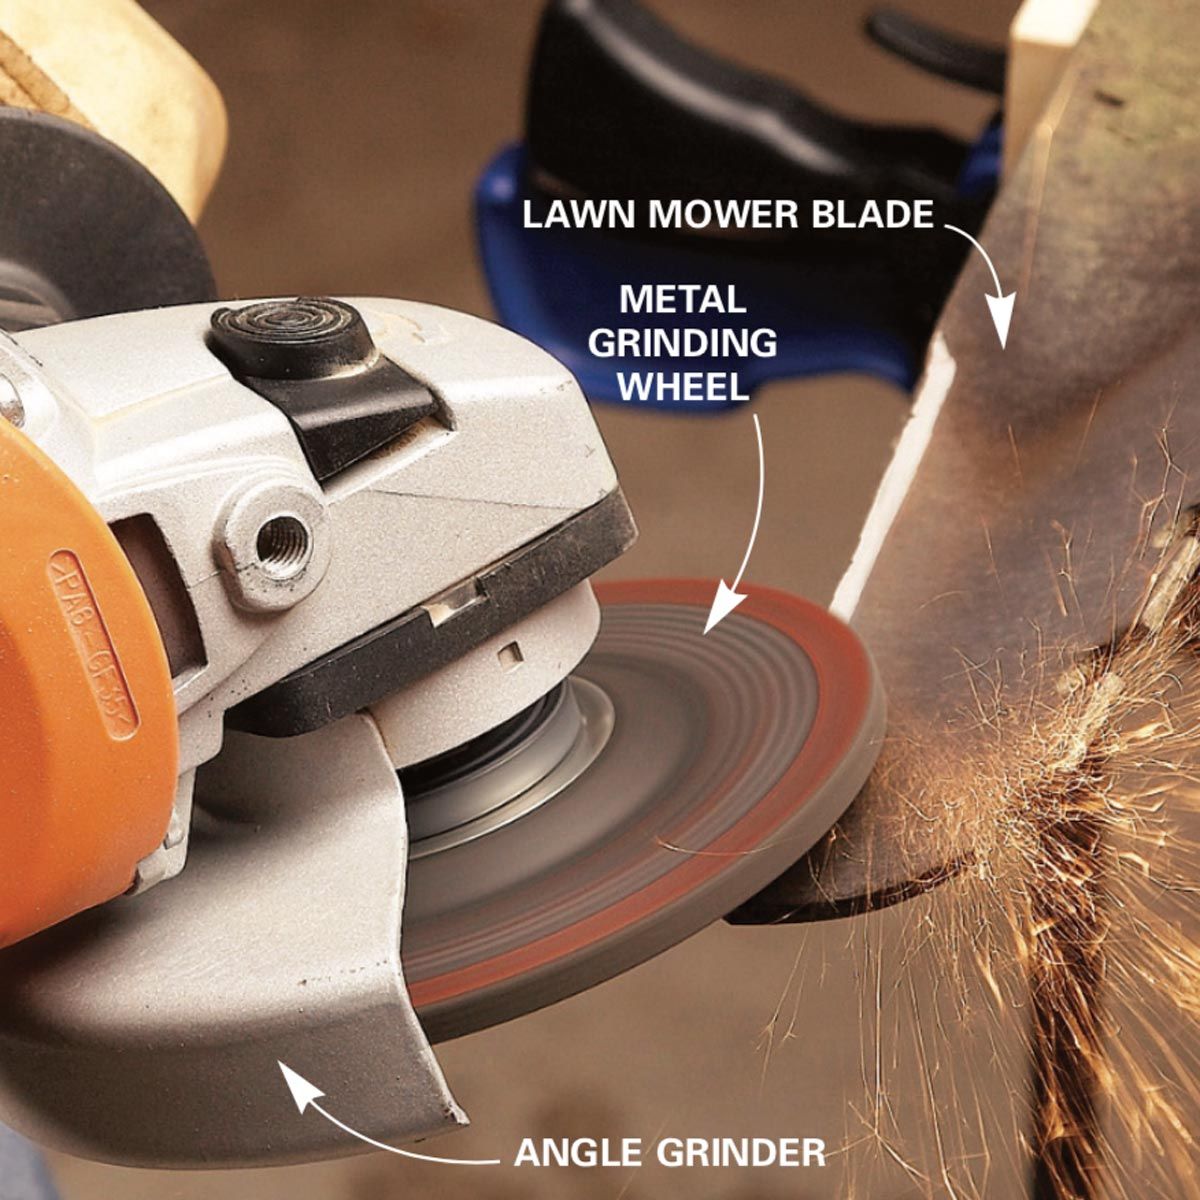
Image source: Bing (Web (fair-use with source credit))
Flap disc vs grinding wheel: Use a flap disc if you have one. It runs cooler, leaves a smoother edge, and is more forgiving on a thin mower blade. A standard grinding wheel cuts faster but throws more heat and can gouge if you're heavy-handed.
For lawn mower steel, a flap disc is the safer pick.
Disc grit: Start with 60 grit. Move to 80 or 120 only if you want a polished edge, though for a mower, the rougher finish actually holds up longer between sharpenings.
Step-by-Step: Sharpening Lawn Mower Blades With an Angle Grinder
Here's the full process, start to finish. Read it through once before you start, the order matters.
Prep the mower and pull the blade
Park on a flat surface. Disconnect the spark plug wire (or the negative battery cable on a battery model). Tip the mower carburetor-side up so oil doesn't leak into the air filter.
Slide a block of wood under the deck to keep it stable. Use the wood block to stop the blade from turning while you break loose the center bolt with a socket or impact wrench. Most bolts torque to 40 to 80 foot pounds, so they take some muscle.
Tip the blade off and mark which side faced down. A Sharpie dot on the down side saves a headache at reinstall. Lay the blade on your workbench and scrub the underside with a wire brush.
You want to see the original edge clearly before you grind.
Inspect before you grind
Run your finger along the cutting edge, away from the direction it cuts. You'll feel the factory bevel, the angle that's already there. That's the line you follow.
Don't try to put a steeper edge on, just restore what's there. Look for the deep nicks and any cracks flagged in the decision table above. If the blade fails that check, stop and order a replacement.
Clamp and grind
Mount the flap disc and put the wheel guard in place. Clamp the blade in your vise with the cutting edge up and the bevel facing you. Stand so the disc throws sparks down and away from your face.
Fire up the grinder and let it reach full speed before contact. Touch the disc to the edge with light pressure, following the existing bevel. Aggregate reviews from users sharpening thousands of mower blades report that 3 to 5 light passes per side is plenty.
Heavy pressure is where people ruin blades. The disc should do the work, not your arm.
Move in one direction along the edge, end to end, not back and forth in a small spot. That spreads heat and keeps the angle consistent. After every 2 or 3 passes, dip the edge in your water can for 2 seconds.
You want to feel the edge stay cool. If it turns blue, you've burned the temper and that section of edge won't hold sharpness.
Flip the blade and repeat on the other cutting end. Keep passes matched side to side so the blade stays balanced before you even hit the balancer.
Don't forget the lift side
Most standard mower blades have a second edge on the underside, the "lift" wing that creates suction. As of 2026, most OEM blades we've researched from brands like Briggs and Stratton and Honda come single-edged, but a lot of aftermarket and older blades are double-edged. If yours has a second edge, sharpen it the same way, same angle, same number of passes.
Final clean and check
Wipe the blade with a rag. Run your thumb across the edge, perpendicular to it. You want to feel a slight burr on the back side, that's a sign the edge is sharp.
A clean, shiny cutting surface with no rounding is the visual cue you're done.
Blade Balance and Reinstall: The Steps Most People Skip
This is the part that decides whether your mower runs smooth or vibrates itself apart over the next season. Skipping it is the single most common mistake we see in aggregate user feedback.
Why balance matters
An unbalanced blade wobbles at 3,000+ RPM. That wobble hammers the spindle bearing, the engine crankshaft, and the deck welds. A bad balance can take out a spindle in a single mowing season.
A good balance lets a blade last for years.
How to balance
Two methods work:
- Cone balancer: Stick the center hole over the cone. A balanced blade sits level. A heavy side tilts down, and you grind a touch more off the heavy end to compensate.
- Nail in the wall: Drive a nail partway into a stud. Hang the blade on the nail through the center hole. Same idea, the heavy side drops, and you grind to match.

Image source: Bing (Web (fair-use with source credit))
You're aiming for the blade to hang within about 1/8 inch of level. Close is fine. Don't grind a balanced blade just because it's not perfect, you'll throw off the other end.
Reinstall the blade
The blade goes back with the lift wings facing up, into the deck. The angled cutting edge is the leading edge in the direction of spin. That "down side" mark you made with the Sharpie confirms the orientation.
Thread the center bolt by hand first, then torque it to spec. Per manufacturer specs, most walk-behind blades torque to 38 to 50 foot pounds. Riding mower blades often run 70 to 80.
Check your engine manual for the number.
Reconnect the spark plug wire. You're done.
Mistakes That Ruin Blades (or Mowers)
Most first-timers make at least one of these. The good news, all of them are easy to avoid once you know they exist.
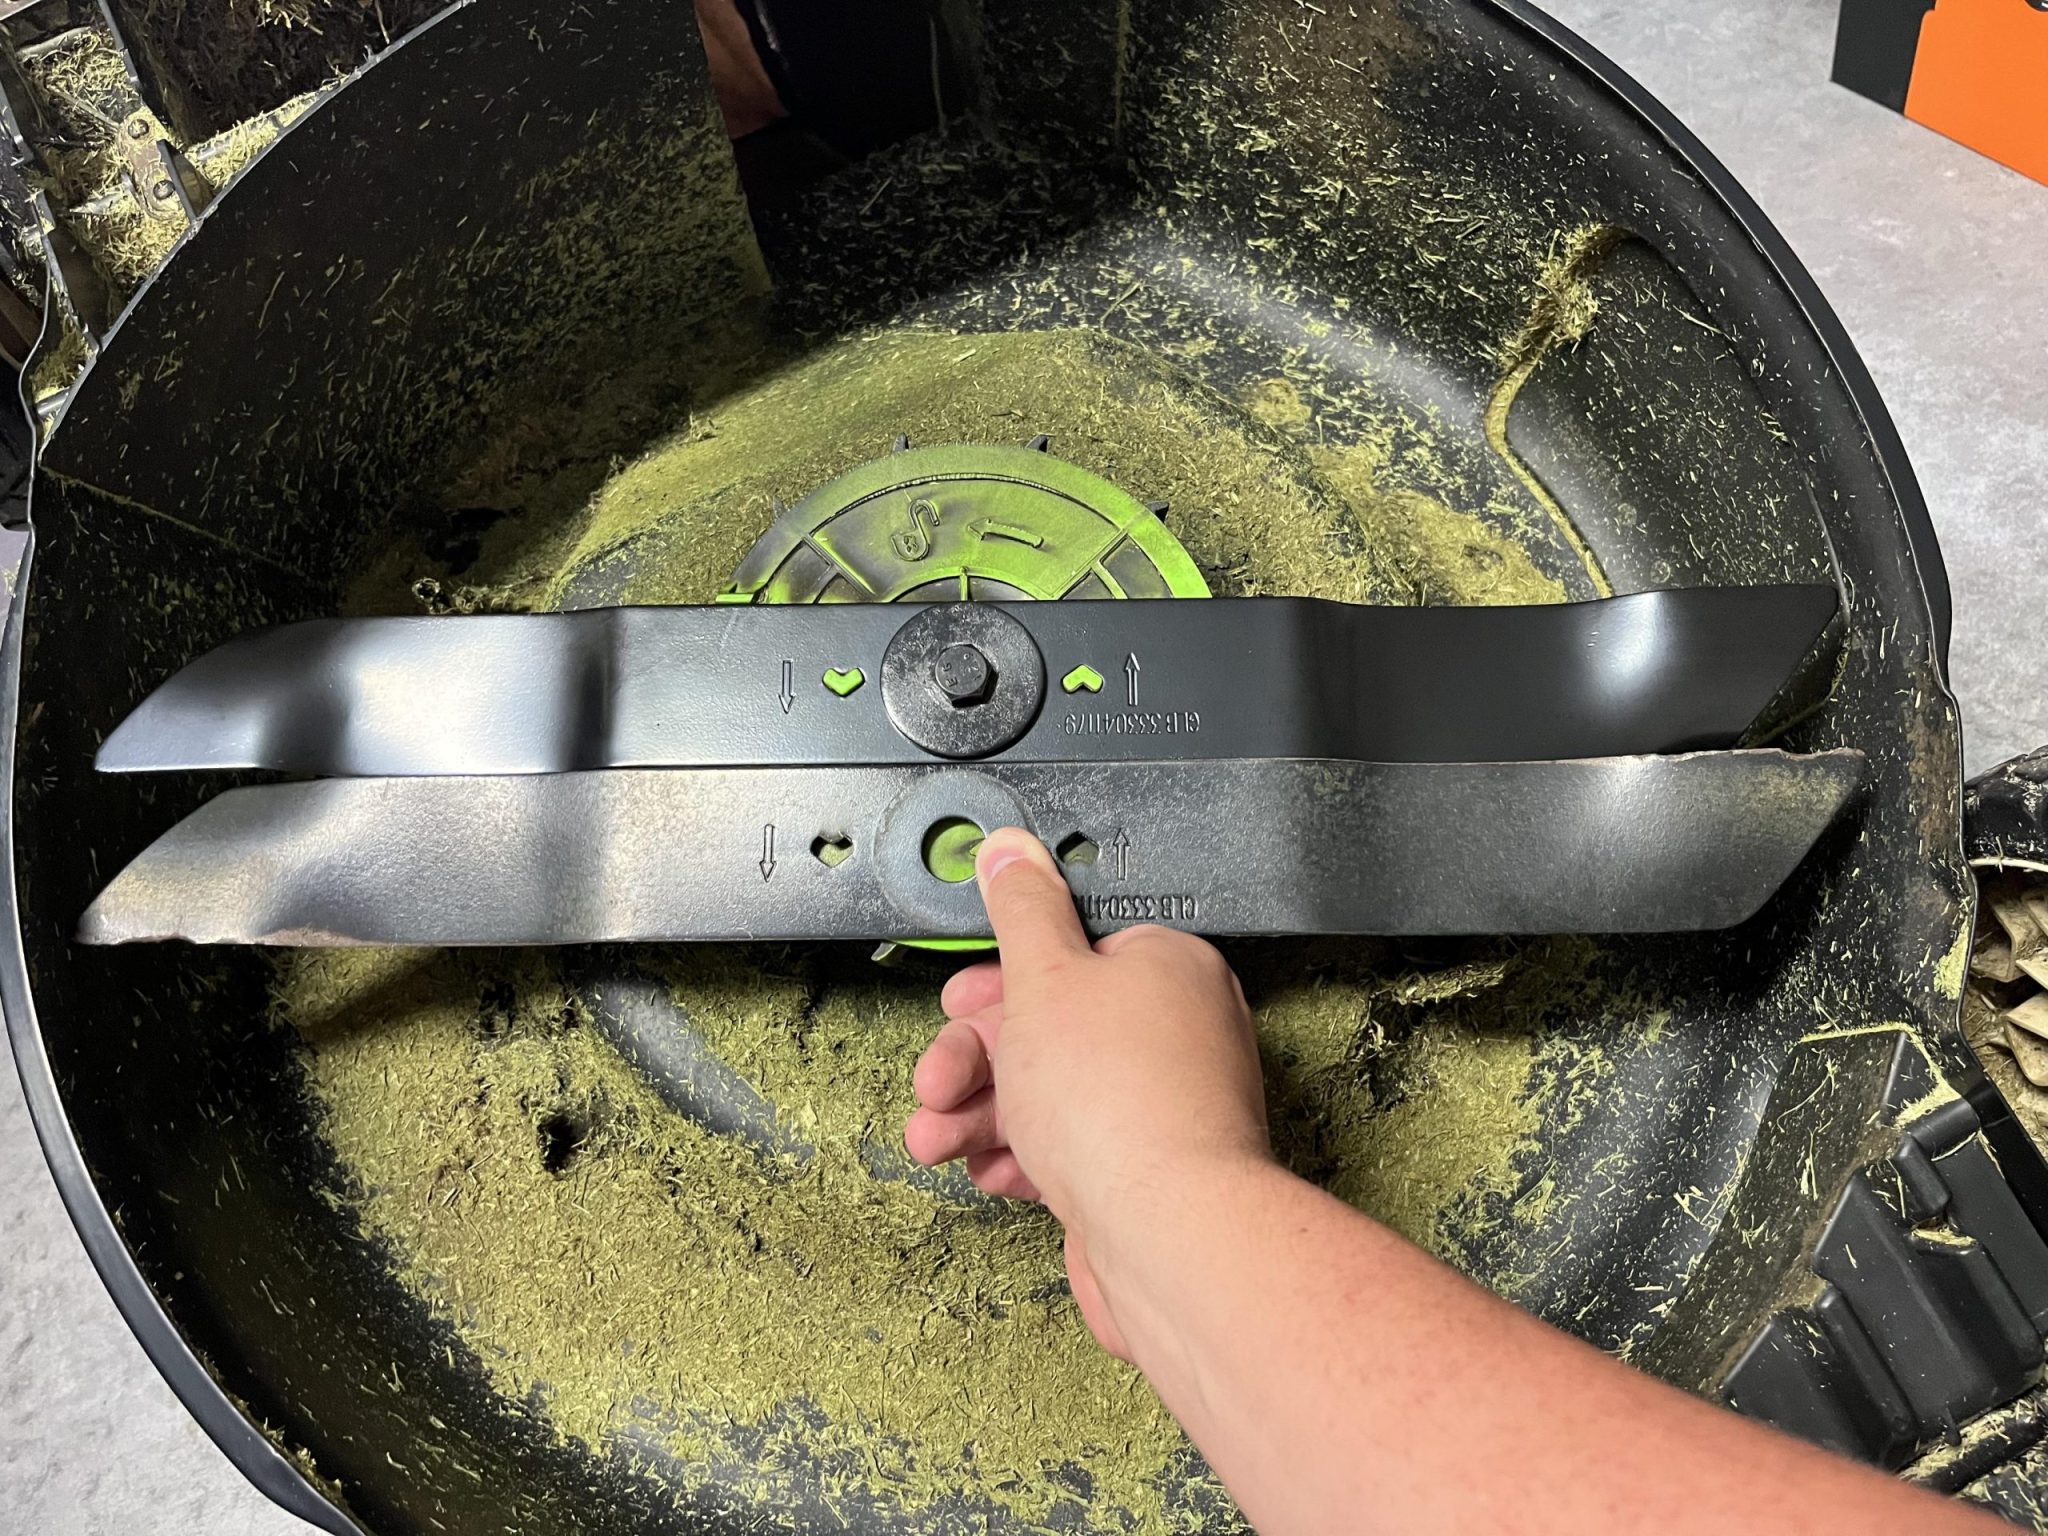
Image source: Bing (Web (fair-use with source credit))
Grinding until the edge turns blue. A blue or straw-colored edge means the steel lost its temper. That section won't hold an edge, and you'll be back sharpening in two mows. Dip often, grind light.
Skipping the balance check. We've seen one bad install take out a $60 spindle. The two minutes on a balancer save a much more expensive repair.
Reinstalling the blade upside down. The lift wings have to face up into the deck. Flip it and the mower won't bag, won't discharge, and the blade cuts poorly. That Sharpie dot from earlier solves this.
Forgetting to disconnect the spark plug. This is the dangerous one. A bump of the blade while you're under the deck can crank the engine. Pull the wire.
Every time.
Grinding with a wheel guard removed. The guard is there because abrasive wheels shatter. Per ANSI B7.1 safety standards, a guard is non-negotiable. Don't grind a mower blade without one.
FAQ
How often should I sharpen my lawn mower blade?
Once per 25 hours of mowing is the standard guideline. Sandy soil halves that, and a tiny quarter-acre yard might stretch to once a season. Torn grass tips and longer cut times are the real signs.
Can I sharpen the blade without removing it from the mower?
Yes, with a right-angle grinder you can reach the edge. It's faster for a quick touch-up but messier. You also can't balance it without pulling it, so for a full sharpening, removal is the better move.
What angle do you sharpen a lawn mower blade at?
Follow the factory edge, typically 30 to 45 degrees. Most walk-behind blades sit around 40 degrees. Don't put a steeper "axe edge" on, it chips fast on rocky soil.
Is a flap disc or grinding wheel better for mower blades?
A flap disc, almost always. It runs cooler, gives a smoother edge, and won't dig in if you push too hard. Reserve grinding wheels for heavy cleanup of nicked edges, then finish with a flap disc.
Do I need to balance the blade after sharpening?
Yes, every time. Even a small difference between the two cutting ends creates a wobble that kills the spindle bearing. A $10 cone balancer is worth it.
Final Checklist Before You Fire Up the Mower
Run this list before you lower the deck for the first pass. It takes 30 seconds and saves a season of headaches.
- Blade reinstalled with lift wings facing up.
- Center bolt torqued to spec (check your engine manual for the number).
- Blade sits level on the balancer, within 1/8 inch.
- Spark plug wire reconnected and seated.
- Air filter housing dry, especially if you tipped the mower carburetor-side up.
- Test run for 30 seconds at half throttle to listen for vibration. Any shaking means stop, re-balance, or check the bolt.
If all six check out, you just did a $50 sharpening job for the cost of a flap disc. That edge should last you 20 to 25 mow hours before the next touch-up, and the grass will look noticeably cleaner within the first pass.

Similar Posts