Fix a Cracked Sprinkler Pipe Without Digging Up Your Yard
Lead Turfgrass & Lawn Care Specialist at Totally Green Lawn · Certified Turfgrass Specialist (CTS), Master Gardener, B.S. in Agronomy & Turf Science · 14+ years in residential turf management, organic fertilization, and weed science
If you've got a soggy patch in the lawn, a sky-high water bill, or a sprinkler zone that barely trickles, you're probably looking at a cracked underground sprinkler pipe. The good news is you can almost always fix it without tearing up the whole yard. The repair method depends on what kind of pipe you have, how deep it sits, and how bad the crack is.
A single cracked lateral can leak thousands of gallons a month. EPA WaterSense data shows household leaks waste nearly 10,000 gallons per year on average, and a broken irrigation line is one of the worst offenders. Let's walk through how to figure out what you're dealing with, and then how to fix it the smart way.
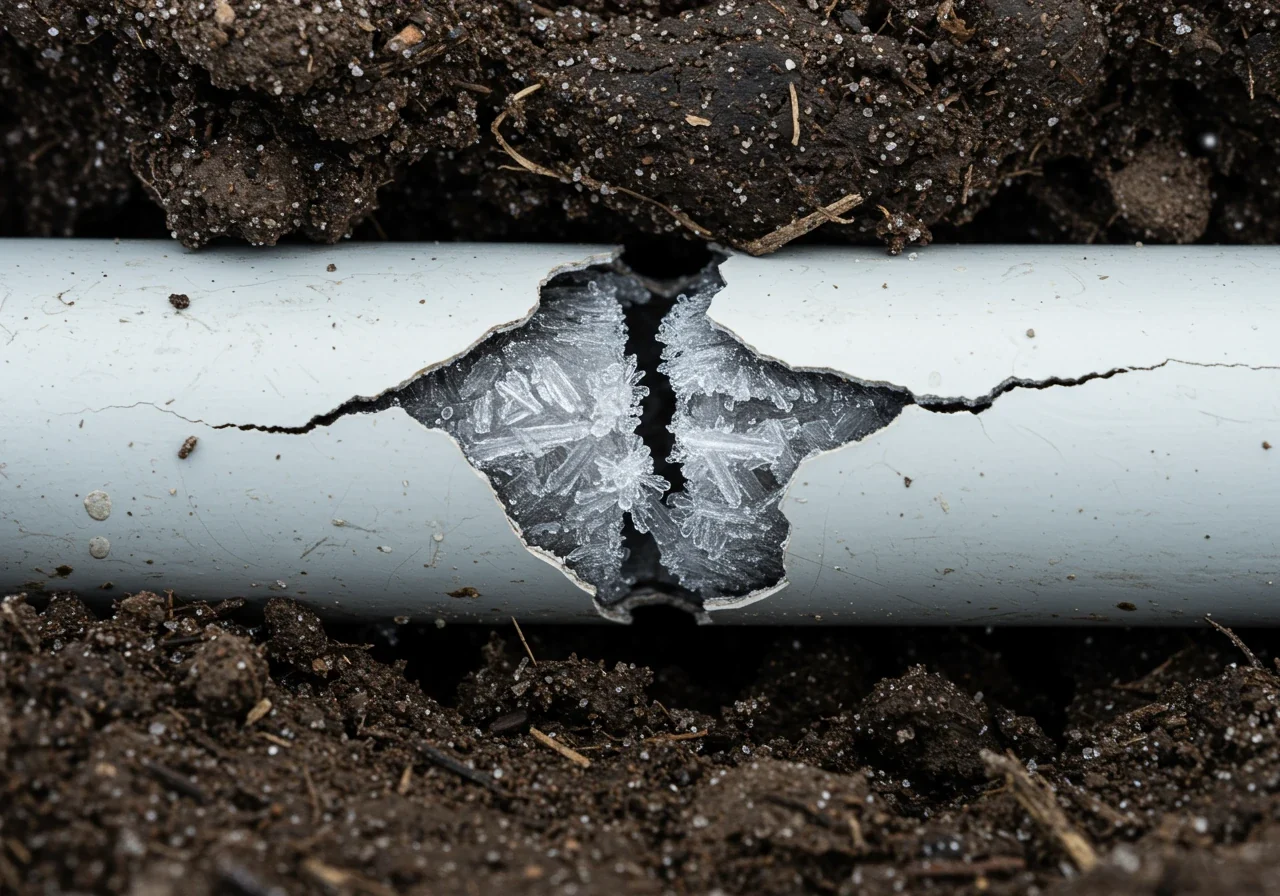
Image source: Bing (Web (fair-use with source credit))
Quick Answer
Yes, you can repair a cracked underground sprinkler pipe without digging up your whole yard. Confirm the leak with a pressure test or a probe at the soggy spot. Then dig a small 12"x12" to 24"x24" hole.
Cut out the cracked section. And join a new piece with a repair coupling, compression fitting, or push-to-connect fitting. The whole job takes 2 to 4 hours and costs $20 to $75 in parts.
How to Tell Where the Crack Is (Without Digging Up the Whole Yard)
The first move is finding the leak, not just guessing. You can't fix what you can't see, and the wet spot on top of the grass is rarely right above the crack. Water follows the path of least resistance through the soil, so the real break can be 2 to 4 feet away from where the surface looks wettest.
Start with these checks before you grab a shovel:
- Look at the water meter. Turn off all indoor water, including the irrigation system. Watch the meter for 10 minutes. If the flow indicator spins, you've got a live leak somewhere.
- Run each zone one at a time. Walk the yard while each zone runs. Look for geysers, bubbling, or a soft spot that gives way underfoot. Note which zone shows the problem.
- Listen between sprinkler heads. With the zone running, put your ear near the soil between heads. A hissing or sucking sound means pressurized water escaping underground.
- Probe with a rod. Push a long screwdriver or rebar into the soft ground. If it sinks easily, you've found the path the water is taking. The crack usually sits along that line, between the last working head and the first dry head.
For deeper confirmation, irrigation pros use a pressure gauge on the zone valve. If static pressure reads 60 psi but zone pressure drops to 30 psi with heads running, you've got a significant leak starving the line. The EPA's WaterSense program recommends tracking irrigation water use monthly.
A sudden jump is your earliest warning.
If you're still not sure, a leak detection service uses acoustic listening devices and pressure testing. They charge $200 to $500. It's worth it if you've got multiple possible leak points or you don't want to risk a wrong dig.
What Type of Pipe You're Dealing With (And Why It Changes Everything)
The repair method that works on one pipe will fail on another. You need to know the material before you cut anything. In our research across irrigation forums and manufacturer install guides, material confusion is the #1 reason DIY repairs leak right after they're done.
Here are the three types you'll find in yards built before 2020:
- PVC (white, hard, rigid). Most common in homes built before 2000. Comes in Schedule 40 (thick wall) or Class 200 (thin wall). Cuts clean with a ratchet cutter or fine-tooth saw. Joins with primer and solvent cement. Brittle when old.
- Polyethylene (poly, black, flexible). Standard in homes built after 2000 in many regions. Sold in coils. Cuts with scissors or a sharp blade. Joins with barb fittings and hose clamps, or compression fittings. More forgiving of soil movement.
- PEX (cross-linked polyethylene, red/blue/white). Rare in irrigation but showing up in newer high-end installs. Cuts with a PEX cutter. Joins with crimp, clamp, or push-to-connect fittings.
If you can't tell what you've got, scratch the surface. PVC shaves white. Poly stays black and bends.
As of 2026, poly is the most common irrigation lateral material installed across the Sun Belt. That's because it flexes with soil movement and tolerates mild freezing better than rigid PVC.
Why this matters for your repair:
- If you've got PVC, you'll use a repair coupling with primer and cement.
- If you've got poly, you'll use a barb fitting with a clamp or a compression coupling.
- If you don't know, take a 1-inch sample to any irrigation supply house. They'll ID it for free.
| Pipe Type | Common Era | Repair Method | Difficulty |
|---|---|---|---|
| PVC Schedule 40 | Pre-2000 | Solvent weld coupling | Moderate |
| Polyethylene | 2000+ | Barb + clamp or compression | Easy |
| PEX | 2020+ | Push-to-connect or crimp | Easy |
The No-Dig and Low-Dig Repair Methods: Picking the Right One for Your Situation
Now that you know what pipe you have, the right repair method depends on three things: crack size, pipe condition, and what you can tolerate in your yard. Here's the decision tree most irrigation techs follow.
If the crack is small (under 6 inches) and the pipe is otherwise sound
Go with a spot dig and repair coupling. You dig one small hole right over the break, cut out the bad section, and splice in a new piece with a repair coupling. This is the standard fix and works on 90% of residential lateral cracks.
Hole size is usually 12"x12" to 24"x24", and you only disturb one spot in the yard.
If the pipe is old, brittle, or has multiple cracks
Skip the spot fix. Use a pipe pull replacement (also called "pipe pull" or "trenchless replacement"). You tie a new poly line to the old one, pull the old pipe out, and the new one follows in its place.
It needs a clear path and no sharp bends, but it avoids digging a trench. It works best for full lateral runs under 50 feet.
If the crack is right under a hardscape (driveway, patio, walkway)
Use a push-to-connect fittings setup with new poly pipe routed around the obstacle. You dig on either side, run a new line through the open area, and connect both ends with push fittings. No need to break concrete.
The fittings install in under 2 minutes and work on PVC, copper, and PEX.
If the pipe is constantly failing in the same area
Stop patching. The issue is usually soil movement, root pressure, or a poorly bedded pipe. Reroute the line around the trouble zone with new poly pipe.
It costs more upfront but ends the cycle of recurring repairs.

Image source: Bing (Web (fair-use with source credit))
Step-by-Step: Spot-Dig Repair for a Cracked Sprinkler Lateral
This is the most common fix. The whole process takes 2 to 4 hours for a first-timer, and a pro can do it in under an hour. Here's how to do it right.
Step 1: Call 811 before you dig
This is free and required by law in every U.S. state. Call at least 2 business days before digging. They'll mark buried gas, electric, water, and telecom lines so you don't hit one.
Skipping this step risks injury, fines, and liability for any damage. The Common Ground Alliance runs the 811 "Call Before You Dig" service nationwide.
Step 2: Shut off the irrigation system
Close the main irrigation shutoff valve and the specific zone valve. Open a manual bleed on the zone or run a head to relieve pressure. Working on a pressurized line is dangerous and wasteful.
Step 3: Expose the pipe
Dig straight down with a square-blade shovel, not a pointed one. You want clean walls so you can backfill cleanly later. Most residential laterals sit 8 to 12 inches deep, but go to 18 inches if you live in a cold climate.
Once you see the pipe, clear 6 inches of soil on each side of the suspected crack so you can work.
Step 4: Confirm the crack
Wipe the pipe dry and look closely. You may see a hairline split, a chunk missing, or a fitting that's separated. If you can't see it, run the zone briefly and watch for water bubbling up.
Step 5: Cut out the damaged section
For PVC, use a ratchet pipe cutter or a fine-tooth hacksaw. Cut about 1 inch on each side of the crack to remove all weakened material. For poly, use a sharp utility knife or poly pipe shears.
Make straight, clean cuts.
Step 6: Prep the pipe ends
Deburr the inside and outside of each cut end with a utility knife or sandpaper. Wipe off dirt and moisture. For PVC, apply purple primer to both the pipe ends and the inside of the repair coupling.
Wait 10 seconds.
Step 7: Dry-fit the repair
Slide the repair coupling onto one end. It should slide on dry without forcing. If it doesn't, your cut isn't square.
Re-cut.
Step 8: Cement (for PVC) or clamp (for poly)
- PVC: Apply solvent cement to both primed surfaces. Push the coupling onto one end with a quarter turn. Slide the other pipe end into the opposite side with another quarter turn. Hold for 30 seconds. Don't move it for 2 minutes. Full cure is 24 hours, but you can pressure test after 2 hours.
- Poly: Slide a stainless steel clamp over each end. Push a barb fitting into both ends. Tighten the clamps with a screwdriver until snug, then a quarter turn more. Some pros use double clamps per end for security.
Step 9: Pressure test before backfilling
Turn the zone on and watch the repair for 30 seconds. No drips, no damp soil, full pressure at the sprinkler heads. If it leaks, you didn't seat the fitting fully.
Cut it out and redo it.
Step 10: Backfill properly
Use the soil you removed, minus any rocks bigger than a marble. Add 2 inches of sand around the pipe if your soil is rocky. Compact in 4-inch lifts.
Don't dump all the soil back at once; air pockets let the pipe shift and crack again.
Step 11: Run the full zone
Watch all heads for proper rotation and pressure. Low pressure now means a stuck valve or a second leak. Adjust heads as needed.
Cost, Time, and Tools: What to Expect for Each Method
Here's what each repair option realistically runs, based on aggregate reviews from irrigation supply pricing as of 2026 and contractor data from trade groups.
| Method | DIY Cost | Pro Cost | Time | Yard Disruption |
|---|---|---|---|---|
| Spot dig with repair coupling | $20–$75 | $150–$400 | 2–4 hours | One 1–2 ft hole |
| Push-to-connect reroute | $40–$120 | $200–$500 | 1–3 hours | Two small holes |
| Pipe pull replacement | $80–$200 (50 ft of poly) | $400–$900 | 3–6 hours | Two end holes, no trench |
| Full zone re-pipe | $300–$800 | $1,500–$3,000 | 1–2 days | Multiple holes or full trench |
| Leak detection service | N/A | $200–$500 | 1–2 hours | None |
Basic tools you'll need for the spot dig method:
- Square-blade digging shovel
- Ratchet pipe cutter or hacksaw (for PVC) or utility knife (for poly)
- PVC primer and cement, or stainless hose clamps
- Repair coupling or compression fitting
- Utility knife, screwdriver, work gloves
- Sand or fine backfill
- Bucket for soil
If you don't already own a ratchet cutter, they're $25 to $40 and worth it. They make cleaner cuts than a saw and are faster.
FAQs: Quick Answers Homeowners Actually Ask
Can I repair a cracked sprinkler pipe without digging at all?
Only in rare cases. Pipe liners and epoxy sleeves exist for pressurized lines, but they're not DIY-friendly, cost $1,000+, and don't work well on small-diameter irrigation laterals. For residential systems, a small spot dig is the practical no-dig alternative.
How deep are sprinkler pipes usually buried?
Most residential laterals sit 8 to 12 inches deep. In cold climates, code often requires 12 to 18 inches to protect against freezing. Your mainline may run deeper than your lateral lines.
Always dig carefully and call 811 first.
What if I don't know what kind of pipe I have?
Scratch the surface and bend it gently. PVC is white, hard, and snaps. Poly is black, flexible, and bends.
Take a 1-inch sample to a local irrigation supply house. They'll ID it free in under a minute.
Will a repair coupling reduce my water pressure?
A single repair coupling on a 3/4" lateral adds negligible pressure loss. Most residential systems run 40 to 60 psi, and a single coupling has the same internal diameter as the pipe. The leak itself was costing you far more pressure than the repair will.
How long will a DIY repair last?
Manufacturer specifications for compression and repair couplings indicate 25+ year service life when properly installed. Solvent-welded PVC joints are rated for the life of the pipe (50+ years) under normal conditions. Most DIY repairs outlast the rest of the irrigation system.
Mistakes That Turn a Simple Crack Into a Full Yard Disaster
Most failed DIY repairs trace back to one of five mistakes. We've seen each of these turn a $30 fix into a $500 problem.
Not calling 811 first. Hitting a gas line or buried electric can injure you, your neighbors, or cost you a massive repair bill. This is free, fast, and legally required. There's no excuse to skip it.
Backfilling before pressure testing. A leak you don't catch underground will saturate the soil and erode the new repair. It can also wash out the backfill, creating a sinkhole. Always run the zone and watch for 60 seconds before you shovel dirt back.
Using the wrong fitting for the pipe. A PVC coupling on poly pipe won't seal. A poly barb on PVC will crack the rigid pipe when you tighten it. Match the fitting to the material.
The pipe tells you what it is the moment you scratch it.
Skipping primer on PVC. Primer isn't optional. It softens and cleans the PVC so the cement can chemically fuse the joint. Skip it and the joint may hold for a few weeks, then blow apart under pressure.
Dumping all the backfill at once. Heavy soil dropped on the pipe can shift it, crack the new joint, or create air pockets. Backfill in 4-inch lifts and tamp lightly.
Other errors we see in field reports: cutting too narrow a section (leaves weakened pipe), using electrical tape instead of a proper coupling, and forgetting to relieve pressure before cutting. None of these are exotic mistakes. They're all avoidable with a slow, careful approach.
Call 811, Backflow Rules, and Other Legal Must-Knows Before You Cut
Before you put a shovel in the ground, there are a few rules you need to follow. Most homeowners don't realize their irrigation system is a cross-connection with the potable water supply. That means it's regulated.
The 811 requirement
Every U.S. state requires you to call 811 (or submit online) at least 2 business days before any digging project. Locators will mark buried utilities for free. The Common Ground Alliance coordinates this nationwide.
Hitting a buried utility is dangerous and expensive. The fine in many states exceeds $1,000, and you're liable for all repair costs.
Backflow prevention
Your irrigation system has a backflow preventer. It's the brass or plastic device near the valve manifold. It stops irrigation water from siphoning back into your drinking water.
Most municipalities require annual testing by a certified backflow tester. When you repair a lateral, leave the backflow device alone unless it's the actual problem.
Permits and codes
Most cities don't require a permit for a single sprinkler pipe repair. But if you're rerouting lines, adding a new zone, or touching the mainline, a permit may be required. Check with your local building department.
Some HOAs have additional rules about visible repair work and restoration timelines.
Local water restrictions
Many regions enforce watering schedules year-round, and stricter rules during drought. Check your local water utility before running a zone to pressure-test. In drought-stricken areas, runoff from a leak can trigger a fine.
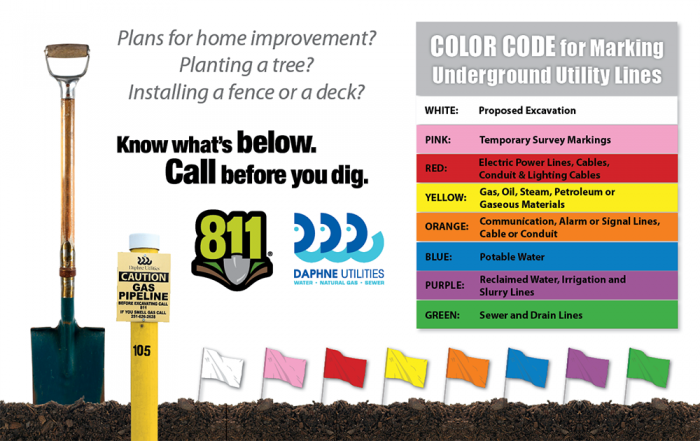
Image source: Bing (Web (fair-use with source credit))
Frequently Asked Questions
How do I know if my sprinkler pipe is cracked or if it's a sprinkler head issue?
A cracked pipe usually shows up as a soggy spot, low pressure across a whole zone, or a water bill spike. A bad head shows as a single head that won't pop up, sprays unevenly, or leaks from the base. Cap the suspected head and run the zone.
If the rest of the zone works fine, it's the head, not the pipe.
Can I use epoxy or pipe tape to fix a cracked underground pipe?
Not reliably. Pipe thread tape and epoxy are designed for above-grade joints and don't hold up under constant soil moisture and pressure. A mechanical repair coupling or push-to-connect fitting is rated for buried service and will outlast any chemical fix.
What's the difference between a repair coupling and a slip coupling?
A repair coupling is a fixed-length fitting you slide over the joint. A slip coupling has no internal stop, so it slides fully onto one pipe end, then back over the other. Slip couplings are easier when you have a long gap or limited pipe to work with.
Both are acceptable. Pick based on what fits in your hole.
Should I replace the whole lateral or just patch the crack?
If the pipe is under 15 years old and the crack was caused by a single event (freeze, root, shovel), patch it. If the pipe is older and showing multiple weak spots, replace the full lateral. A spot patch on a failing line is throwing good money after bad.
Pipe pull replacement costs $80 to $200 in parts and lasts 30+ years.
How do I prevent the pipe from cracking again in the same spot?
Three things help most: bed the pipe in 2 inches of sand before backfilling, avoid running irrigation lines near large trees (root intrusion), and winterize the system in cold climates. If the break came from a freeze, insulate the backflow preventer and consider installing pressure-activated drain valves.
Is it worth calling a pro, or is this a solid DIY job?
If you can locate the leak, dig safely, and identify the pipe material, this is a beginner-level DIY project. Call a pro if you can't find the leak, the break is under a structure, the pipe is brittle and keeps cracking as you work, or you're not comfortable with the 811 process. Pro costs run $150 to $400 for a spot dig, which is reasonable if you'd rather not spend a Saturday in the dirt.

Similar Posts