How to Tell If Your Sprinkler Solenoid Is Bad: 5 Signs
Lead Turfgrass & Lawn Care Specialist at Totally Green Lawn · Certified Turfgrass Specialist (CTS), Master Gardener, B.S. in Agronomy & Turf Science · 14+ years in residential turf management, organic fertilization, and weed science
If one of your sprinkler zones won't turn on, won't shut off, or just sits there silent while the rest of the system runs fine, the solenoid is the first thing to check. Figuring out how to tell if lawn sprinkler solenoid is bad comes down to a short sequence of tests anyone can run with a basic multimeter and about ten minutes. Skip the guesswork, follow the steps below, and you'll know exactly which part to replace.
A healthy irrigation solenoid runs on 24V AC and typically reads between 20 and 60 ohms of resistance across its two wire leads. Per manufacturer specifications from Hunter Industries and Rain Bird, anything outside that range usually means the coil is shorted, open, or corroded beyond saving. The good news is that diagnosis doesn't require special training, just a clear process.
Quick Answer
A bad sprinkler solenoid usually shows one of three symptoms. The zone won't turn on at all, the valve clicks but no water flows, or the valve stays open and won't shut off. You can confirm a bad solenoid with a multimeter.
Set it to ohms and check resistance across the two solenoid wires. A reading between roughly 20 and 60 ohms means the coil is good. An open (infinite) reading or a near-zero reading means the coil is dead.
No voltage at the wires means the problem is upstream, not the solenoid.
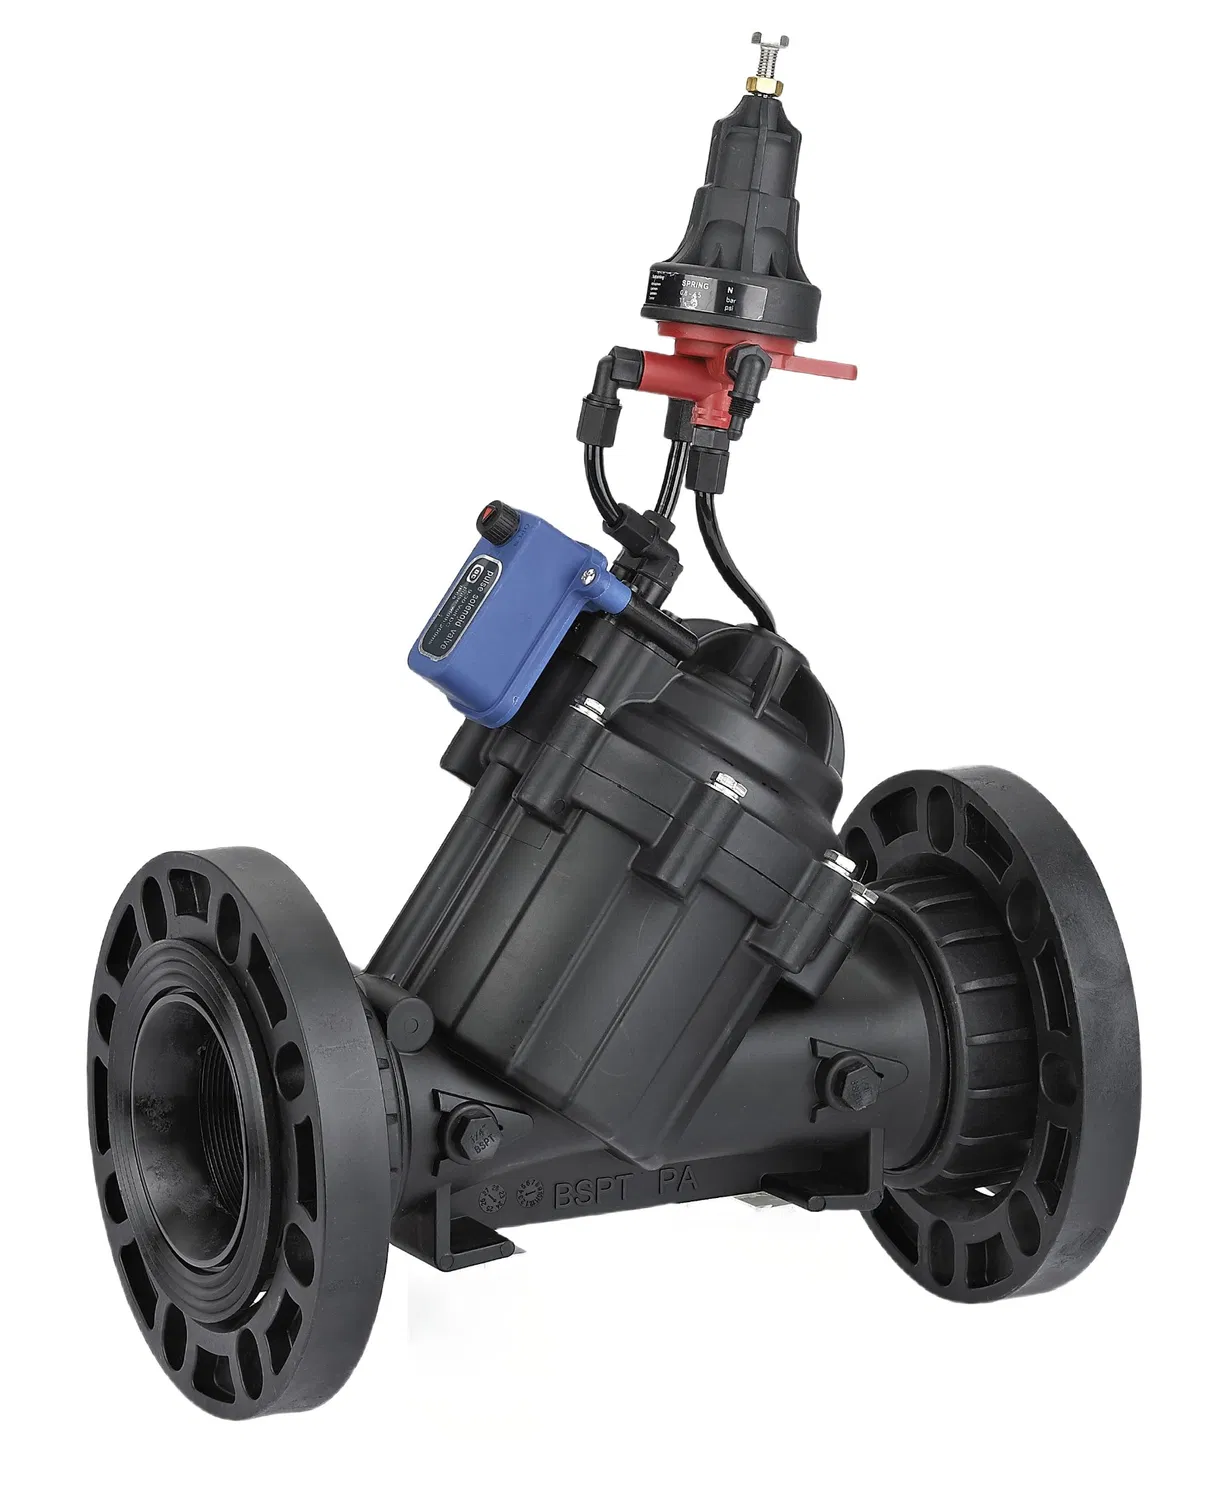
Image source: Bing (Web (fair-use with source credit))
How a Sprinkler Solenoid Works (and Why It Fails)
The solenoid is the small cylindrical component, usually black or brown, screwed onto the top of each irrigation valve. When your controller tells a zone to run, it sends 24 volts of alternating current down a pair of low-voltage wires to that zone's solenoid. That electrical current energizes a copper coil inside the solenoid, which creates a small magnetic field.
The magnetic field lifts a tiny plunger, which opens a port that lets water pressure into the valve diaphragm chamber. Once that chamber pressurizes, the diaphragm lifts and the valve opens, sending water to the sprinkler heads.
The whole sequence takes about a second. That's why a working valve makes a soft "click" right before water starts flowing.
When the solenoid fails, the failure usually traces back to one of these causes:
- Burnt coil from age or power surge (lightning strikes are a common culprit)
- Corroded wire connections at the solenoid base
- Internal plunger wear after roughly 5 to 10 years of use
- Cracked solenoid housing from over-tightening during installation
- Debris or mineral buildup clogging the bleed port
The takeaway: the solenoid is the electrical switch that tells a mechanical valve to open. If the switch is dead, the valve never gets the memo.
The Symptoms: What a Bad Solenoid Actually Does
Before you grab a multimeter, the zone's behavior tells you a lot. Use the table below to match what you're seeing to the most likely cause.
| Symptom | Most Likely Cause | Confirm With |
|---|---|---|
| Zone dead silent, no click, no water | No voltage reaching solenoid, or coil is open | Multimeter voltage test at solenoid |
| Audible click but no water | Solenoid is firing, but diaphragm or port is stuck | Manual override test (see below) |
| Valve won't shut off, zone runs constantly | Stuck plunger or debris holding valve open | Manual override and visual inspection |
| Zone works only when you twist the solenoid by hand | Solenoid coil is weak or failing | Resistance test |
| Water leaking from solenoid base | Cracked housing or loose threads | Visual inspection |
The single most useful trick in the field is the manual override. Twist the solenoid a quarter to half turn counter-clockwise. If the valve opens and water flows, your solenoid is the problem.
The valve body itself is fine. If the valve still does nothing with the solenoid manually opened, the issue is downstream. Look at the diaphragm, ports, or water supply.
One more thing: a solenoid that clicks but doesn't open the valve is often misdiagnosed as a bad coil. In our research, the actual failure in that case is usually a weak magnetic field from a partially shorted coil, combined with a sticky diaphragm. Test the resistance before replacing anything.
The Step-by-Step Diagnosis (Start Here)
Work through these checks in order. Each one rules out a layer of the problem and tells you whether to keep going or stop and replace a specific part.
Tools you'll need:
- Digital multimeter (any basic model under $20 works)
- Small screwdriver or pliers
- Wire strippers (only if you need to re-terminate wires)
- Phone camera (to photograph wire positions before disconnecting)
Step 1: Rule out the controller first.
Turn on the suspect zone from the timer. Walk to the valve box and listen. Silence here means the controller isn't sending voltage, or the solenoid isn't receiving it.
Either way, the solenoid isn't the first suspect.
Step 2: Test for voltage at the solenoid.
With the zone still calling, set your multimeter to AC voltage (the 200V range works on most meters). Touch one probe to each of the two solenoid wires. You should see roughly 24 to 28 volts AC.
If you see zero, the problem is in the wire run or the controller station, not the solenoid.
Step 3: Try the manual override.
Turn the zone off at the controller. At the valve, twist the solenoid counter-clockwise about a quarter to half turn. If water flows, the valve body works.
The solenoid is the failure.
Step 4: Test the solenoid resistance.
Turn the controller off. Disconnect the two wires from the solenoid (note which color goes where). Set your multimeter to the ohms setting (200Ω range).
Touch one probe to each solenoid terminal.
| Reading | Meaning | Action |
|---|---|---|
| 20 to 60 ohms | Coil is good | Problem is elsewhere, check diaphragm or wiring |
| OL or infinite | Coil is open/burnt | Replace the solenoid |
| 0 to 5 ohms | Coil is shorted | Replace the solenoid |
| Fluctuating wildly | Intermittent connection | Replace the solenoid |
Step 5: Swap test (when in doubt).
If you have another working zone with the same valve model, swap the suspect solenoid onto the working valve. If the working valve now fails, you've confirmed the solenoid is bad. If nothing changes, your original solenoid is fine.
This whole sequence takes about 10 minutes. By the end, you'll know with near certainty whether to spend $20 on a solenoid or $40 on a full valve.
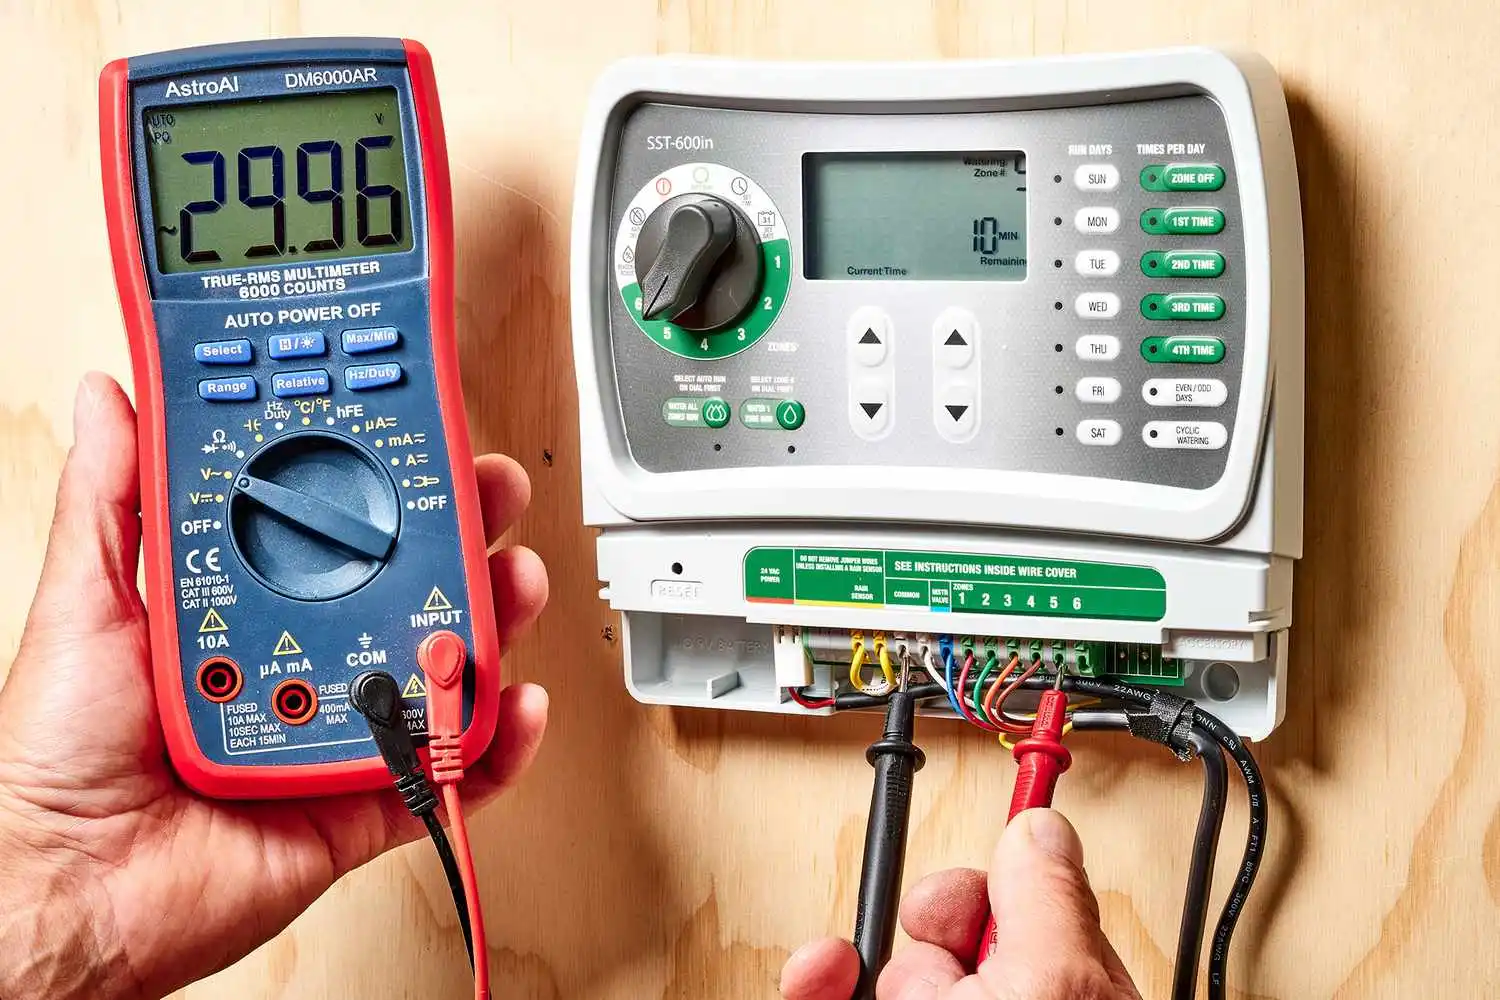
Image source: Bing (Web (fair-use with source credit))
Reading the Results: What Your Multimeter Is Telling You
The resistance test is the part most DIYers get wrong, so let's slow down here. When you put your multimeter probes on the two solenoid terminals, the meter is sending a tiny current through the coil and measuring how much the coil resists it. A healthy coil resists in a predictable way, which is why manufacturers publish a normal range.
For most residential 24V AC solenoids (Hunter PGV, Rain Bird DV/DVF, Toro P220, Irritrol 2710), that range is 20 to 60 ohms. A reading of zero means the coil's internal wire has melted and is touching itself, shorting out the circuit. A reading of "OL" or "1" on the display (depending on your meter) means the coil wire has broken, so no current can flow through it at all.
Either condition means the coil is electrically dead and the solenoid needs replacement.
A few practical notes from the field:
- A reading just outside the 20 to 60 range, say 18 or 65, is usually still a functional coil. Don't replace based on a slightly off number.
- If the reading fluctuates while you hold the probes, you have a corroded connection at the terminals. Clean them with a small wire brush and retest.
- If you get no reading at all, double-check that your multimeter is actually on the ohms setting. A surprising number of "dead solenoid" diagnoses turn out to be a meter on the wrong mode.
- Per UL listings for irrigation components, replacement solenoids should match the original voltage class. A 24V AC solenoid should be replaced with another 24V AC unit, not a DC latching model.
If the resistance test passes but the zone still won't work, the solenoid isn't your problem. Move on to the next suspect.
For a deeper look at how residential irrigation circuits are designed and wired, the University of Florida IFAS Extension landscape irrigation resources lay out the electrical basics clearly.
Solenoid vs. Diaphragm vs. Wiring vs. Controller
Most "bad solenoid" calls turn out to be something else. Here's the fast way to tell which part is actually at fault, using only what you've already tested.
| What You Found | Real Culprit | What to Do |
|---|---|---|
| 24V at solenoid, clicks, no water | Diaphragm stuck or torn | Replace diaphragm (about $8) or full valve |
| 0V at solenoid, controller calls zone | Wire break or bad controller station | Trace wire or swap stations at the timer |
| Good resistance, manual override works | Wiring is fine, coil is fine, valve is fine | Recheck the controller program and rain sensor |
| Good resistance, no click, no manual action | Mechanical failure inside valve | Replace full valve assembly |
A common pattern we see in field reports: the solenoid gets replaced, then the zone still doesn't work because the wire had a nick in it from a recent lawn edging. Always test voltage at the solenoid before buying parts.
When the controller is the problem
Controllers do fail. A station output can burn out from a short or lightning surge, leaving the solenoid silent even when the timer says the zone is running. If you have zero volts at the solenoid, swap the suspect zone's wire to a known-good station terminal at the controller.
If the zone now runs, the original station is dead. Most residential controllers have a spare station you can use in the meantime.
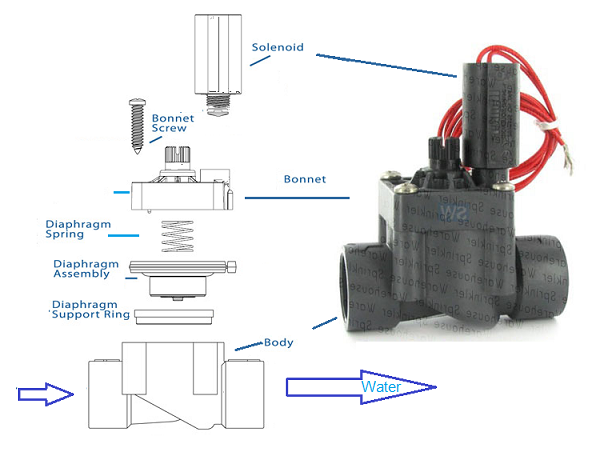
Image source: Bing (Web (fair-use with source credit))
Replacing the Solenoid (Only If It's Actually Bad)
Once you've confirmed the coil is dead, replacement is the easy part. The whole job takes about 15 minutes per valve.
Parts and cost (as of 2026):
| Item | Typical Price |
|---|---|
| Replacement solenoid (Hunter, Rain Bird, Toro) | $15 to $30 |
| Waterproof wire connectors (DBY/DBR) | $5 for a pack |
| Full valve replacement (if needed) | $25 to $75 |
The swap:
- Shut off the controller and shut off the water supply if you're working on the mainline.
- Unscrew the old solenoid by hand, counter-clockwise. It threads into the valve bonnet.
- Note the wire polarity. Most residential systems don't care, but some DC latching systems do.
- Disconnect the old wires. Cut back any corroded wire and strip about half an inch of fresh copper.
- Thread the new solenoid onto the valve bonnet. Hand-tight is enough, no tools needed.
- Connect the two wires using waterproof connectors. Wrap with electrical tape if you want extra insurance.
- Turn the controller back on and test the zone.
If the new solenoid clicks and the zone runs, you're done. Run the zone manually for a minute to flush any debris that got in during the swap.
Mistakes That Lead to Replacing the Wrong Part
A few errors come up over and over in DIY irrigation repair. Avoiding these saves you money and a second trip to the valve box.
Skipping the voltage test. If you replace a solenoid without confirming 24V at the wires, you might be installing a brand new coil on a dead circuit. Always check voltage first.
Over-tightening the new solenoid. The threads are plastic. Snug is enough. Overtightening cracks the housing and creates a slow leak that looks like a bad valve later.
Ignoring the diaphragm. If the valve clicks but doesn't open, the diaphragm is the prime suspect, not the coil. A full diaphragm repair kit runs about $8 and takes 10 minutes.
Using non-waterproof connectors. Standard wire nuts will corrode within a year in a valve box. Always use DBY or DBR direct-burial connectors.
Forgetting the manual override test. This 30-second check tells you whether the valve body works at all. Skipping it leads to replacing both the solenoid and the diaphragm when only one was bad.
Not labeling wires. Photograph the wiring before disconnecting anything. On a multi-zone manifold, swapping two zones' wires will run the wrong station for a week before you notice.
A quick safety note
Low-voltage irrigation wiring (24V AC) is safe to handle when the controller is off. That said, the water supply side is pressurized. If you're removing the entire valve, relieve pressure by running a zone manually first or opening the manual bleed on the valve before disassembly.
Frequently Asked Questions
How long do sprinkler solenoids last?
Most residential solenoids last 5 to 10 years. Hard water, lightning-prone areas, and frequent cycling shorten the life. Cheap aftermarket solenoids sometimes fail in 2 to 3 years.
Can a bad solenoid cause a valve to stay open?
Yes. A failing plunger can stick in the open position, keeping the valve energized even after the controller shuts off. A stuck-open valve is one of the classic signs of solenoid wear.
Will a sprinkler valve work without a solenoid?
No, not in an automatic system. The solenoid is what triggers the valve to open electrically. Without it, the only way to run the zone is the manual bleed screw.
How do I know if it's the solenoid or the controller?
Test for voltage at the solenoid wires while the zone is running. If you see 24V AC, the controller is doing its job. If you see zero volts, the controller, wire, or common connection is the problem.
Can I replace just the solenoid without replacing the whole valve?
In most cases, yes. Solenoids are threaded into the valve bonnet and are designed to be replaced independently. The main exception is cracked valve bodies, which force a full replacement.
Is it worth calling a professional for this?
If the multimeter tests feel overwhelming, or if multiple zones are failing at once, a service call (typically $75 to $150) is reasonable. For a single bad zone, most homeowners can handle the diagnosis and swap in under 30 minutes.

Similar Posts