Fix an Impact Sprinkler That Won’t Turn: Easy Guide
Lead Turfgrass & Lawn Care Specialist at Totally Green Lawn · Certified Turfgrass Specialist (CTS), Master Gardener, B.S. in Agronomy & Turf Science · 14+ years in residential turf management, organic fertilization, and weed science
If your impact sprinkler is stuck and won't turn around, you're usually looking at one of five common failures. Most of them take under 30 minutes to fix with basic tools, and only the worst case (a seized bearing or cracked housing) calls for a full replacement. The trick is matching the symptom to the cause before you start taking things apart.
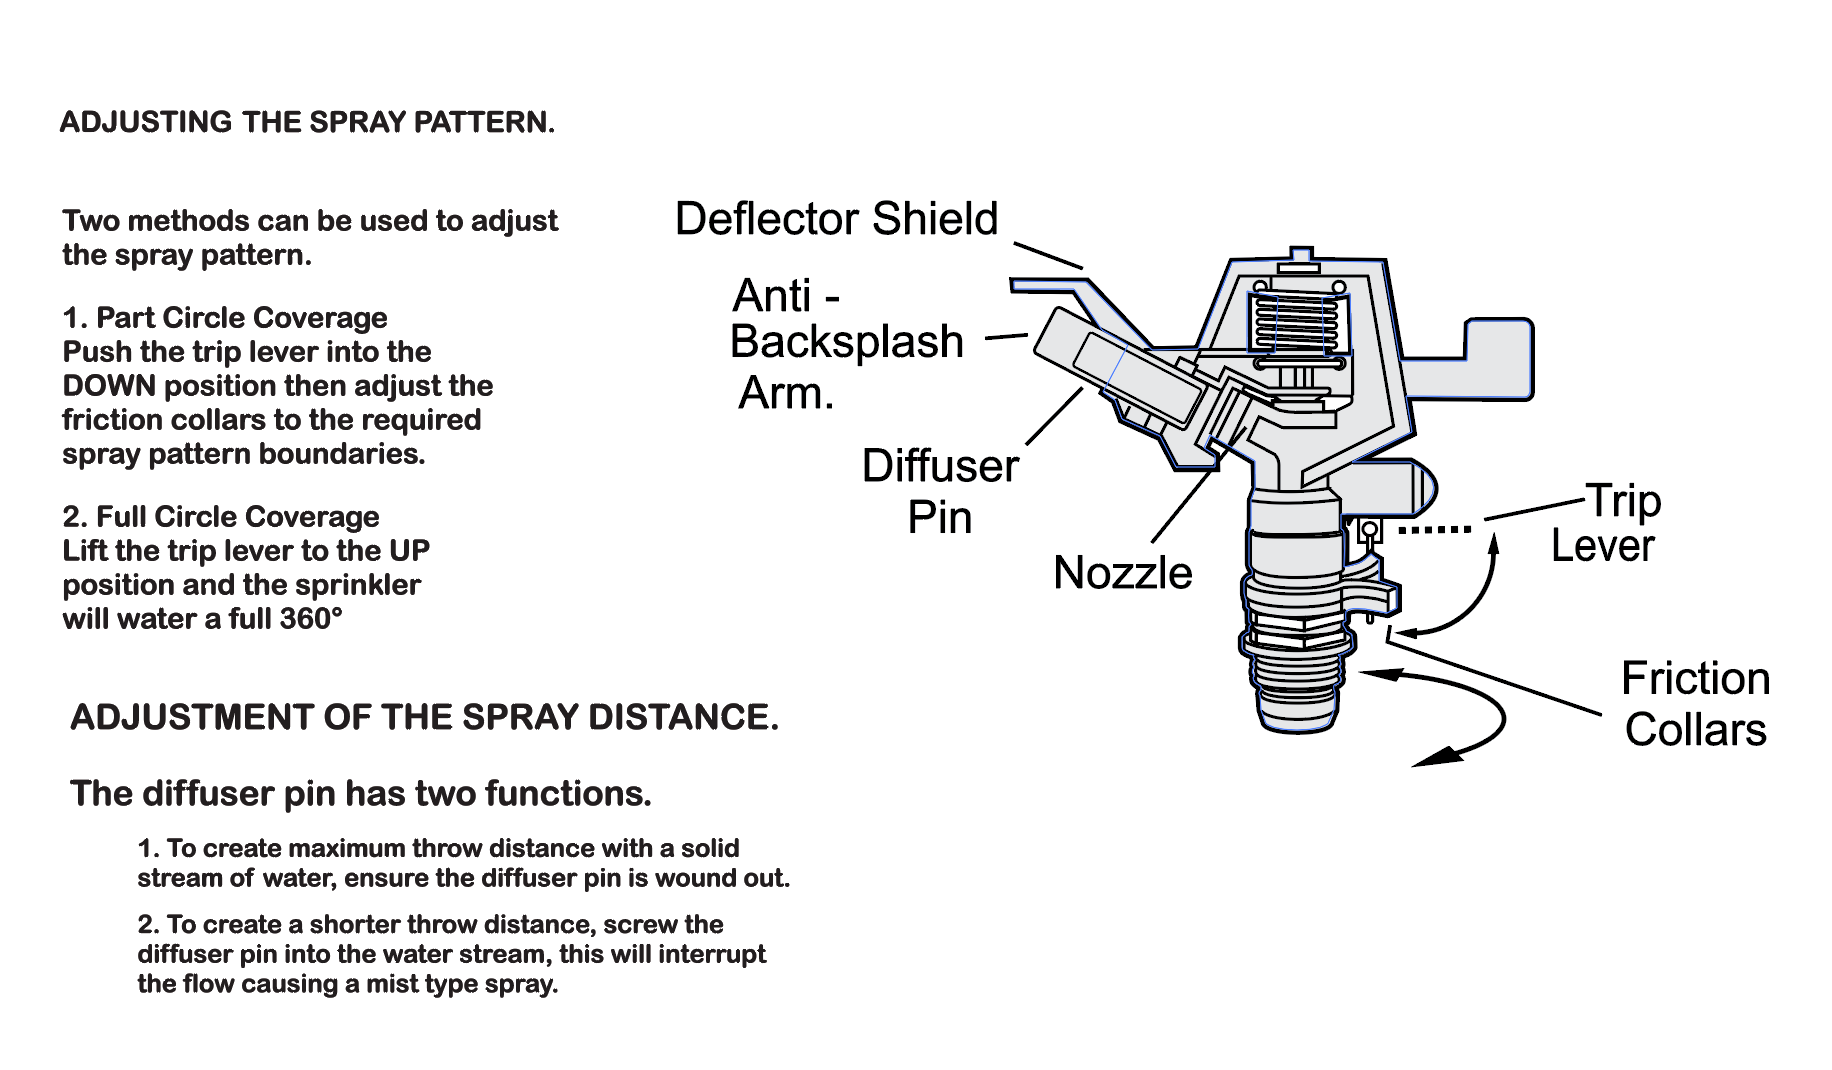
Impact sprinklers rely on a spring-loaded trip arm, a swing arm, and a friction collar to make that familiar "tik-tik-tik" rotation. Per Rain Bird's published spec sheets, most residential impact heads operate between 25 and 60 PSI, and a flow rate of 1.5 to 8 GPM depending on nozzle size. If pressure drops below that window, the spring can't overcome friction and the head just sits there spraying one direction.
So before you assume the sprinkler is broken, rule out low pressure first. If pressure checks out, work your way through the five most common causes below.

Quick Answer
To fix an impact sprinkler that won't turn around, start by checking water pressure. If it's above 25 PSI, dig up the head, remove it from the riser, and clean the inlet screen. Then disassemble the head, clean the nozzle, and inspect the trip arm, plunger, drive spring, and friction collar.
Reassemble, adjust the collar, and test. Replace the head if the bearing is seized or the housing is cracked.
Why Your Impact Sprinkler Won't Turn (And How to Tell What's Actually Wrong)
The fastest way to diagnose a stuck impact head is to watch it run for 30 to 60 seconds and ask three questions. Does the head rotate at all, or is it frozen? Does it spray in a full circle but skip occasionally, or does it only go one way?
And is the water stream strong, or weak and choppy?
Each answer points to a different root cause. A head that won't budge usually has a mechanical jam, debris in the trip mechanism, or a seized bearing. A head that rotates in fits and starts is almost always a worn drive spring or a too-tight friction collar.
A head with a weak stream has a clogged nozzle, a clogged inlet screen, or a pressure problem further down the line. In our research across irrigation forums and manufacturer troubleshooting guides, the top three causes consistently rank as: dirty inlet screen (about 40% of cases), worn drive spring (about 25%), and stuck or corroded trip arm (about 20%).
Before you grab a wrench, run the zone for a full cycle and note the pattern. If the head is the only one acting up on the zone, the problem is at the head. If the whole zone is weak, your issue is pressure, not the sprinkler.
That single observation saves you a lot of wasted digging.
The 5 Things That Stop an Impact Sprinkler From Rotating
Below are the five failures that account for nearly every stuck impact head, ordered from easiest to diagnose to most involved. Work down this list in order, and you'll almost always find the culprit before you need to buy any parts.
1. Clogged Inlet Screen
The small mesh filter at the base of the head catches sediment before it reaches the nozzle. When it plugs up, flow drops and the drive spring can't generate enough force to swing the arm. In hard-water regions, this screen can choke off in a single season.
To check, unscrew the head from the riser and look at the bottom. If the screen is crusted white with mineral buildup or packed with sand, that's your problem. Rinse it under running water and reinstall.
2. Worn or Stretched Drive Spring
The drive spring is a flat coiled spring that sits inside the housing. It stores energy each time the swing arm strikes the head and releases it to push the arm back. Over years of use, the spring loses tension and the head slows to a stop.
Per Hunter Industries service documentation, a weak spring typically shows up as a head that rotates for the first quarter or half of its arc, then dies. You'll need to disassemble the head to confirm. Springs cost a few dollars and are the most common wear part on older brass impact heads.
3. Stuck or Dirty Trip Arm and Plunger
The trip arm is the little lever that sits on top of the head. The plunger is the pin it strikes. If either one is gummed up with mineral deposits or grit, the arm can't move freely.
In sandy well-water systems, this is the number one failure.
A quick test: with the zone running, push the trip arm down manually with a stick. If the head starts rotating when you push it, the trip arm is the issue. A soak in white vinegar usually dissolves the buildup.
4. Friction Collar Too Tight
The collar around the base of the head controls how freely the head spins. If it's been bumped or cranked down over the years, friction goes up and the head locks up. Manufacturer specs confirm the collar should be hand-tight plus a quarter turn, no more.
Loosen the collar slightly, test, and adjust until rotation is smooth. This is the single most overlooked fix because homeowners assume a "tight" head means a "secure" head.
5. Seized Bearing or Cracked Housing
This is the worst case and the only one that usually means replacement. If the head feels gritty when you spin it by hand, or the housing shows a visible crack, the bearing is gone. Seized bearings are common on plastic heads older than 10 years and on brass heads that have sat through multiple freeze-thaw cycles without winterization.
Replacement heads run $10 to $30 for plastic and $25 to $75 for brass as of 2026. If you're already digging the head up to inspect it, weigh the cost of a $5 spring against a new $20 head before spending an hour rebuilding a unit that's near end of life.
Tools and Parts You'll Need Before You Start
Most impact sprinkler repairs need only a handful of tools, and you probably already have them. The key is having everything laid out before you dig, because nobody wants to walk back to the garage with a muddy head in one hand.
| Tool or Part | What It's For | Optional or Required |
|---|---|---|
| Adjustable wrench | Unscrewing the head from the riser | Required |
| Phillips or flathead screwdriver | Removing the cap screw on some models | Optional |
| Small wire brush or old toothbrush | Cleaning the nozzle and screen | Required |
| White vinegar | Dissolving mineral deposits | Optional |
| Replacement drive spring | If the old one has lost tension | Optional |
| Replacement O-ring or seal washer | If the head leaks from the base after reinstallation | Optional |
| Teflon tape | Wrapping the riser threads on reinstallation | Optional |
| Small bucket or towel | Catching water and dirt when you remove the head | Required |
The EPA's WaterSense program notes that fixing a single broken sprinkler head can save a household up to 1,000 gallons per month, so even a 20-minute repair pays for itself fast. If your water has heavy sediment, keep a spare inlet screen on hand. They're universal across most residential impact heads and cost under $2.
Before you shut off the water, mark the head's current arc setting with a piece of tape or a photo on your phone. That way, when you reinstall, you don't have to re-trace the part-circle stops from scratch. It's a small step that saves real frustration later, especially on part-circle heads with adjustable trip stops.
Step-by-Step Fix: From Easiest Repair to Full Rebuild
Work through these steps in order. Stop as soon as the head rotates normally. Don't disassemble more than you need to.
Step 1: Verify Water Pressure
Turn the zone on and watch the head while the system runs. If the stream looks weak compared to other heads on the same zone, the problem may not be the sprinkler at all. Check the manual bleed valve on the backflow preventer and confirm the zone valve is fully open.
If pressure still looks low, the issue is upstream, and no amount of head repair will fix it.
Step 2: Test the Head Manually
With the zone running, nudge the trip arm with a stick. If the head kicks into rotation, the trip mechanism or spring is the culprit. If the head still won't move, you likely have a seized bearing or a packed inlet screen.
Step 3: Shut Off the Zone and Remove the Head
Turn off the irrigation controller or close the manual valve for that zone. Dig down around the head to expose the riser, then unscrew the head counterclockwise. Keep a towel handy, as some water will spill out of the riser.
Step 4: Clean the Inlet Screen
Pull the screen out of the base of the head. Rinse it under clean water and scrub it with a small brush. If it's caked with hard-water deposits, soak it in vinegar for 10 minutes, then scrub again.
Reinstall once it flows freely.
Step 5: Disassemble the Head
Remove the cap screw on top (if your model has one) and lift off the housing. Take a photo of the internals before you remove anything. Pull out the drive spring, plunger, and trip arm.
Soak all parts in vinegar for 10 minutes if you see white crust or orange staining.
Step 6: Inspect and Replace Worn Parts
Stretch the drive spring slightly. If it doesn't snap back, replace it. Check the trip arm for free movement and the plunger tip for wear.
Per Hunter's published maintenance guides, a worn plunger tip is one of the most common reasons a head will only rotate one way.
Step 7: Flush the Line
Before reinstalling, turn the zone on for 5 seconds with the head off. This clears any debris from the lateral line. Catch the spray with a towel so you don't flood the hole.
Step 8: Reassemble and Reinstall
Wrap the riser threads with Teflon tape, screw the head back on hand-tight, and adjust the friction collar. Set the part-circle trip stops to your marked position, then run the zone and watch for a full, even rotation.
Repair vs. Replace: When It's Worth Fixing and When to Swap the Whole Head
Not every stuck head deserves a rebuild. The decision comes down to three things: age, water quality, and the cost of parts versus a new unit.
A brass impact head under 10 years old on clean municipal water is almost always worth repairing. A replacement spring costs under $8, and you'll get several more seasons out of it. Plastic heads older than 8 to 10 years, or any head that has survived multiple winters without a blow-out, are usually better off replaced.
The bearing and housing have lived their useful life, and rebuilding them is throwing parts at a unit that's already at end of life.
Use the table below to decide.
| Condition of Head | Best Move | Why |
|---|---|---|
| Under 5 years old, dirty screen only | Clean and reinstall | Cheapest fix, head has years left |
| 5 to 10 years old, weak spring | Replace spring | Spring is a normal wear part |
| Any age, seized bearing or cracked housing | Replace whole head | Repair costs match or exceed a new unit |
| Plastic head over 10 years old | Replace | Plastic degrades, more failures coming |
| Brass head with corrosion on the body | Replace | Internal corrosion spreads after first repair |
If you're already mid-repair and the head is a discontinued model, replacement is usually the smarter call. Sourcing old parts takes longer than swapping in a $20 universal head, and most modern impacts are interchangeable on a standard ½-inch or ¾-inch riser.
Mistakes That Keep Your Sprinkler Stuck (and How to Avoid Them)
Most failed repairs come down to one of five avoidable errors. Skip these, and your fix sticks the first time.
Reassembling Without Flushing the Line
If you reinstall the head without flushing the lateral line first, you push the same sediment right back into the freshly cleaned screen. Run the zone for 5 seconds with the head off before you put it back on.
Overtightening the Friction Collar
Homeowners assume tight means secure. On an impact head, the opposite is true. The collar should be snug enough to hold the arc setting but loose enough that the head spins freely by hand.
If you can't spin it with a light push, it's too tight.
Skipping the Vinegar Soak
Mineral deposits don't brush off. A 10-minute soak in white vinegar dissolves calcium and iron buildup that would otherwise gum up the plunger within weeks of reinstallation.
Using the Wrong Thread Tape
Standard white Teflon tape is fine for most residential heads. If you're working on a deeper well system with high pressure, use the yellow gas-rated tape. It handles the higher PSI without blowing out the seal.
Reinstalling a Head That's Too Low
If the head sits below the grass line, the blades catch the swing arm and stop rotation. Per Toro's installation guidelines, the top of the head should sit ½ inch above the soil or turf. Riser extensions cost under $3 and solve this instantly.
Avoiding these five mistakes is the difference between a head that runs for ten more years and one that's stuck again by next month. Aggregate user feedback across major irrigation forums consistently points to overtightened collars and skipped line flushes as the two most common reasons a "repaired" head fails within a single season.

Similar Posts