Adjust Rain Bird 5000 Rotor: Arc and Radius Made Easy
Lead Turfgrass & Lawn Care Specialist at Totally Green Lawn · Certified Turfgrass Specialist (CTS), Master Gardener, B.S. in Agronomy & Turf Science · 14+ years in residential turf management, organic fertilization, and weed science
If your lawn has dry patches in one zone and a soggy driveway in the next, the problem probably lives in the top of your sprinkler head. Knowing how to adjust Rain Bird 5000 rotor arc and radius puts you back in control without calling a tech, swapping parts, or buying new nozzles.
The Rain Bird 5000 is a workhorse rotor with two separate screws doing two separate jobs. Manufacturer specifications list an arc range of 40° to 360° and a radius range of roughly 25 to 50 feet, depending on the nozzle and pressure. Get familiar with those two screws, and the rest of the job is just patient fine-tuning.
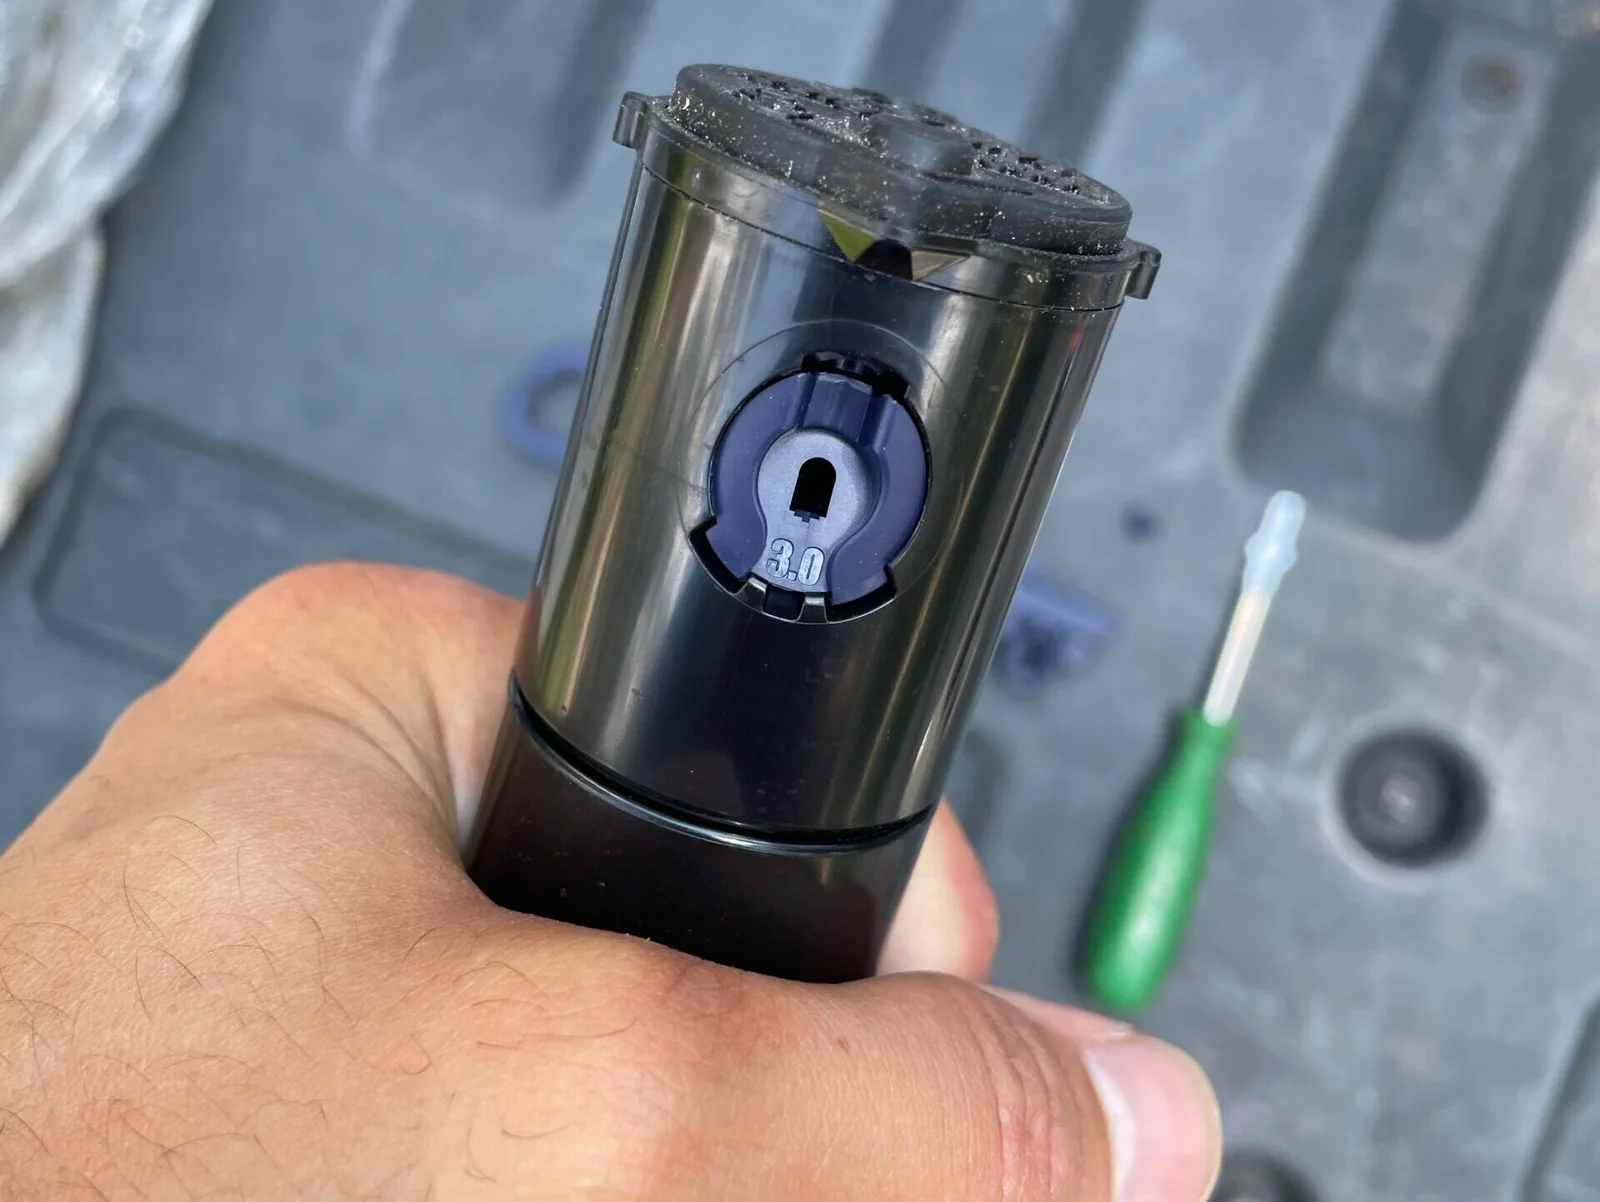
Image source: Bing (Web (fair-use with source credit))
Quick Answer
To adjust a Rain Bird 5000 rotor arc and radius, use a flathead screwdriver on the top arc screw. Turn it clockwise to increase the arc, counterclockwise to decrease. Then use the radius reduction screw on the side to shorten the throw distance.
Always adjust the radius first, then the arc.
The Two Adjustment Points on a Rain Bird 5000 (and Why Most People Mix Them Up)
The Rain Bird 5000 has two adjustment screws, and they do completely different things. Most homeowners grab the wrong one first, which is why the pattern never looks right.
Here's the split:
- Arc screw (top of the head): This controls the width of the spray pattern, measured in degrees. A 90° arc covers a quarter circle, perfect for a corner. A 180° arc covers a half circle, ideal for a lawn edge. The 5000 can run anywhere from 40° (a tight wedge) to a full 360°.
- Radius screw (side of the head): This controls the distance the water throws. Turning it clockwise reduces the radius, pulling the spray in. Counterclockwise lets the water throw farther, up to the rotor's maximum range for that nozzle.
Why confusing them causes problems
If you turn the radius screw expecting it to change the pattern width, you'll cut the throw distance and still have overspray problems. If you crank the arc screw to fix overshoot, you'll shrink the coverage angle and leave dry wedges in the lawn.
The fix is simple. Always start with radius, then set the arc. Radius sets how far the water goes.
Arc sets where the water stops and starts.
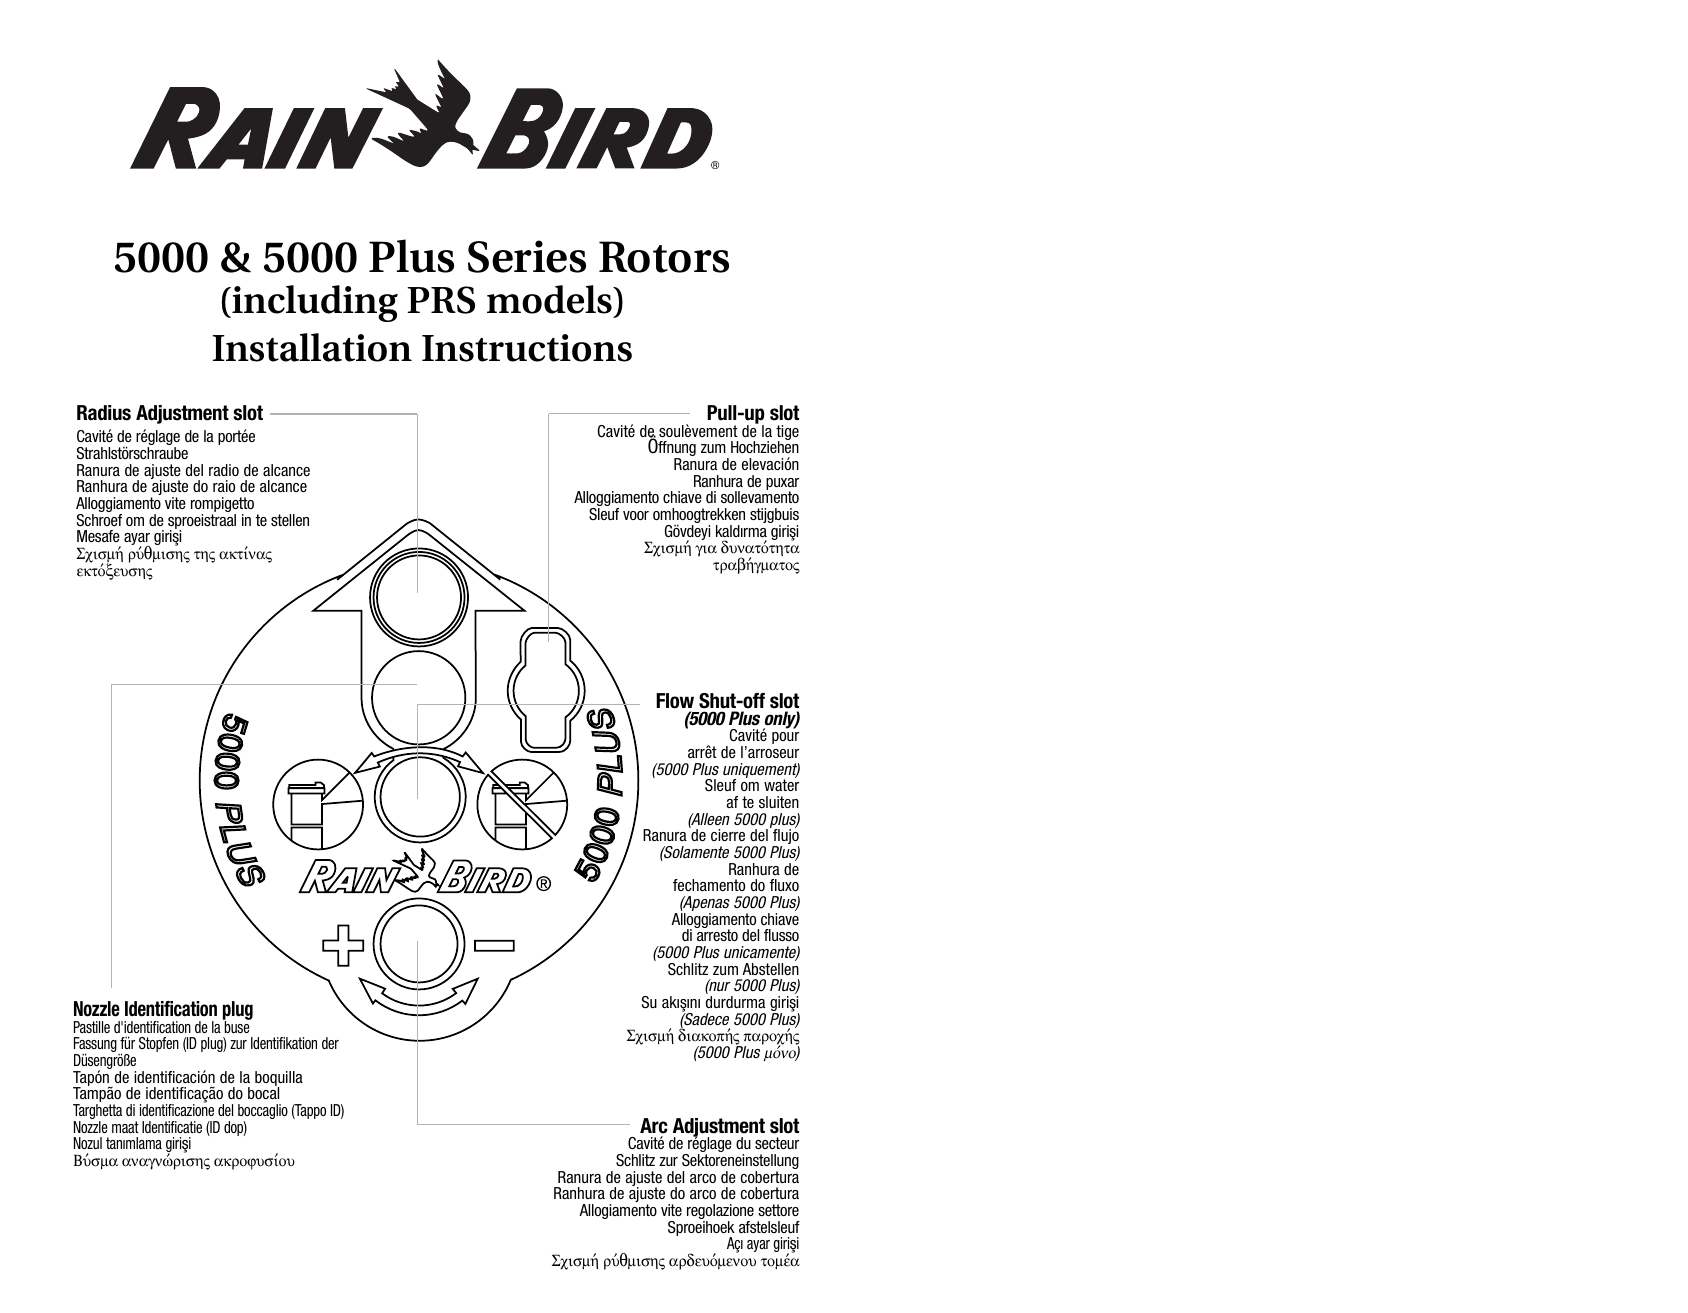
Image source: Bing (Web (fair-use with source credit))
How to identify the screws at a glance
- The arc screw sits dead center on top of the rotor cap, often near a small "+" and "−" marking or a directional arrow. The top of the riser usually has a "fixed left edge" indicator that you align with the start of your spray area.
- The radius screw is on the side of the head, usually near the nozzle opening. It looks like a small slotted screw and often sits inside a small recessed hole.
A quick rule: if the screw is on top, it changes the pattern. If the screw is on the side, it changes the distance.
How to Set the Arc on a Rain Bird 5000 Rotor
Setting the arc is the part most people get wrong the first time. The trick is understanding the fixed left edge, which is the rotation reference point the head uses to know where the pattern starts.
Here's the workflow:
- Step 1: Run the zone briefly to confirm the rotor is working. Watch which direction it turns and where the pattern currently lands. Note any obvious overshoot or dry zones.
- Step 2: Shut the water off. Adjusting while the system is running is the fastest way to strip a screw or spray yourself in the face. Manufacturer guidance is consistent: always adjust with the system off, then test.
- Step 3: Pull the riser up by hand. Grip the top of the head and lift it until it locks in the extended position. The riser should stay up on its own so you can work on it.
- Step 4: Find the fixed left edge indicator. This is a small arrow or notch on the top of the cap. It marks the start of the spray pattern. You need to know where it points before you start turning anything.
- Step 5: Insert a flathead screwdriver into the center arc screw. Turn clockwise to increase the arc, counterclockwise to decrease it. Each click or partial turn changes the angle slightly.
- Step 6: Manually rotate the head to confirm the new arc. With the water off, twist the head by hand from the fixed left edge through the new arc and back. It should stop exactly where you set it.
- Step 7: Run the zone again and check coverage. Walk the pattern. Look for dry spots at the edges and overshoot onto hard surfaces.
Pro tip on the left edge
If the rotor is overshooting a driveway on the left side of its sweep, the fix isn't always turning the arc screw. It's repositioning the head so the left edge lines up with the start of the lawn. The arc screw controls how far the head turns past the left edge, not where the left edge itself sits.

Image source: Bing (Web (fair-use with source credit))
How to Reduce the Radius Without Changing the Nozzle
Sometimes the pattern width is right, but the water throws too far. Maybe a new fence went up, a tree grew in, or the rotor is soaking the side of the house. Replacing the nozzle can fix it, but it's overkill.
The radius reduction screw gets you 80% of the way in about five seconds.
The step-by-step
- Step 1: Identify the radius screw. Look on the side of the head, usually opposite the nozzle opening. You'll see a small slotted screw recessed into the body.
- Step 2: Insert a flathead screwdriver. A standard 1/4-inch blade is the right fit.
- Step 3: Turn clockwise to reduce radius, counterclockwise to increase. Manufacturer specs cap the adjustment at about one full turn clockwise from the factory setting. More than that and you'll start to deform the spray pattern.
- Step 4: Run the zone and observe. The throw distance should drop noticeably. Watch for a clean edge, not a ragged mist. If the stream looks broken up, you've gone too far.
- Step 5: Fine-tune in small increments. A quarter turn can move the throw distance by several feet depending on pressure.
When the radius screw isn't enough
If you've maxed out the radius screw and still have overshoot, the next step is a smaller nozzle. Rain Bird's 5000 series uses a nozzle tree with options from #1.5 up to #8.0, and each step down noticeably shortens the throw. This is also a good moment to check the water pressure.
Per EPA WaterSense guidance on residential irrigation, pressures above 65 PSI create misting and uneven coverage that no screw adjustment can fix.
Common radius mistake
Turning the radius screw too far is a classic DIY error. The stream breaks up into a fog of fine droplets, the rotor stops throwing as far as it should, and the lawn gets less water in a wider cloud. If that happens, back the screw out (counterclockwise) until the stream looks solid again.
Common Mistakes That Strip the Screws or Wreck the Pattern
The 5000 is a forgiving rotor, but a few habits will burn through plastic threads fast. Here's what to skip.
- Adjusting while the system is running. The water pressure pushes the screwdriver around and chews up the screw head. Always shut the zone off first.
- Using the wrong screwdriver size. A blade that's too small slips and strips the slot. A blade that's too big cracks the surrounding plastic. Stick with a 1/4-inch flathead.
- Forcing the head past its stops. The rotor has internal stops for a reason. Cranking it manually against the stops can break the reversing mechanism.
- Treating the radius screw like a shutoff valve. It's not a shutoff. Going more than about one full turn past the factory setting will damage the nozzle stream.
- Losing the left edge reference. If you spin the head by hand without watching the fixed left edge indicator, you'll change the pattern's starting point without realizing it. Then nothing lines up with the lawn.
- Assuming the rotor is the problem. Sometimes the issue is low pressure, a clogged nozzle, or a partially closed zone valve. The screw won't fix any of those.
A good habit is to mark the original screw positions with a small piece of tape before you start. If you overshoot the adjustment, you can always return to factory settings.
Fine-Tuning the Pattern and Testing Coverage
Once both screws are roughly where you want them, the real work begins. Coverage tuning is more art than science, and a five-minute walk-through of the zone beats any amount of staring at the head.
The walking test
Run the zone and walk the spray pattern. Look for three things:
- Dry wedges at the edges. These usually mean the arc is too narrow or the head isn't rotating past the dry spot.
- Overshoot onto pavement. Either the arc is too wide or the radius is too long. Start by reducing the radius, then trim the arc.
- Misting or fog instead of a solid stream. Pressure is too high, or the radius screw is over-tightened.
The catch-can test (optional but worth it)
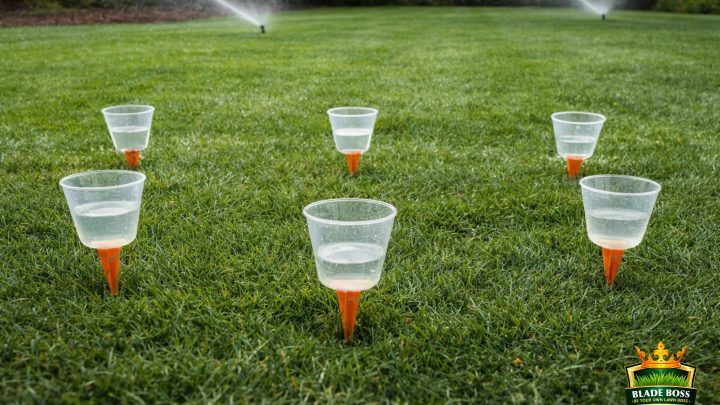
For a more objective read, set out a few identical straight-sided containers (tuna cans work) across the spray pattern. Run the zone for a set time, then measure the water in each can. Adjustable arc rotors like the 5000 should distribute water fairly evenly across the pattern, with about a 10, 15% variation between head-to-head coverage zones.
Big gaps mean the arc or radius is off.
When to leave it alone
If the head is within 1, 2 feet of perfect throw and the arc is hitting the right edges, stop. Perfect is the enemy of good in irrigation. Small overspray onto a sidewalk that drains back to the lawn is fine.
Aiming for laser precision will just wear out the screws.
Quick Troubleshooting: When the Rotor Won't Behave
Sometimes the screws are set right, but the head still misbehaves. Before you assume the worst, run through this quick decision tree.
If the rotor won't rotate at all:
- Check the water pressure first. Anything below 25 PSI and the rotor won't have the force to turn.
- Look for debris clogging the filter screen under the riser. Pop the head up and unscrew the cap to access it.
- The internal drive mechanism may be worn. On rotors with 10+ years of service, this is common and means a full replacement.
If the rotor rotates but skips or stutters:
- A partially clogged nozzle is the usual suspect. Pull the nozzle and rinse it under clean water.
- Worn wiper seal can cause the head to leak from the side instead of spraying cleanly. Replacement seals are cheap and snap in without tools.
If the arc keeps drifting after adjustment:
- The reversing mechanism is sticking. Lift the head manually a few times to free it up.
- Debris inside the riser can block the arc stops. Flush the line by running the zone with the cap unscrewed for a few seconds.
If water leaks from the base of the head when the zone is off:
- The riser seal is shot. This isn't an adjustment problem. The entire rotor needs to be replaced or rebuilt.
For deeper system issues, the EPA WaterSense program maintains solid guidance on residential irrigation troubleshooting and pressure management at their official site, epa.gov/watersense.
FAQs About Rain Bird 5000 Arc and Radius Adjustments
Do I need to turn the water off to adjust a Rain Bird 5000?
Yes. Always shut the zone off before adjusting. Turning the screws under pressure can strip the slots, splash you with water, and throw off your settings as the head moves during adjustment.
Can I adjust the arc on a Rain Bird 5000 without a special tool?
A standard 1/4-inch flathead screwdriver works fine for both the arc screw on top and the radius screw on the side. Rain Bird does sell a dedicated adjustment tool, but it's not required.
What's the difference between the 5000 and the 5000 Plus?
The 5000 Plus adds a pressure-regulating feature that holds the operating pressure steady around 30 PSI. As of 2026, Rain Bird still ships both versions, and the adjustment process is identical. The PC version just gives more consistent radius on systems with pressure swings.
Why does my rotor only spray in one direction and not rotate?
A rotor that sprays but won't rotate usually has low pressure, a clogged nozzle, or a worn internal drive. Check pressure first, then clean the nozzle, then suspect a worn mechanism. The 5000 isn't user-rebuildable on the drive, so a full replacement is the fix at that point.
How tight should the radius reduction screw get?
No more than about one full turn clockwise from the factory setting. Going past that point breaks up the stream into mist and hurts coverage more than it helps.
Can I set a Rain Bird 5000 to less than 40 degrees?
No. The 5000 has a minimum arc of 40° by design. For tighter patterns, you need a different rotor model or a fixed-pattern spray nozzle.
Trying to force the arc below 40° will just spin the head to full circle.
Final Takeaway: Getting It Right the First Time
Adjusting a Rain Bird 5000 rotor comes down to one habit: identify the screw before you turn it. Arc is on top, radius is on the side, and the order of operations is radius first, arc second.
A few minutes of patient work beats a service call every time. Set the radius to keep water on the grass, set the arc to match the shape of the lawn, and walk the pattern to confirm. The head will tell you everything you need to know if you slow down and look at it.
Rain Bird's own documentation for the 5000 series is worth bookmarking, since the specs and adjustment logic haven't changed as of 2026. For broader irrigation best practices, university extension programs like the one at extension.umn.edu publish solid homeowner-focused guidance on sprinkler layout, pressure, and water budgeting.
Keep the screwdriver in the garage, mark the factory settings before you start, and don't fight the head past its stops. The 5000 has been on the market for decades because it does its job well once it's set up right.

Similar Posts