How to Clean Rust and Fertilizer from a Broadcast Spreader
Lead Turfgrass & Lawn Care Specialist at Totally Green Lawn · Certified Turfgrass Specialist (CTS), Master Gardener, B.S. in Agronomy & Turf Science · 14+ years in residential turf management, organic fertilization, and weed science
How to clean rust and fertilizer from a broadcast spreader depends on what your spreader is made of, what kind of fertilizer you last used, and how long the residue has had to bake on. Skip the right prep and you'll either damage the hopper or leave behind salts that eat the metal from the inside out.
Most residential broadcast spreaders hold between 50 and 175 pounds of product and get used three to ten times a season, so the hopper sees a lot of chemical exposure. The good news: as of 2026, manufacturers and university extension services have settled on a clear cleaning workflow that handles both fertilizer residue and rust without shortening the life of the unit.
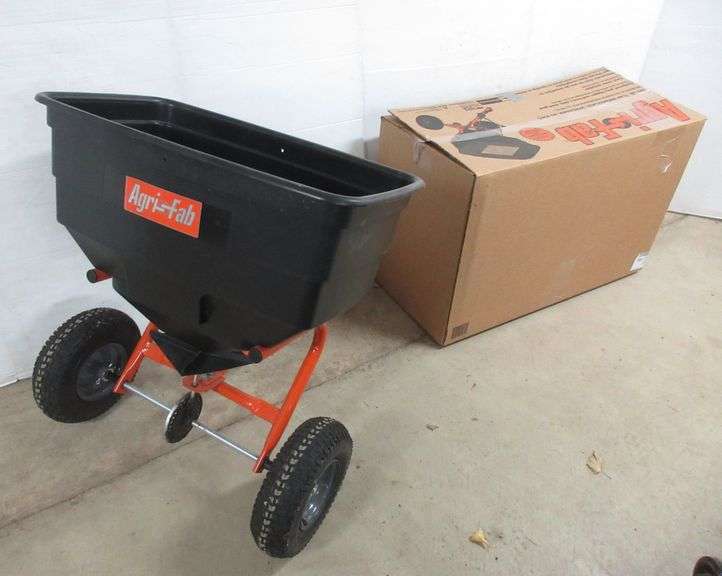
Image source: Bing (Web (fair-use with source credit))
Quick Answer
To clean rust and fertilizer from a broadcast spreader, empty the hopper and sweep out loose product. Wash the inside with warm water and dish soap to dissolve fertilizer salts. Treat any rust with white vinegar or a rust converter, then rinse and dry the spreader completely before storage.
What You're Dealing With: Why Rust and Fertilizer Build Up
Fertilizer isn't just plant food once it sits in a metal hopper overnight. Most granular lawn products contain soluble salts, and some include iron sulfate or ammonium nitrate, both of which pull moisture out of the air and hold it against bare metal. That trapped moisture is what kicks off corrosion, even on a spreader you used just once.
Once a thin film of fertilizer residue forms on the hopper wall, two things happen at the same time. The salts keep the surface damp, and any small scratch in the paint or powder coating turns into a rust nucleation site. Within a few weeks of sitting through rain, dew, or a humid garage, you get the orange haze and pitting that so many owners see at the start of the next season.
Polyethylene hoppers don't rust, but they have their own version of the same problem. Caked fertilizer holds moisture against the plastic, stains it, and slowly degrades the surface. Either way, the fix starts the same way: get the residue off, dry everything, and stop the cycle before it gets worse.
Before You Start: Identify Your Spreader and the Damage
Not all spreaders clean the same way, and using the wrong scrubber on the wrong material is the fastest way to turn a routine job into a replacement. Take two minutes to figure out what you're working with before you reach for any tools.
What Kind of Hopper Do You Have?
| Hopper Material | Cleaning Method | Tools to Avoid |
|---|---|---|
| Polyethylene / plastic | Mild soap, soft brush, water rinse | Wire brushes, abrasive pads, strong solvents |
| Painted steel | Soap, then targeted rust treatment | Steel wool on paint, bleach |
| Stainless steel | Stronger cleaners OK, still avoid chlorine | Chlorine bleach, steel wool on polished finish |
| Galvanized / zinc-plated | Gentle soap, no acid soak | Vinegar soak, citric acid bath |
What Kind of Damage Are You Looking At?
Surface rust is a uniform orange or brown haze you can wipe off or scrub off with light effort. It's cosmetic, and a quick acid treatment plus a touch-up coat handles it fine. Pitting is different.
You can feel the divots with your fingernail, and the metal is physically gone. Pitting on a steel hopper usually means the spreader is near the end of its useful life, especially if it's eaten through near welds or the axle mount.
For polyethylene, the equivalent damage isn't rust but staining and micro-cracking. If the inside of the hopper feels rough or chalky even after cleaning, the plastic has started to break down. That surface grabs onto the next batch of fertilizer and the cycle gets worse every season.
Image source: Bing (Web (fair-use with source credit))
What Fertilizer Was In There Last?
Iron-based products (like many "lawn greening" blends) and ammonium sulfate are the most aggressive. They leave a reddish-brown stain and will flash-rust untreated steel within days. Urea-based and most general-purpose lawn foods are milder but still hygroscopic, meaning they pull moisture from the air and keep the hopper damp.
Knowing what's in there tells you how aggressively you need to rinse and neutralize.
A quick look at the USDA's lawn and garden care guidance confirms that the salt content in common lawn fertilizers is exactly why manufacturers emphasize cleaning after every use, not just at season's end.
The Cleaning Workflow: A Step-by-Step Decision Path
Once you know your hopper material and the type of damage, the actual cleaning breaks into a clean sequence. Follow it in order, and don't skip the drying step at the end. Most of the rust people see next spring forms because the spreader went into storage still damp.
Step 1: Empty and Sweep Out Loose Product
Pour out any remaining fertilizer onto a patch of lawn you intend to treat anyway. There's no point wasting it. Then use a dry paintbrush or a shop vacuum to get the dust and granules out of the corners, around the impeller, and under the agitator pin.
The goal here is to get rid of anything that'll turn into mud the moment water hits it.
Step 2: Disassemble What You Can
You don't need a full teardown. Just remove the rate-control linkage, the hopper from the frame if it's a bolt-on design, and the impeller on models where it lifts out. Five minutes with a screwdriver or wrench saves you an hour of trying to clean around parts that block your access.
Lay the hardware in a coffee can or magnetic tray so nothing walks off into the grass.
Step 3: Pre-Rinse With Water
A garden hose is plenty. Knock off the loose fertilizer film and any dirt on the outside of the hopper. If you own a pressure washer, keep it under 1,500 PSI and stay 12 inches or more back from the surface, especially on polyethylene.
Higher pressure can force water past sealed bearings and into places that won't dry out before storage.
Step 4: Wash With Detergent
Mix a few squirts of dish soap in a bucket of warm water. Scrub every interior surface with a soft brush, paying extra attention to the corners and the area under the agitator. The soap breaks down the waxy coating that some fertilizers leave behind.
Rinse thoroughly. Leftover soap film attracts moisture just like fertilizer salts do, so don't cut this step short.
Step 5: Address Fertilizer Stains Before Rust Treatment
If you see dark staining on a poly hopper, make a paste of baking soda and water and let it sit for 10 minutes before scrubbing. For metal hoppers with stubborn residue, a wipe-down with isopropyl alcohol cuts through what's left without leaving a film. Skip this step and the rust treatment in the next section won't bond properly to bare metal.
Treating Rust Based on What You Find
Rust treatment isn't one-size-fits-all. The right approach depends on how deep the damage goes, and the wrong product can actually speed up the corrosion on certain metals. Choose the path that matches what you saw in Step 1 of the workflow above.

Image source: Bing (Web (fair-use with source credit))
Light Surface Rust on Steel or Stainless
Wipe the area with white vinegar on a rag, let it sit for 5 to 10 minutes, then scrub with a nylon brush. The acetic acid dissolves the iron oxide without harming the surrounding paint. Rinse, dry immediately with a clean towel, and you're done.
For a faster job, a 30-minute soak in a citric acid solution (about 2 tablespoons per liter of warm water) works just as well and smells better.
Moderate Rust With Visible Pitting
You need a rust converter at this point, not just an acid. A converter chemically turns iron oxide into a stable black polymer layer that you can prime and paint over. Brush it on clean, dry metal, let it cure per the label (usually 24 hours), then apply a rust-inhibiting primer and a topcoat rated for outdoor use.
This is the only path that stops pitting from spreading.
Heavy Rust or Pitting Through the Metal
If a fingernail sinks into the divot or you can see light through the hopper wall, stop. No chemical treatment will save it. Replace the hopper, the axle, or the whole spreader depending on what's affected.
A new residential broadcast spreader runs about $80 to $250 as of 2026, which is cheaper than chasing rust repairs on a unit that's structurally compromised.
What to Skip
Chlorine bleach on metal causes flash rust within hours, so avoid it. Steel wool leaves tiny iron particles that rust under the paint. And don't use a wire wheel on a polyethylene hopper.
You'll scar the plastic and create permanent grooves that trap fertilizer every time you use the spreader.
Mistakes That Shorten the Life of Your Spreader
Most broadcast spreader failures we see in owner feedback aren't from worn-out parts. They're from cleaning habits that quietly do more harm than the rust itself. The biggest offenders are the ones that feel like the "right" thing to do.
Storing the spreader wet is the number one cause of springtime rust. Even a thin film of moisture trapped under the hopper lip or around the axle hardware is enough to start oxidation. Wipe it down with a clean towel after the final rinse, then let it air-dry in the sun for at least an hour before you put it away.
Greasing the hardware too early is another trap. Some owners hit every moving joint with WD-40 right after washing. The problem is that WD-40 displaces water but also attracts dust and grit, which then grind into the rate-control linkage.
A dry silicone spray or a light machine oil applied after the spreader is fully dry works much better.
Leaving fertilizer caked under the agitator pin is a third common slip. The pin sits in a small well that holds moisture against the hopper wall. Pop it out once a season, clean the well, and reinstall dry.
It's a five-minute job that prevents the most common leak point on older spreaders.
Finally, don't skip cleaning just because you only used the spreader once or twice. Single applications of iron-rich products have caused more hopper damage in our research than years of general use. Make the post-application rinse a habit, not a chore.
Storing It Right So You Don't Do This Again Next Season
A clean spreader still needs the right storage setup to stay that way. The goal is to keep moisture away from the metal and keep the moving parts free to move when spring arrives. A few minutes here saves you the whole cleaning job next year.
Where and How to Store It
A covered, dry space is best. A garage, shed, or under a tarp all work, as long as the spreader isn't sitting directly on a damp concrete floor. Concrete wicks moisture, and a hopper resting on it will rust from the bottom up.
Set the spreader on a wooden plank, a rubber mat, or hang it on a wall hook if your model has a handle loop.
Position the hopper so any residual water drains out. Most broadcast spreaders have a low spot near the axle mount. Tilt the unit so that spot is the lowest point, or remove the hopper entirely and store it upside down on a shelf.
The frame can stay on the ground.
Long-Term Protection for Metal Parts
A light coat of paste wax on the outside of a steel hopper adds a moisture barrier that lasts through the winter. Carnuba-based auto wax works fine. Skip the wax on polyethylene, since it won't bond and will just attract dust.
For stainless hardware and exposed axles, a wipe-down with a rag lightly oiled in mineral oil prevents flash rust through temperature swings.
Cover the impeller and any exposed bearings with a plastic bag or a piece of tape if your shed is dusty. Grit that settles into the rate-control mechanism is the leading cause of uneven spread patterns the following spring. A clean, dry cover keeps that from happening.
Quick Pre-Season Check
Before the first spring use, give the spreader a 60-second inspection. Check that the flow gate opens and closes smoothly. Confirm the agitator pin spins freely.
Run a small amount of dry sand through the hopper to confirm even distribution. This quick test catches any storage issues before they show up as bare patches or stripes on your lawn.
| Storage Task | Time Needed | Frequency |
|---|---|---|
| Empty and rinse hopper | 5–10 min | After every use |
| Dry and wax metal surfaces | 10 min | End of season |
| Lubricate moving parts | 5 min | End of season |
| Pre-season calibration test | 5 min | Once each spring |
FAQs About Cleaning a Broadcast Spreader
How Often Should I Clean My Broadcast Spreader?
Rinse the hopper after every third or fourth use during the season, and do a full cleaning at the end of each season before storage. If you use iron-based or sulfur-based fertilizers, clean after every single application. Those products corrode metal within days.
Can I Use a Pressure Washer on My Spreader?
Yes, but only on low pressure. Keep the washer under 1,500 PSI and hold the nozzle at least 12 inches from the surface. Higher pressure forces water past bearing seals and into the gearbox, which then traps moisture and rusts from the inside out.
A garden hose and brush handle 95% of cleaning jobs without the risk.
Is Vinegar Safe for Cleaning Rust Off a Spreader?
White vinegar is safe on most steel and stainless steel hoppers when used as a wipe or short soak under 15 minutes. Don't leave it sitting on galvanized or zinc-plated hardware, since the acid will strip the protective coating and cause faster rust later. For heavier rust, a dedicated rust converter gives longer-lasting protection.
What Should I Do With the Dirty Rinse Water?
Pour it back onto the lawn you just treated, or onto any lawn area that needs feeding. Fertilizer-laden water shouldn't go into storm drains, gutters, or onto paved surfaces. Most local water authorities follow EPA guidance that classifies lawn fertilizer runoff as a pollutant, so keep it on the grass.
Can I Clean a Spreader Without Taking It Apart Completely?
For routine maintenance, no disassembly is needed beyond removing the rate-control linkage. For end-of-season deep cleaning, a partial teardown of the hopper from the frame and the agitator pin takes about 10 minutes with basic hand tools. A full teardown is only necessary if you find pitting or seized hardware.
How Do I Stop Rust From Coming Back After Cleaning?
Keep the spreader dry between uses and store it indoors or under cover. Apply a light coat of paste wax to painted steel hoppers once a year. Lubricate the hardware with silicone spray or light machine oil.
The cleaning job you just did will last five times longer if the storage conditions are right.

Similar Posts