How to Remove a Frozen Stuck Garden Hose from Spigot
Lead Turfgrass & Lawn Care Specialist at Totally Green Lawn · Certified Turfgrass Specialist (CTS), Master Gardener, B.S. in Agronomy & Turf Science · 14+ years in residential turf management, organic fertilization, and weed science
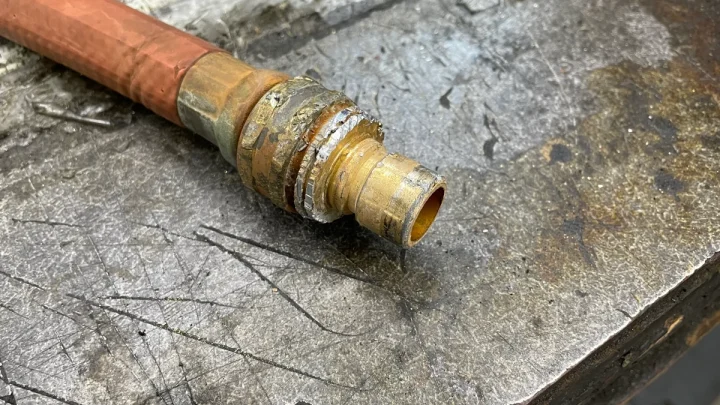
If you've ever walked out on a January morning and found your garden hose locked to the spigot like it's been welded there, you're not alone. Knowing how to remove a frozen stuck garden hose from an outdoor spigot the right way saves you from cracking a brass fitting, stripping threads, or worse, bursting a pipe behind the wall.
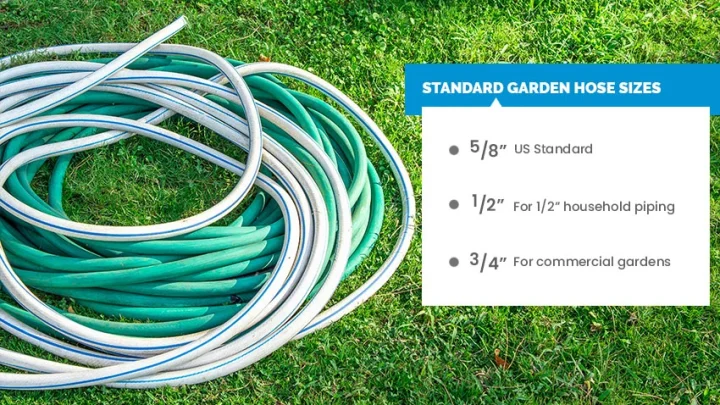
The trick isn't brute force. It's a sequence: shut off the indoor supply, figure out what kind of spigot you have, thaw the connection gently, then unscrew. Most U.S. outdoor spigots use the standard 3/4" Garden Hose Thread (GHT), and per the 2026 International Plumbing Code, any hose connection needs a backflow preventer, which is a small one-way valve that stops contaminated water from siphoning back into your house.
That little check valve often freezes solid too, so you'll want to know it's there before you start pulling. Let's walk through the right order, because as of 2026, cold snaps are pushing further south and more homeowners are hitting this problem in zones that rarely used to see it.
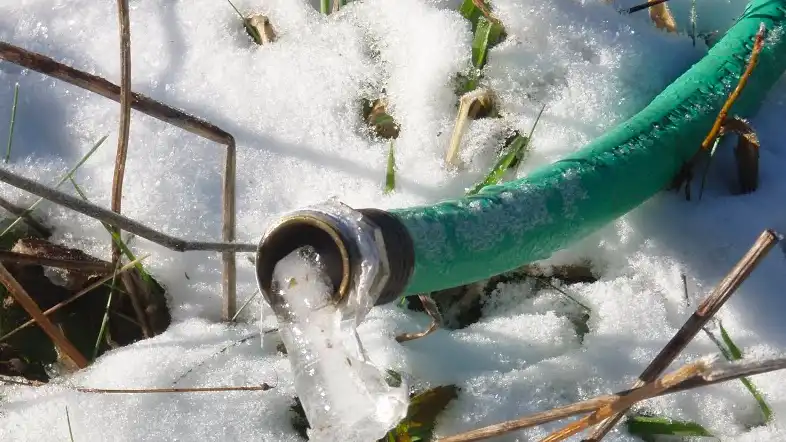
Image source: Bing (Web (fair-use with source credit))
Quick Answer
Shut off the indoor water supply to the outdoor line first. Open the spigot to drain pressure. Thaw the connection with a hair dryer or warm towels.
Twist the hose, do not pull it. Reinstall only after everything is dry and drip-free.
Start Here: What to Do First Before You Pull
The first instinct is to yank. Don't. A frozen hose bonded to a brass spigot can rip the entire hose bib out of the wall, and then you're not doing a five-minute DIY, you're doing a Saturday with a plumber and a hole in your siding.
So before you touch the hose, do four things in this order:
- Find the indoor shut-off valve for the outdoor line. It's usually in the basement, crawlspace, or utility room, on the pipe feeding the outside wall. Turn it clockwise until it stops.
- Open the outdoor spigot. Even if it's frozen, try the handle. Opening it releases pressure and lets any liquid water drain out instead of pooling behind the ice.
- Look at the spigot style. A standard hose bib sits flush with the outside wall. A frost-free sillcock (also called a frost-proof hose bib) has a long stem that reaches 4 to 12 inches back into the heated wall. Knowing which you own changes the whole approach.
- Gather your thawing tools. You'll want a hair dryer, a few old towels, and either a strap wrench or channel-lock pliers. No torches, no boiling water poured on glass, no propane heaters indoors.
Here's the thing most folks miss: the indoor shut-off step isn't optional. If the spigot has an ice plug inside it and the supply is still on, your gentle thaw can suddenly release pressure and shoot water into a frozen section of pipe. That's how you go from a stuck hose to a flooded wall cavity.
The International Plumbing Code treats outdoor hose connections as a cross-connection hazard for exactly this reason, and the shut-off step is what keeps a small problem from becoming a structural one.
The Condition Check: Which Situation Are You In?
Not all frozen hoses are the same. Before you grab the hair dryer, run through this quick check. The answer changes your method.
Is the indoor shut-off valve accessible and working?
If yes, you're in the best-case scenario. You can take your time. If no, or if the valve is stuck open (a common issue in homes where it hasn't been touched in years), treat the situation as urgent.
Every minute the spigot stays full of water is a minute a burst pipe is possible.
Do you have a standard hose bib or a frost-free sillcock?
This matters more than anything else. A standard hose bib has the valve seat right at the outside wall, so the water column sits in the cold zone. A frost-free sillcock moves the valve seat back into the heated wall, so the outside section drains automatically when you close the handle.
If you have a frost-free unit and the hose is still frozen to it, the problem is almost always a hose left connected, which stops the auto-drain feature from working.
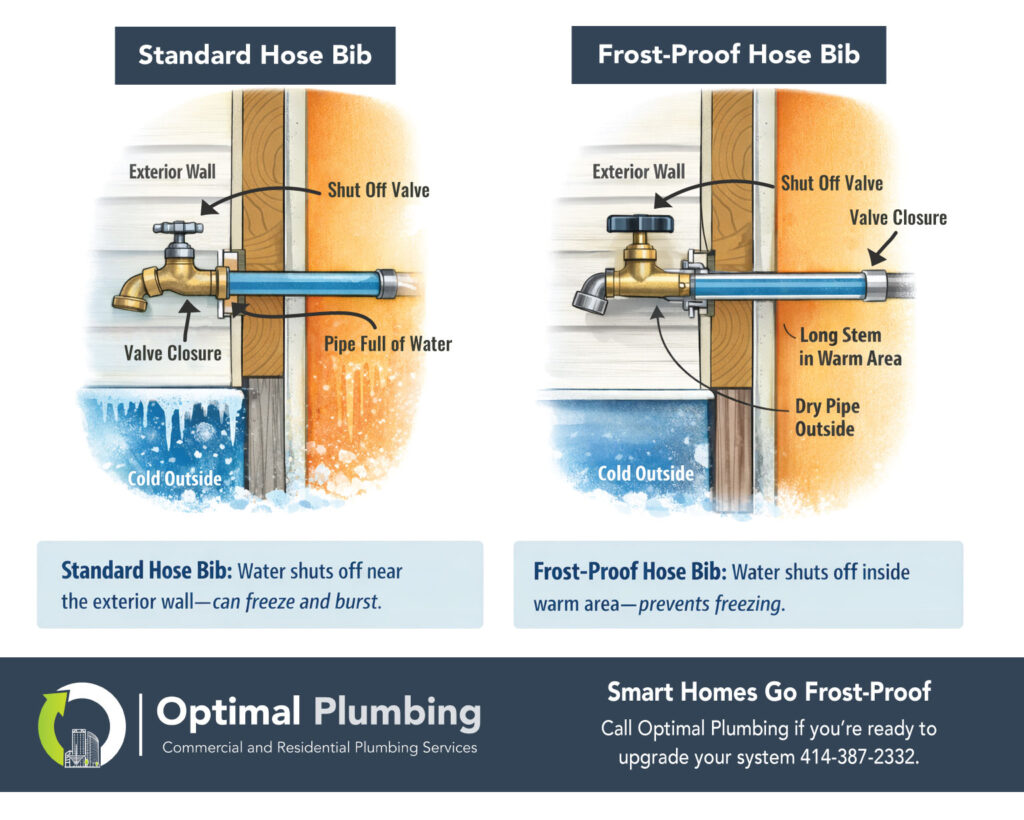
Image source: Bing (Web (fair-use with source credit))
Is the anti-siphon vacuum breaker frozen too?
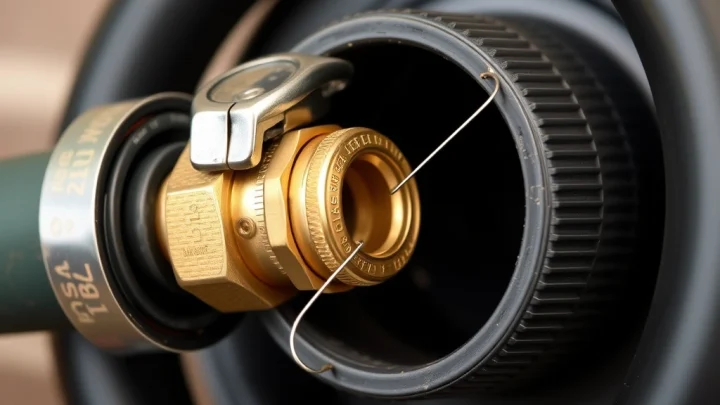
Most spigots built or updated after the late 1980s have a small cap on top called a vacuum breaker or anti-siphon device. It's required by code to stop irrigation water from contaminating your drinking supply. These little caps freeze solid all the time.
If yours is locked up, thaw it first with a hair dryer before you even try the hose connection, because the cap can crack if you torque against it.
Is the hose itself solid as a rock, or just stiff at the coupling?
A hose frozen all the way through is a bigger project. You may need to bring it indoors to thaw. A hose that's only frozen right at the coupling (the metal or plastic end that screws onto the spigot) usually breaks free with 10 to 15 minutes of gentle heat.
Use this mini decision table to pick your path:
| Your situation | Best next move |
|---|---|
| Indoor valve accessible, coupling only is frozen | Heat the connection directly, twist the hose |
| Indoor valve stuck open | Thaw slowly, no closed system pressure |
| Frost-free sillcock with hose still attached | Thaw the hose to allow auto-drain, do not force the handle |
| Vacuum breaker cap is frozen | Thaw the cap first with a hair dryer, never pry it |
Step-by-Step Removal Based on Your Situation
Now the actual removal. Pick the path that matches what you found in the condition check above.
Path A: Standard hose bib, indoor valve shut off
- Confirm the indoor valve is fully closed and the spigot is open.
- Wrap an old towel around the coupling. Pour warm (not boiling) water over it slowly.
- Aim a hair dryer at the coupling on medium heat. Keep it moving, never held in one spot, to avoid warping the plastic washer inside.
- After 10 to 15 minutes, grip the hose with a strap wrench. Twist clockwise and counterclockwise in short arcs to break the ice bond.
- Once it moves, unscrew the rest of the way by hand.
- Dry the spigot threads, then reattach once everything is at room temperature.
Path B: Frost-free sillcock with the hose still connected
- The hose is what's blocking the auto-drain. That's the real problem.
- Thaw the hose itself first. A frozen hose can't flex, and forcing it will crack the sillcock stem.
- Bring the hose indoors if you can. Lay it in a bathtub with warm water for 20 to 30 minutes.
- Meanwhile, leave the spigot handle in the open position so the stem can drain once the ice clears.
- Once the hose is flexible, reattach it briefly and open the spigot to confirm water flows and then stops fully when closed. If it drips when closed, the internal valve seat is probably worn and the sillcock may need replacement.
Path C: Vacuum breaker frozen solid
- Aim a hair dryer at the cap on top of the spigot, never a torch.
- Keep the heat moving in circles. The plastic cap can soften around 200°F.
- After a few minutes, try turning the cap with pliers wrapped in a rag to protect the finish.
- If it still won't budge, spray a small amount of silicone lubricant (not WD-40, which can damage rubber seals) around the cap threads and wait five minutes.
- Once the cap moves, leave it loose until the spigot fully thaws. This gives the ice a path to escape.
Path D: Everything is frozen and you can't tell what's what
This is the slow road. Bring the entire outdoor section inside the heated space if possible, or wait for a warmer day above 20°F. Trying to muscle a fully frozen assembly is how you end up with a cracked spigot body, and brass cracks can't be repaired, only replaced.
Mistakes That Crack Pipes and Ruin Spigots
Most damage from a frozen hose isn't from the cold. It's from the recovery. Here are the moves that get people in trouble.
Using an open flame. Propane torches and plumber's torches are tempting because they work fast. They also anneal brass (soften the metal by relieving its internal stress), melt vacuum breaker caps, and can ignite vinyl siding. Manufacturer specs from brands like Woodford and Prier explicitly warn against torch use on hose bibs.
Pouring boiling water on a frozen spigot. The thermal shock can crack the brass body, especially on older units. Warm tap water around 100 to 110°F is plenty. You're thawing, not cooking.
Pulling instead of twisting. A hose stuck to a spigot has a mechanical bond, not a glue bond. Twisting breaks the ice crystals. Pulling just transfers all that force to the spigot mount, where the pipe enters the wall.
Forcing the spigot handle. If the handle won't turn, the valve seat is probably frozen. Forcing it can snap the stem packing nut, and then you have a leak you can't stop without shutting off water to the whole house.
Leaving the hose attached after a partial thaw. The hose refreezes within hours, often harder than before, and now there's water trapped in the line because you drained it. Always drain, detach, and store the hose after a freeze event, even if you plan to reattach later in the day.
Skipping the vacuum breaker check. After removal, the vacuum breaker is the most common part to leak. If you see a slow drip from the top cap after the line is back under pressure, the internal washer is probably shot. Replacement caps are about $10 to $20 and screw on with a hand-tight fit, no tools needed.
Ignoring the indoor pipe. If the spigot was frozen long enough to bond the hose, the pipe behind the wall may have been frozen too. After you finish, turn the indoor valve on slowly and watch the spigot for 30 seconds. Any irregular drip or burst of air means the line needs a closer look.
Thawing Methods Compared
There's more than one way to thaw a frozen hose-to-spigot connection, and they aren't all equal. Some are safer for the spigot, some are faster, and a couple are flat-out unsafe. Here's how the common methods stack up in 2026.
| Method | Best for | Time to work | Risk level |
|---|---|---|---|
| Hair dryer on medium | Couplings, vacuum breaker caps | 10–20 min | Low |
| Warm towel + warm water | Standard brass hose bibs | 15–30 min | Low |
| Heat gun on low | Stubborn ice, metal-only parts | 5–10 min | Medium |
| Hot water bottle / rice sock | Slow safe thaw overnight | 4–8 hours | Very low |
| Propane torch | Nothing on a hose bib | N/A | High, not recommended |
| Boiling water poured on | Never on plumbing | N/A | High, can crack brass |
A hair dryer is the everyday workhorse. It stays under 140°F on most settings, well below the temperature that softens vacuum breaker plastic. Heat guns are faster but easy to overdo.
Keep them on low and keep the nozzle moving, at least 4 inches away from any plastic or rubber part.
The rice sock trick is underrated for overnight thaws. Fill a clean cotton sock with dry rice, microwave it for two minutes, then wrap it around the coupling. It holds heat for 30 to 45 minutes and you can reheat it as needed.
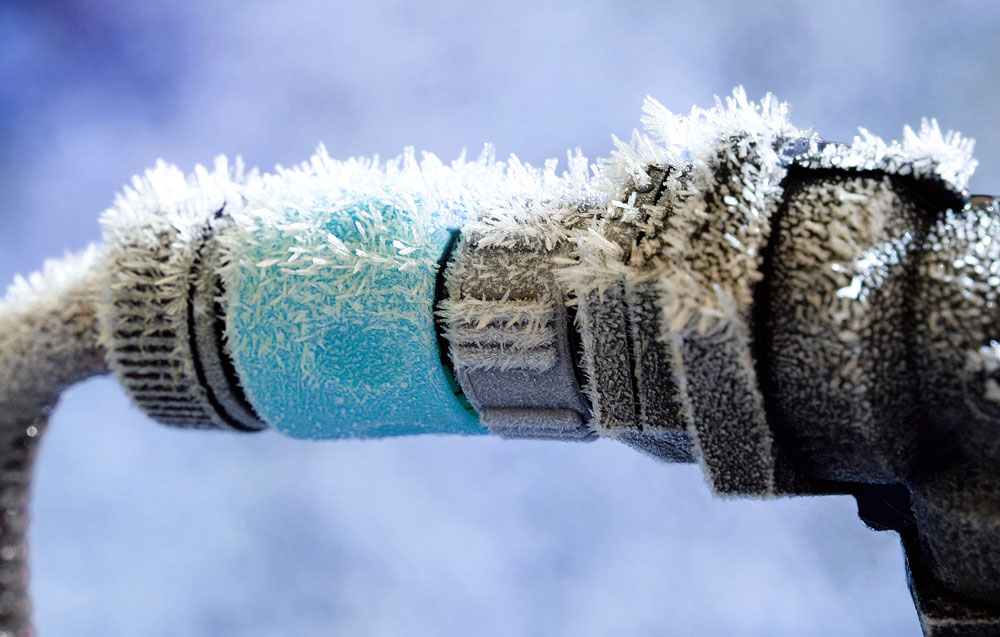
Image source: Bing (Web (fair-use with source credit))
When to Stop and Call a Plumber
Most stuck hoses are a DIY fix. Some aren't, and pushing past the warning signs costs more than the service call would have.
Call a licensed plumber if you see any of these:
- Water leaking from the wall, ceiling, or floor near the spigot
- The spigot handle turns but no water comes out, and the indoor valve is fully open
- Visible cracks in the spigot body, the vacuum breaker cap, or the hose coupling
- A frozen hose that won't budge after 30 minutes of gentle heat
- Any sign of ice or frost on the interior pipe in the basement or crawlspace
- A home that uses a mixing valve or a recirculating loop on the outdoor line
A plumber can pressure-test the line after the thaw to confirm nothing split behind the wall. They can also replace a damaged frost-free sillcock in under an hour, typically $150 to $300 for parts and labor in most U.S. markets. That's a lot cheaper than opening a wet wall.
If the spigot is more than 20 years old, replacement is often a better call than repair. Modern frost-free units from brands like Woodford, Prier, and SharkBite come with longer stems, better vacuum breakers, and silicone seals that hold up to multiple freeze-thaw cycles.
Preventing a Frozen Hose From Ever Happening Again
Once you've fought this battle once, you don't want to fight it again. The good news is that prevention is mostly about three habits, not expensive upgrades.
Disconnect every hose before the first hard freeze. This is the single biggest thing. A hose left attached holds water in the spigot body, which is what freezes and bursts the pipe. Even frost-free sillcocks rely on the hose being removed to drain properly.
Install an outdoor spigot cover. Foam insulated covers cost $5 to $15 and slide over the spigot. They won't help in extreme cold, but for the typical overnight freeze in zones 6 and 7, they keep the temperature around the spigot above the critical 20°F threshold.
Shut off and drain the indoor valve for the outdoor line each winter. If your home has a dedicated shut-off for the outdoor spigot (most do, often labeled "outside" or "hose bib"), close it in late fall. Then go outside and open the spigot to drain the line. This removes the water that would otherwise freeze.
For homes in zones 3 to 5, consider upgrading to a frost-free sillcock with at least an 8-inch stem. The longer the stem, the deeper into the heated wall the valve seat sits. Pair it with a loose-fitting foam cover for the best protection in brutal cold snaps.
Finally, store the hose itself indoors. A coiled hose in a garage or shed stays flexible and lasts years longer than one left outside through freeze-thaw cycles. The rubber and vinyl both degrade faster when they freeze repeatedly.
Frequently Asked Questions
How long does it take to thaw a frozen garden hose connection?
Most couplings thaw in 10 to 20 minutes with a hair dryer on medium. A hose frozen all the way through can take 30 to 60 minutes in a warm bathtub. Patience beats force every time.
Can I use a heat gun to thaw a frozen hose bib?
Yes, on low setting, and only on metal parts. Keep the nozzle moving and at least 4 inches from any plastic or rubber component. The vacuum breaker cap on top of the spigot will melt or warp around 200°F.
Will a frozen hose ruin my outdoor spigot?
It can, if the ice expands enough to crack the brass body or strip the threads. More often, the damage shows up later as a slow drip from the vacuum breaker or a spigot handle that won't fully shut off. Inspect the spigot closely after every freeze event.
Should I leave the hose on or off during winter?
Always off, drained, and stored indoors. A hose left attached stops a frost-free sillcock from draining, which defeats the whole point of the design. Even a standard hose bib holds water in the valve when a hose is connected.
What temperature will a garden hose freeze at?
Water inside the hose freezes at 32°F (0°C), but the hose material itself stays flexible a bit lower. The danger zone for damage is any sustained temperature below 20°F (-6°C), especially when wind chill drops it further.
Do I need to call a plumber if my outdoor spigot is frozen?
Not usually. If you can shut off the indoor valve and thaw the connection gently, it's a DIY job. Call a plumber if you see leaks inside the wall, cracks in the spigot, or no water flow after 30 minutes of careful thawing.

Similar Posts