Level Uneven Stepping Stones in Your Lawn Fast
Lead Turfgrass & Lawn Care Specialist at Totally Green Lawn · Certified Turfgrass Specialist (CTS), Master Gardener, B.S. in Agronomy & Turf Science · 14+ years in residential turf management, organic fertilization, and weed science
If your stepping stones have started rocking, sinking, or lifting out of your lawn, you're not alone. This is one of the most common path problems homeowners run into, and the fix depends almost entirely on why the stones moved in the first place. In this guide, we'll walk through how to level uneven stepping stones in a lawn, match the right repair method to your specific situation, and make sure the stones actually stay put this time.
Most re-leveling jobs come down to the base, not the stone itself. Interlocking Concrete Pavement Institute guidelines (ICPI Tech Spec 2) recommend a minimum 4-inch compacted crushed-stone sub-base for pedestrian paths, plus a 1-inch bedding layer of coarse sand or stone dust. Skip those layers, and you'll be re-leveling the same stones every spring.
Let's figure out which problem you actually have so you can fix it once and be done.
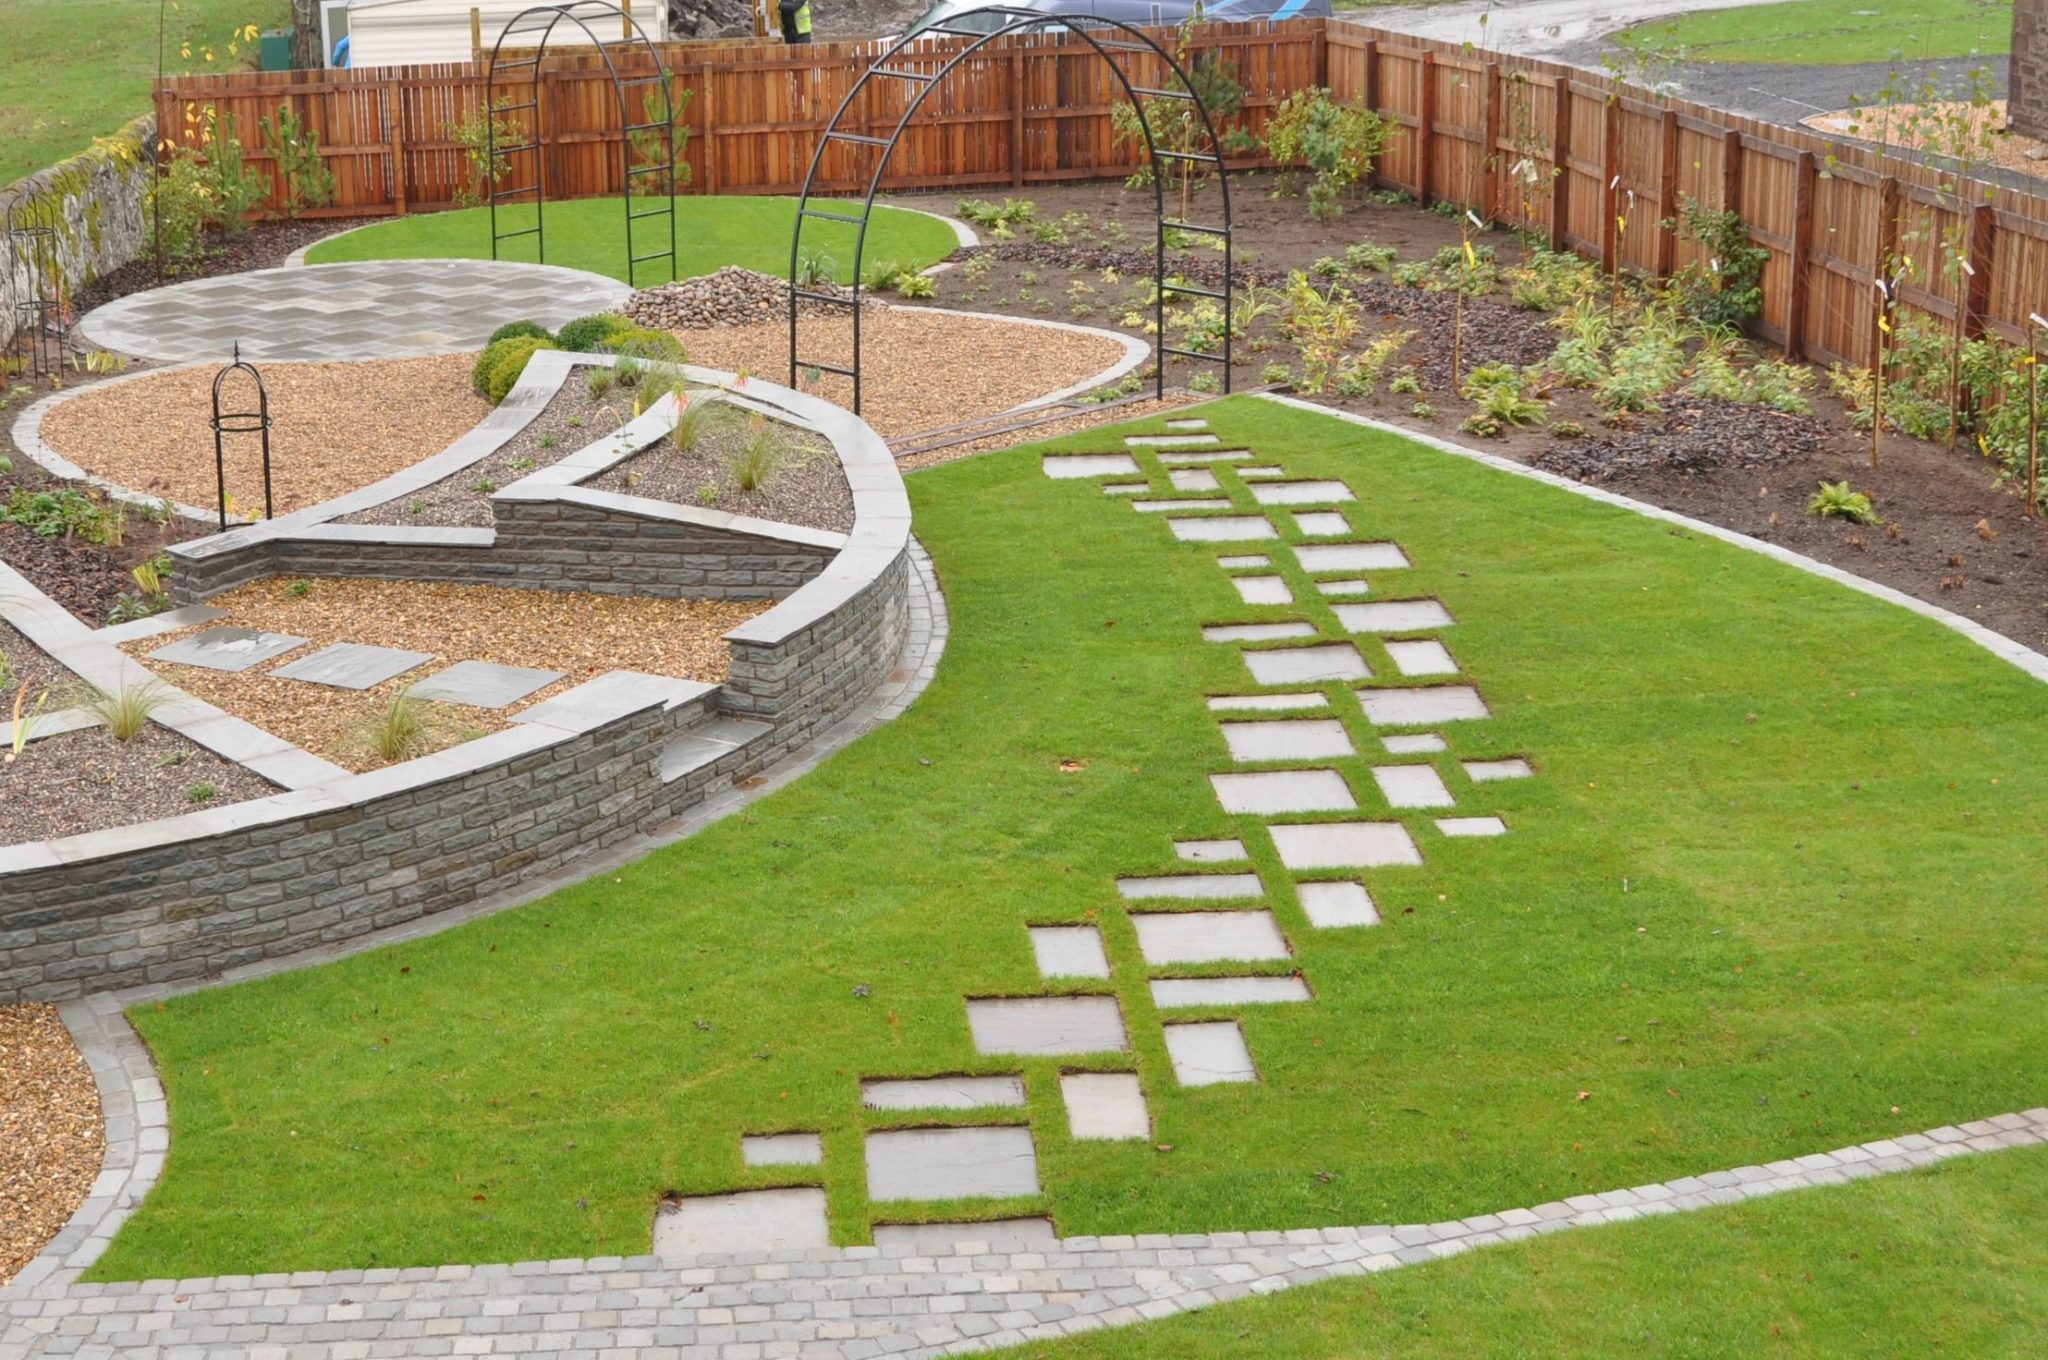
Image source: Bing (Web (fair-use with source credit))
Quick Answer
Lift the stone with a flat bar. Excavate 4 to 6 inches of soil. Add and compact 4 inches of crushed stone (ASTM #57 or decomposed granite).
Add a 1-inch bedding layer of coarse sand or stone dust. Screed it level, set the stone, and check level in both directions. Tamp it down, then fill the joints and restore the turf.
Why Your Stepping Stones Keep Going Uneven (And What That Tells You)
Uneven stepping stones almost always come from one of four causes, and the cause determines the fix. Treating every problem the same way, usually by just shimming sand under a low spot, is why most repairs fail within a season.
Here's what's really happening under each stone:
- The base was never built right. No compacted sub-base means the stone settles into soft soil over time.
- Water is washing out the bedding. Poor drainage erodes the sand layer and the stone sinks or shifts.
- Frost is heaving things up. Freeze-thaw cycles (common in USDA Hardiness Zones 3 through 7) push stones upward when trapped moisture expands.
- Roots are pushing from below. Tree and shrub roots grow thick enough to tilt a 2-inch flagstone out of place.
If you just want to patch a single wobbly stone, you can do that in 30 minutes. If the whole path is sinking, the real fix is a base rebuild, and that takes a weekend. The next section helps you figure out which scenario you're in.
Find Your Situation: Which Type of Uneven Do You Have?
Take 30 seconds and look at your path. The pattern of the problem tells you almost everything about the cause, and the cause tells you the fix.
Stones That Rock or Wobbly Underfoot
The stone tips when you step on it, but it hasn't actually dropped below the surrounding grass. This usually means the bedding sand has eroded out from under one edge, or the stone was never set on a flat layer in the first place. Quick lift, re-level the sand, reset, and you're good.
Most wobbles fall into this bucket and are the easiest fix on the list.
Stones That Have Sunken Below the Lawn
You can see a depression, the stone is sitting below the grass line, and the surrounding turf has grown over the edges. This points to a base problem. Either the soil underneath was never compacted, or water has been quietly washing the fines out for months.
A simple sand shim won't hold here. You need to lift the stone, dig out the soft spots, and rebuild the base with compacted crushed stone.
Stones That Have Lifted Above the Lawn
The opposite of sinking. A stone is now higher than it used to be, sometimes with the surrounding grass worn away. In cold climates, that's frost heave.
In warmer areas, it's almost always tree or shrub roots. The fix here is different because adding material under the stone would just trap more water and make the heave worse next winter. You need to address what's pushing from below, not what's missing above it.
Stones That Shift After Every Season
You level them in spring, they're off again by fall, rinse and repeat. This is a drainage problem. Water is getting under the path and slowly moving material every time it rains or freezes.
The fix is a proper base (compacted crushed stone, not just sand) and making sure the path has a slight grade, roughly 1/8 inch per foot, so water runs off instead of pooling.
How to Level Uneven Stepping Stones: The Right Fix for Each Problem
Once you know which type of uneven you're dealing with, the actual repair is pretty straightforward. Below are the three methods that cover roughly 95% of homeowner situations, in order from lightest to heaviest repair.
Fix for Sinking or Wobbly Stones (The Lift-and-Rebed Method)
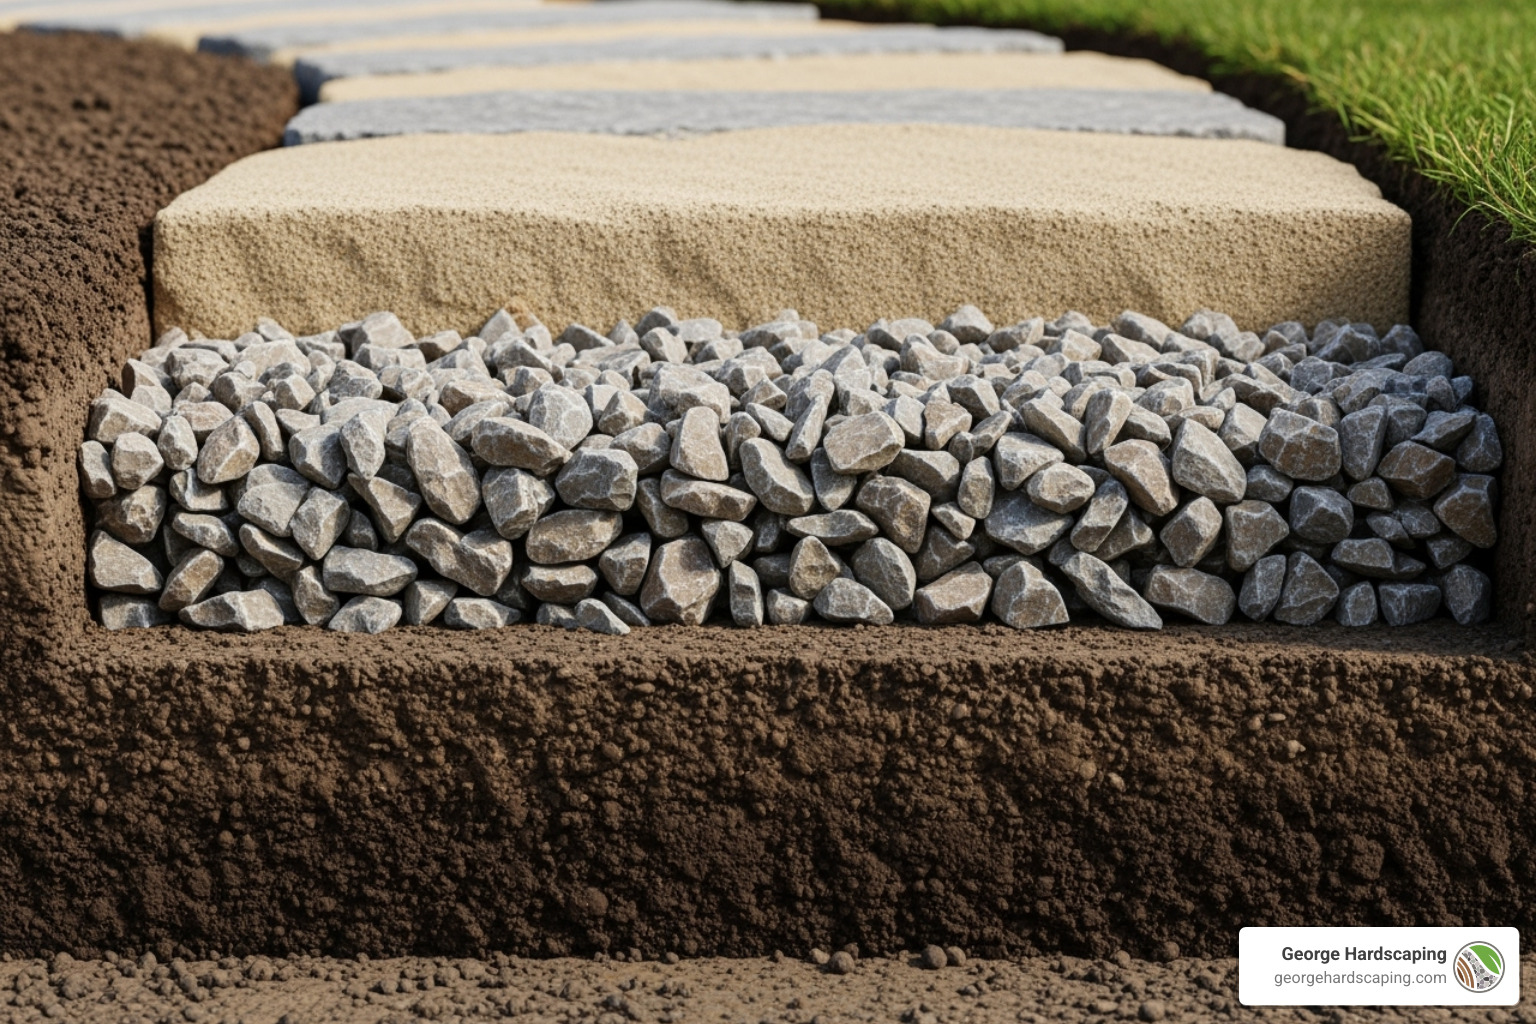
Image source: Bing (Web (fair-use with source credit))
This is the workhorse fix for most lawn pathways. It works for sinking stones, rocking stones, and anything where the base underneath has failed. The idea is to lift the stone out, fix what's under it, and put it back on a base that will actually hold.
- Remove the stone. Work a flat bar or pry bar under one edge and lift. For stones over about 30 pounds, get a second person. Natural stone can crack if you lever it from one side alone.
- Clean the underside. Scrape off the old bedding material. You want bare stone-on-sand contact at the end.
- Excavate the hole. Dig out 4 to 6 inches below where the finished stone surface should sit. A 2-inch-thick flagstone plus 1 inch of bedding sand plus 4 inches of sub-base = 7 inches total depth for a typical install.
- Add the sub-base. Pour in 4 inches of crushed stone (#57 grade) or decomposed granite. Compact it in 2-inch lifts with a hand tamper. A plate compactor is faster and more thorough, but a hand tamper works for a single stone.
- Add the bedding layer. Screed 1 inch of coarse sand or stone dust over the compacted base. Use a straight board to get it flat.
- Set the stone. Place it in the hole and check level in two directions (front-to-back and side-to-side). Tap with a rubber mallet to adjust.
- Tamp and finish. Tamp the stone flat with the rubber mallet or a piece of scrap wood. Fill the joints with sand, soil, or polymeric sand depending on the look you want.
For a single stone, this takes 20 to 45 minutes. For a whole path of 10 to 15 stones, plan a full Saturday.
Fix for Lifted Stones (Root Heave or Frost Heave)
Lifted stones need a different approach because the problem is under the base, not the base itself. Adding more sand here just gives water somewhere to collect, which makes the heave worse next winter.
If it's frost heave: The fix is drainage. Lift the stone, dig the hole an extra 2 inches deeper than usual, and fill that extra depth with open-graded crushed stone (no fines). That creates a reservoir so water has somewhere to go before it freezes.
Per USDA NRCS drainage guidance, free-draining aggregate below the frost line dramatically reduces heave in pedestrian paths.
If it's root heave: You've got a choice. Cut the root (only if it's a small feeder root and you're sure it's not load-bearing for a tree you want to keep), or relocate the stone. Trying to lift the stone higher each year to keep up with the root just creates a trip hazard and a bigger problem later.
Quick Patch for a Single Slightly-Low Stone (No Full Reset)
If you've got one stone that's dropped a half-inch to an inch and the rest of the path is solid, you can do a fast patch without a full lift. Slide a flat bar under the stone, lift just enough to slip something underneath, and pump in coarse sand or stone dust with a squeeze bottle or grout bag. Lower the stone, tamp it level, water the joint to settle the sand.
This is a 15-minute fix, not a permanent one. Expect to repeat it every year or two unless you address the underlying base. It's fine as a stopgap, especially going into a weekend when guests are coming over, but don't kid yourself that it solves the problem.
Fixing the Base So It Stays Level Long-Term
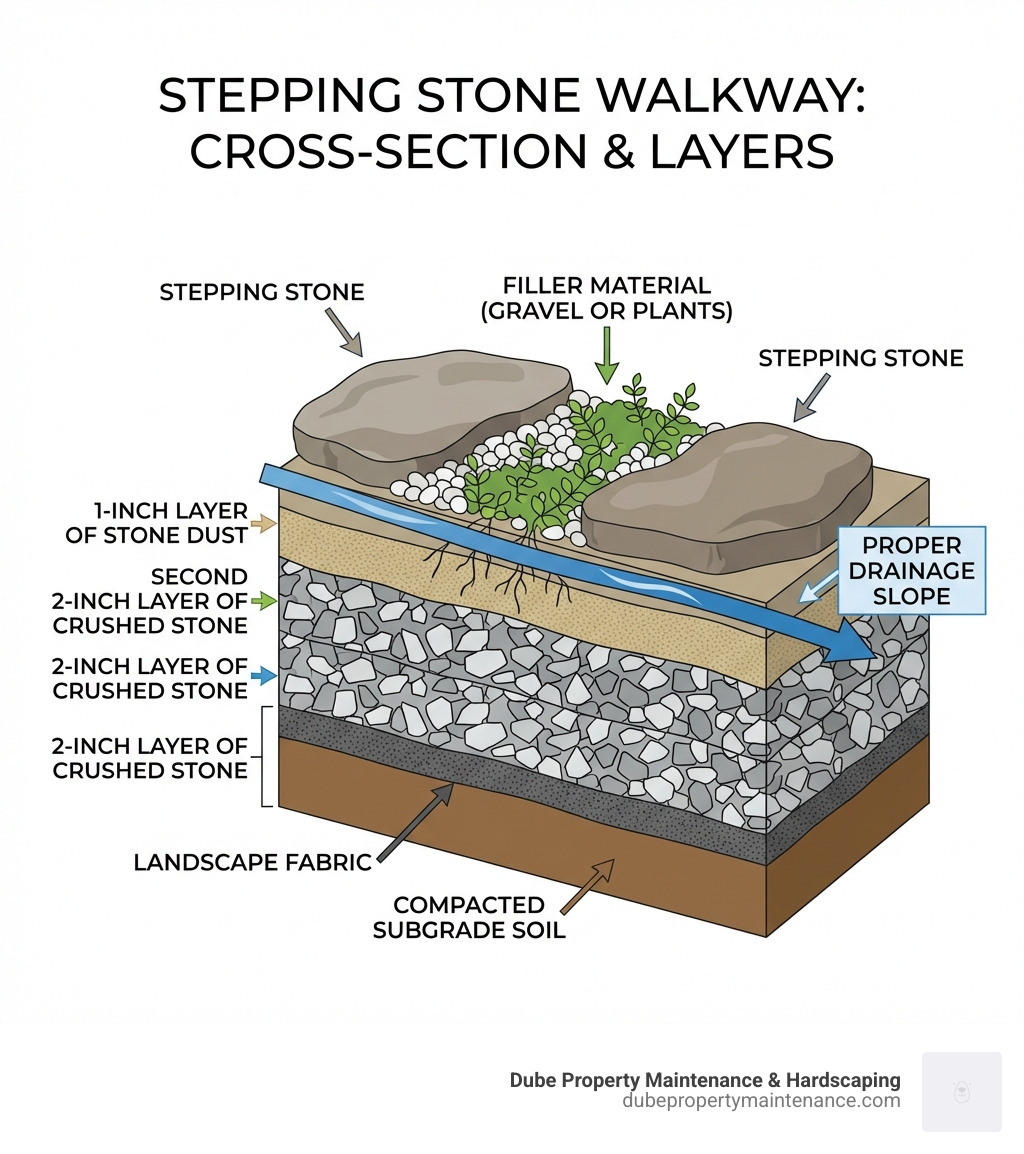
Image source: Bing (Web (fair-use with source credit))
The reason most re-leveling jobs fail within a season is that the base was never right to begin with. A stepping stone in a lawn is sitting in a constantly wet, constantly changing environment, and it needs a real base to stay put.
Here's what a long-lasting install looks like from the ground up:
| Layer | Material | Thickness | Purpose |
|---|---|---|---|
| Subgrade | Native soil, compacted | — | Stable foundation |
| Sub-base | Crushed stone (#57) or decomposed granite | 4 inches (compacted in 2-inch lifts) | Load distribution, drainage |
| Bedding | Coarse sand or stone dust | 1 inch | Level setting surface |
| Stone | Flagstone, paver, or concrete | 1.5 to 2 inches typical | Walking surface |
The 4-inch sub-base is the part most DIY installs skip, and it's the difference between a path that lasts 3 years and one that lasts 15. In heavy clay soil (common in USDA Soil Types 6 and 7 across the Midwest and Southeast), that crushed-stone layer also acts as a drainage layer, which directly fights frost heave and the slow settlement that wrecks most lawn paths.
A 1% slope (about 1/8 inch per foot) across the path is enough to shed water without feeling sloped underfoot. Use a 2-foot level with a 1/4-inch shim under one end as a quick slope gauge.
What You'll Need (Tools, Materials, and What They Cost)
You don't need much for a single-stone repair. For a full path reset, the tool list grows a bit. Here's what to have on hand, with 2026 pricing from major home improvement retailers.
| Item | Use | Approx. Cost (USD) |
|---|---|---|
| Flat bar or pry bar | Lifting stones | $15 to $30 |
| Rubber mallet | Setting and tamping | $10 to $20 |
| Hand tamper | Compacting base | $25 to $40 |
| Plate compactor (rental) | Full path base work | $50 to $100 per day |
| Crushed stone #57 (0.5 cu ft per stone) | Sub-base | $4 to $6 per bag |
| Coarse sand or stone dust (0.25 cu ft per stone) | Bedding layer | $4 to $8 per bag |
| Level (2-foot) | Checking grade and slope | $15 to $30 |
| Landscape fabric (optional) | Weed suppression | $20 per 100 sq ft |
| Safety glasses and gloves | Eye and hand protection | $15 combined |
Cost per stone (DIY materials only): roughly $5 to $15, depending on size. Hire a pro? Expect $15 to $30 per square foot for full-path installation as of 2026, which usually makes sense for paths of 50+ square feet, but is overkill for re-leveling a handful of stones.
Mistakes That Send You Back to Square One Next Year
Most stepping-stone repairs fail for the same handful of reasons. Avoid these and your fix will hold for a decade instead of a season.
Setting the stone directly on soil. This is the single biggest mistake. Soil stays soft, especially after rain. A stone set on bare earth will sink within months, no matter how well you tamped it.
Always use a compacted crushed-stone sub-base.
Skipping compaction of the sub-base. "Compacted in 2-inch lifts" sounds like extra work. It isn't optional. ICPI specs and university extension guidance both confirm that uncompacted base settles under load, usually unevenly, within the first year.
Using play sand or fine masonry sand for the bedding layer. Fine sand washes out fast. Coarse concrete sand (sometimes called "paver sand") or stone dust locks together and resists washout. The bag label matters.
Forgetting slope. A perfectly flat path in a lawn will hold water. Standing water softens the base and migrates fines. A 1/8-inch-per-foot slope is invisible to the eye but solves the drainage problem.
Re-leveling without fixing the cause. Pumping sand under a sinking stone without addressing the base is treating the symptom. You'll be back next year, same problem, same stone.
Setting stones too high. A stone sitting 1 inch above the lawn is a twisted ankle waiting to happen, and a dull mower blade the first time you mow. Aim for the stone surface to sit flush, or up to 1/4 inch above the surrounding turf to account for grass growth.
How to Stop the Problem From Coming Back: Long-Term Path Maintenance
A well-built path needs very little upkeep, but a little goes a long way. A 10-minute check each spring will catch small issues before they become a full re-leveling job.
Annual spring check. Walk the path and look for rocking, sinking, or joint washout. Address small dips with a sand top-up before they grow.
Top up the joints. Polymeric sand and regular jointing sand both erode over time. A quick sweep of fresh sand each year keeps the stones locked and stops weeds from taking hold.
Watch the surrounding turf. Grass that dies back along the path edges is a sign of either shade or a buildup of thatch. A thin layer of topsoil and reseeding the edges keeps the path looking intentional and stops the lawn from receding.
Manage nearby trees. If you have trees within 10 feet of the path, monitor for root growth. A root barrier installed during a full reset can prevent heave for the life of the path.
Regrade if water starts pooling. If you see standing water after rain that wasn't there before, the path has settled against grade. Lift the affected stones, re-screed the bedding, and re-set with a proper slope.
In most climates, a properly built path with a 4-inch compacted sub-base will go 10 to 15 years before needing any major work. Skip the base, and you're looking at annual maintenance.
Frequently Asked Questions
How often should I re-level stepping stones in a lawn?
If your path was built on a proper 4-inch compacted sub-base, you shouldn't need to re-level for 10 to 15 years. Paths set directly on soil typically need re-leveling every 1 to 3 years. Annual spring inspection catches small issues before they grow.
Can I level a stepping stone without lifting it out?
Yes, for a stone that has dropped 1/2 inch or less. Slide a flat bar under one edge, lift slightly, and pump coarse sand underneath with a squeeze bottle. Tamp the stone level and water the joint.
This is a 15-minute fix, not a permanent one. Expect to repeat it.
What's the best base material under stepping stones?
Crushed stone (ASTM #57 grade) or decomposed granite, compacted in 2-inch lifts to a total depth of 4 inches. Bedding layer of 1 inch of coarse concrete sand or stone dust goes on top. ICPI Tech Spec 2 and most university extension services recommend this combination for pedestrian paths.
Why are my stepping stones lifting up instead of sinking?
In cold climates (USDA Zones 3 through 7), it's usually frost heave. Water under the stone freezes and expands, pushing the stone up. The fix is better drainage: dig the base 2 inches deeper and fill with open-graded crushed stone so water has somewhere to drain before it freezes.
In warm climates, lifted stones usually mean root heave from nearby trees or shrubs.
Should I use polymeric sand or regular sand between stepping stones?
Polymeric sand hardens when wet and resists washout and weeds better than regular sand. It costs more (about $15 per 50-pound bag versus $5 for regular sand) and requires careful installation. For a lawn path that gets a lot of rain or sprinkler overspray, polymeric sand is worth the upgrade.
For a dry, low-traffic path, regular coarse sand swept into the joints works fine.
Is it cheaper to fix stepping stones myself or hire a landscaper?
For 1 to 5 stones, DIY is far cheaper. Materials run $5 to $15 per stone, and most homeowners can finish a single stone in 20 to 45 minutes. For a full-path rebuild of 50+ square feet, professional installation runs $15 to $30 per square foot as of 2026, while DIY materials run $2 to $5 per square foot.
The trade-off is time: a pro crew does a full path in a day, while a DIYer should plan a full weekend.
The Short Version: Which Method Should You Use?
If one or two stones are rocking and the base underneath looks solid, do the quick sand-pump patch. If the stone is sunk, lifted, or the base feels soft, lift it and do a full rebed with a proper 4-inch sub-base. If the whole path is failing, plan a weekend and rebuild the base on every stone.
The fix is the same on each one, and doing the whole path at once means you won't be back next spring fixing the next one.

Similar Posts