Winterize Outdoor Spigot Without Shut Off Valve: 7 Easy
Lead Turfgrass & Lawn Care Specialist at Totally Green Lawn · Certified Turfgrass Specialist (CTS), Master Gardener, B.S. in Agronomy & Turf Science · 14+ years in residential turf management, organic fertilization, and weed science
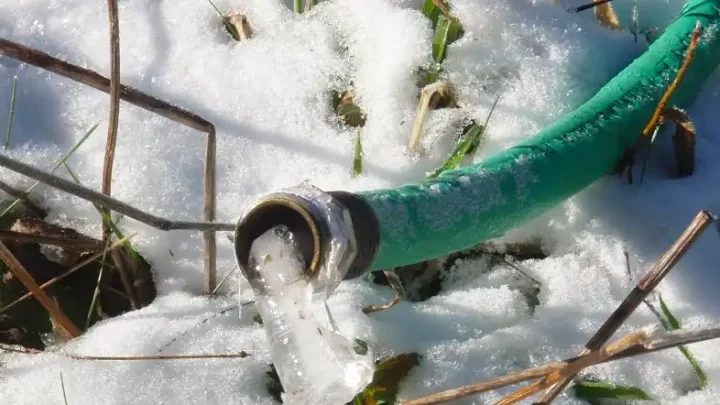
Learning how to winterize outdoor garden hose spigot without shut off valve is a fix most homeowners put off until the first hard freeze is already on the radar. The problem is that without an interior valve, you cannot just turn off the water and call it done. Residual water sits in the supply line, and once temps drop below about 20°F (-6°C) that water expands roughly 9% as it freezes, which is more than enough to split copper, PEX, or PVC.
The good news is you have real options. Frost-free sillcocks, insulation covers, heat cable, and interior shutoff retrofits each solve a different version of the same problem. The right choice depends on what kind of spigot you have, what your wall looks like behind it, and how cold your winters actually get.
Below, as of 2026 building guidance, we'll walk through how to figure that out and exactly what to do once you do.

Image source: Bing (Web (fair-use with source credit))
Quick Answer
You can winterize an outdoor spigot without a shutoff valve. Disconnect every hose first. Identify whether you have a frost-free sillcock or a standard hose bibb.
Then choose one of three methods: insulate the exterior spigot, install heat tape on the supply line, or shut off the main water and drain the line. Always drain residual water after shutting supply. Each method has tradeoffs in cost, effort, and reliability.
Why a Spigot Without a Shutoff Is a Different Problem
A standard outdoor faucet has a simple job. You turn the handle, water flows. In winter, the same design becomes a liability.
Water sits in the pipe between the exterior handle and wherever the supply line meets warm indoor air. Once that waterline drops below freezing, the pipe becomes a pressure vessel with no relief valve.
Most homes built after the mid-1990s have a frost-free sillcock. That design moves the actual shutoff valve 6 to 12 inches inside the heated wall, so the water column stays inside conditioned space. Older homes, mobile homes, and many DIY additions still have a standard hose bibb where the valve sits right at the exterior wall.
Both can fail, but they fail in different places and require different fixes.
If you cannot find an interior shutoff for your outdoor spigot, you are dealing with one of three real situations:
- The spigot is frost-free but the slope is wrong, so water does not fully drain out
- The spigot is a standard hose bibb with no indoor valve at all
- There is an indoor valve, but you cannot find it, or it is behind a finished wall
Each of those needs a different approach, and picking the wrong one is the most common reason a "winterized" spigot still bursts.
First, Figure Out What Kind of Spigot You Actually Have
This is the single step most guides skip, and it is the reason so many winterizing attempts fail. Before you buy a cover, install heat tape, or drain the line, look at your spigot and answer three quick questions.
Is the stem long or short?
A frost-free sillcock has a noticeably long stem, usually 6 to 12 inches between the handle and the wall. A standard hose bibb has a short stem, with the handle almost flush against the siding or brick. Manufacturer specs from brands like Woodford and Prier confirm frost-free models are sold in 4, 6, 8, 10, 12, and 14-inch lengths to match wall thickness.
Where is the vacuum breaker?
Most outdoor faucets made after 2004 have an anti-siphon vacuum breaker on top, a small plastic or brass cap with a little hole. If the vacuum breaker is loose, dripping, or has been removed and replaced with a cap, the spigot cannot fully drain even if the rest of the design is correct. That is one of the most overlooked causes of freeze damage.
Does the spigot slope slightly downward toward the outside?
This matters more than most homeowners realize. A frost-free sillcock only works if it is installed with a slight downward pitch to the outside. That pitch is what lets residual water drain out when the handle is closed.
If your spigot is level or pitched the wrong way, gravity keeps water sitting right where it freezes.
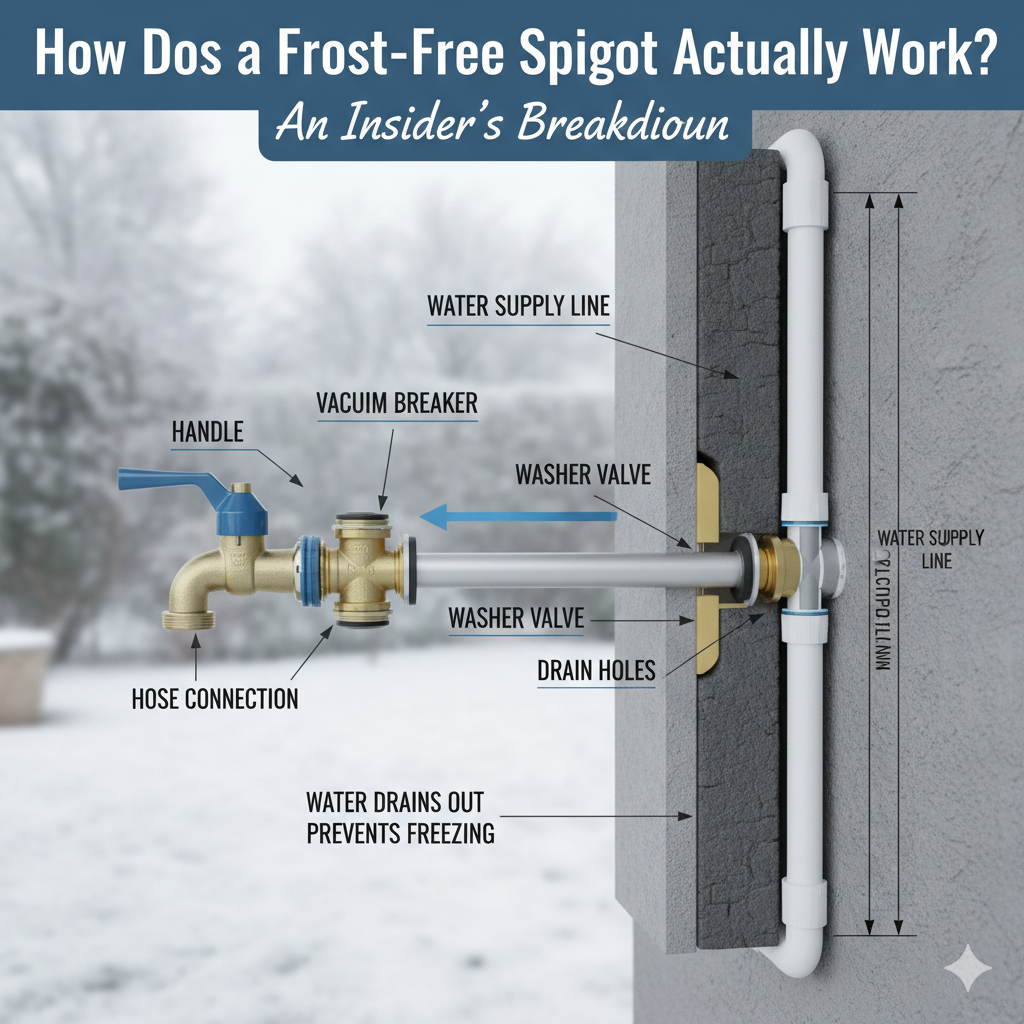
Image source: Bing (Web (fair-use with source credit))
If you can see a long stem, a working vacuum breaker, and the spigot slopes outward, you almost certainly have a frost-free model. You still need to winterize it, but your job is much easier. If any of those checks fail, your situation is closer to a standard hose bibb, and the next section matters more.
The Three Real Ways to Winterize Without an Interior Valve
When you cannot shut off the water locally, you have three honest options. Each one trades cost, effort, and reliability differently. Pick the one that matches your situation, not the one a big-box store display pushes on you.
Method 1: Drain the line at the main
This is the most reliable method, and it is the one plumbers use when nothing else is available. You turn off the main water supply to the house, open the outdoor spigot and a few interior faucets to break the vacuum, and let the line drain by gravity. Then you close everything back up and reopen the main.
Pros:
- Works on any spigot type
- Costs nothing
- Removes the freeze risk entirely for the winterized line
Cons:
- Loses water to the rest of the house during work
- Requires everyone in the home to avoid running water for 15 to 30 minutes
- You must remember to reopen the main, or you will find out the next morning
Best for: homes with no interior valve, no crawlspace access, and no electrical outlet near the spigot for heat tape.
Method 2: Insulate the exterior spigot
This is the cheap and easy method that works about 80% of the time in zones 4 to 7. You disconnect every hose and accessory, then either install a foam dome cover or wrap the spigot and the first 12 to 18 inches of exposed pipe with foam pipe insulation. Quality foam covers from brands like Frost King have an R-value around R-3 to R-5, which buys you several degrees of protection.
Pros:
- Fast, usually under 10 minutes
- Costs $5 to $30
- No tools required
- Reusable year after year
Cons:
- Does not add heat, just slows heat loss
- Fails in extreme cold or windy exposures
- Useless if the spigot itself is not a frost-free design
- Covers can blow off in high wind unless secured
Best for: frost-free sillcocks in moderate climates where temps rarely stay below 15°F for more than a few hours.
Method 3: Install heat tape or heat cable
Heat tape is the heavy-duty method. Self-regulating heat cable like the Heat-Line Pal or Frost King HW2 wraps directly on the supply pipe and only uses power when temperatures drop near freezing. Most operate from -40°F to 110°F and draw 5 to 8 watts per foot.
Aggregate reviews and manufacturer data confirm a properly installed heat cable will keep a pipe above freezing even at sustained -20°F ambient.
Pros:
- Works in the harshest climates
- Activates only when needed
- Can be left on all winter unattended
Cons:
- Requires a GFCI-protected outdoor outlet
- $25 to $80 for the cable, plus electricity cost
- Failure mode is silent, so you won't know it's broken until the pipe is already frozen
- Useless if the spigot is buried in a finished wall with no exposed pipe
Best for: standard hose bibbs, exposed pipes in unheated crawlspaces, and any location with a long history of frozen pipes.

Image source: Bing (Web (fair-use with source credit))
If-Then Decision Branch
If your spigot is frost-free and properly pitched, then Method 2 (insulation) is enough.
If your spigot is a standard hose bibb, then choose Method 1 (drain) or Method 3 (heat tape).
If you have no interior access and no exterior outlet, then you must use Method 1.
If your winters regularly drop below 0°F, then Method 3 is the only reliable long-term answer.
Step-by-Step: The Best Method for Most Homes
For the typical homeowner with a frost-free sillcock and no interior valve, here is the method that combines reliability, cost, and effort best. It is what most licensed plumbers recommend in zone 5 and warmer zones 6 and 7, and it costs under $20 in materials.
Step 1: Disconnect everything attached to the spigot
Remove every hose, splitter, timer, or Y-connector. This is non-negotiable. A frost-free sillcock cannot drain properly if anything is attached to the outlet, because a closed hose holds water in the vacuum breaker.
The University of Minnesota Extension and most building guides call this out as the single most common cause of frozen "frost-free" faucets.
Step 2: Open the spigot fully and let it drain
Turn the handle to the open position and leave it there. On a properly installed frost-free sillcock, you will see water run, then slow to a drip, then stop. That last bit of dripping is the residual water in the stem finally clearing out.
Wait until it stops on its own, which usually takes 30 to 90 seconds.
Step 3: Check the vacuum breaker
Look at the small cap on top of the spigot. Wiggle it gently. If it spins freely or drips when the spigot is closed, it is working as designed.
If it is missing or has been replaced with a solid cap, water is trapped inside the vacuum breaker body. Replace it with the correct anti-siphon cap, available at any plumbing supply store for $5 to $10.
Step 4: Insulate the exterior
Slide a foam dome cover over the spigot and push it snug against the wall. If the cover does not have a built-in gasket, wrap the spigot in a layer of foam pipe insulation first. The goal is to block wind from hitting the metal directly, since wind chill is what pushes an otherwise "safe" spigot into the danger zone.
Step 5: Mark the spigot
Tie a piece of bright tape or a ribbon around the spigot handle. This sounds silly, but it is the cheapest insurance against someone in the house turning the spigot back on mid-winter. If the spigot is opened after a hard freeze, even a frost-free model can split if the water is already partly frozen in the supply line.
Step 6: Document the date
Write the date you winterized on the inside of the cover with a marker. Come spring, you will thank yourself. Most forgotten spigots get a cover in October, get used one more time in November, and never get re-winterized before December's first real cold snap.
Common Mistakes That Still Cause Burst Pipes
Most failed winterizations are not caused by bad luck. They are caused by skipping one of the same handful of steps every year. Aggregate claims data from major home insurance carriers show that burst pipes from outdoor faucets consistently rank in the top five winter water-damage sources, and the same patterns show up in nearly every claim.
Leaving the hose attached
This is the number one cause, every single year. A frost-free sillcock drains through the vacuum breaker when the handle is open. The moment you screw a hose onto the outlet, that drain path closes off.
Water stays trapped in the stem and freezes inside the heated wall cavity.
Forgetting the vacuum breaker
If the small cap on top of the spigot is loose, missing, or replaced with a solid plug, the spigot cannot drain. Always test it in fall with a gentle wiggle and a visual check.
Insulating over a closed valve
Some people close a shutoff that does not exist, or close the wrong valve, and then cover the spigot. A closed valve with no drain equals a burst pipe waiting to happen. Open the spigot after closing any valve.
Using a plastic bag instead of a real cover
A bread bag, a garbage bag, and a rubber band do almost nothing. They block nothing in a real cold snap. Use a foam cover with a proper gasket, or do not bother.
Skipping the spring inspection
A spigot that survived winter can still leak once it thaws. The first warm day is when to check the handle, the vacuum breaker, and the drywall behind the spigot for any sign of moisture. A small drip now becomes a mold problem in May.
Cost, Tools, and Time You'll Need
For most homeowners, the whole job is under $30 and under an hour. Here is what you actually need to do the methods described above, without buying anything you will not use.
| Item | Approx. Cost | Where You Use It |
|---|---|---|
| Foam dome faucet cover | $6 to $15 | Method 2 (insulation) |
| Foam pipe insulation (6 ft) | $4 to $8 | Wrapping exposed pipe |
| Self-regulating heat cable (6 ft) | $25 to $45 | Method 3 (heat tape) |
| Anti-siphon vacuum breaker cap | $5 to $10 | Replacing a missing or broken cap |
| Adjustable wrench | Already owned | Removing old vacuum breaker |
| Marker and bright tape | $1 | Marking the winterized spigot |
If you choose Method 1 (drain at the main), the only cost is your time. Twenty minutes to find the main, 15 to drain, 5 to reopen. No materials needed.
Most homeowners who buy a foam cover, replace a worn vacuum breaker, and spend 30 minutes on a Saturday in October solve the problem for the entire winter. Heat cable adds another $30 to $50 but is the right call for older homes, standard hose bibbs, or properties with a documented freeze history.
Your Winter Prep Checklist Before the First Hard Freeze
Run this list the weekend before your area's average first frost. In most of zones 5 through 7, that lands between mid-October and early November. Do not wait for the first 32°F forecast to appear on your weather app.
By then, overnight lows can already be in the danger zone for an unprepared spigot.
- Walk outside and disconnect every hose, splitter, timer, and sprinkler from every outdoor spigot
- Open each spigot fully, let it drain, then leave it in the open position
- Test the vacuum breaker on top of each spigot and replace any that are loose or missing
- Inspect each spigot for the correct outward slope, especially on older homes
- Install foam covers on every exterior spigot, even ones you think are frost-free
- Wrap any exposed supply pipe in unheated crawlspaces, garages, or exterior walls
- Locate your main water shutoff and make sure everyone in the house knows where it is
- Mark each winterized spigot with bright tape so nobody turns it on mid-winter
- Write the date on the inside of each cover for your spring inspection
- Check the GFCI outlet near any spigot you plan to use heat cable on
If your home has a history of frozen pipes, a single hard freeze can still overwhelm a foam cover. In that case, plan on installing heat cable before Thanksgiving, or budget for a plumber to add a real interior shutoff valve next spring. The International Code Council (ICC) and most modern building codes now require an interior valve for any new outdoor faucet installation, so if your home predates that requirement, you are carrying a risk newer homes do not have.

Similar Posts