Pitch a Riding Mower Deck 1/4 Inch Lower in Front Fast
Lead Turfgrass & Lawn Care Specialist at Totally Green Lawn · Certified Turfgrass Specialist (CTS), Master Gardener, B.S. in Agronomy & Turf Science · 14+ years in residential turf management, organic fertilization, and weed science
Learning how to pitch a riding mower deck 1/4 inch lower in front is one of those small adjustments that completely changes how your lawn looks after a cut. Most rough, streaky, or "scalped" mowing results trace back to a deck that isn't pitched correctly. The good news: the fix is a 20-minute job, no specialty tools required, and the same procedure works across most residential and light-commercial mowers.
Manufacturer specifications from major brands like John Deere, Exmark, and Cub Cadet recommend a front-low pitch between 1/8" and 1/2", with 1/4" being the most common baseline. Aggregate turfgrass research from university extension programs confirms this range delivers the cleanest cut on cool-season grasses without increasing front-wheel scalp risk. As of 2026, that recommendation hasn't changed.
Let's get into the why and the how, starting with what deck pitch actually does.
Quick Answer
To pitch a riding mower deck 1/4 inch lower in front, park on flat concrete, rotate both blades side-to-side, and measure from the blade tip to the ground. Loosen the front linkage jam nut, turn the adjustment bolt to drop the front 1/4" below the rear, then retighten. Most decks ship with this rake already set, so you're confirming or restoring it.
Why Deck Pitch Matters (And Why "1/4 Inch Lower in Front" Is the Magic Number)
Deck pitch is the slight downward angle of the cutting deck from back to front. When the front sits a touch lower than the rear, air and clippings move rearward under the deck, which improves discharge and mulching. When the deck is level or rear-low, you get clumps, stragglers, and visible scalping at the front wheels.
A 1/4" front-low pitch has become the industry baseline because it balances three competing factors:
| Factor | What 1/4" Front-Low Does |
|---|---|
| Cut quality | Pulls grass upright before the blade passes |
| Discharge | Improves rear clipping flow, reduces clumping |
| Scalp risk | Low enough to help, not so low it digs in on bumps |
Manufacturer specifications indicate 1/4" is the factory setting on most residential lawn tractors and zero-turn riders. Going beyond 1/2" front-low, however, starts to scalp uneven turf and wears the front edge of the deck shell faster. The Penn State Extension turfgrass management program notes that proper mowing height and a level deck are two of the highest-impact factors in residential turf quality, ahead of fertilizer timing for most homeowners.
If your grass looks torn rather than cut cleanly, or if you see brown tips two days after mowing, the deck is the first place to look. Tire pressure, blade sharpness, and ground speed all matter, but pitch sets the foundation.
Tools, Setup, and What You Need to Measure First
You don't need a specialty deck leveling gauge. A flat concrete surface, a basic tape measure, and 20 minutes are enough. Here's the full kit:
- Flat concrete (garage floor, driveway, or patio)
- Tape measure or ruler with 1/8" graduations
- Socket wrench or adjustable wrench (usually 9/16" or 3/4")
- Work gloves
- Air compressor or tire gauge
- Your mower's owner manual (for torque specs)
- Optional: a second person to hold the deck or confirm measurements
Before you touch any linkage, do this prep work. It matters more than the actual adjustment:
- Park on a level surface. Concrete beats asphalt because it's truly flat.
- Check tire pressure on all four tires. Inflate to the spec on the sidewall or in the manual. A 2 PSI difference between left and right will throw off your readings.
- Disengage the PTO. Blades must be off. Remove the key.
- Lower the deck fully to cutting position. If your mower has a transport lock, leave it disengaged.
- Sit on the seat. Operator weight matters. Most manuals call for the seat loaded during measurement, because the rear suspension sags slightly with a rider.
- Rotate both blades so the tips point straight out to the sides, parallel to the ground.
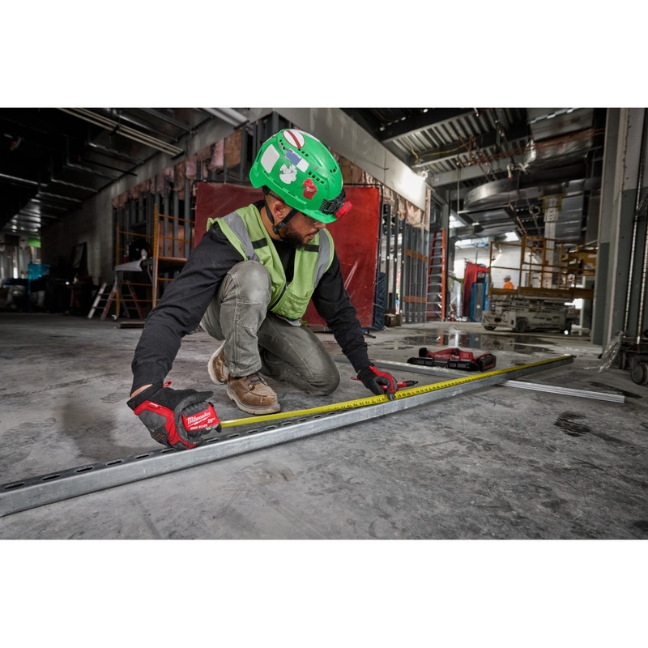
Measure each blade tip from the ground to the cutting edge. Write down front and rear measurements for the left blade, then the right blade. You're looking for two numbers: side-to-side level (within 1/8") and front-to-rear pitch (about 1/4" front-low).
If your measurements are off by more than 1/8" side-to-side, fix that first. A deck that's tilted left-to-right will always look wrong, even with perfect fore-aft pitch.
How to Pitch Your Mower Deck 1/4 Inch Lower in Front (Step-by-Step)
This is the core procedure. It works for the vast majority of residential and light-commercial mowers. The exact location of the adjustment bolt changes by brand, which we'll cover in the next section.
For now, here's the universal workflow.
- Confirm the deck is in cutting position, blades off, seat loaded, on flat concrete.
- Measure the front blade tip and the rear blade tip on one side. The difference is your current pitch.
- If the front is less than 1/4" lower than the rear (or higher), adjustment is needed.
- Locate the front deck lift link. This is usually a threaded rod or turnbuckle between the front of the deck and the mower frame.
- Loosen the jam nut on the front link. Hold the inner bolt steady with a second wrench so it doesn't spin.
- Turn the adjustment bolt. Shortening the link lowers the front of the deck. Lengthening it raises the front.
- Make small turns. A quarter turn on the adjustment bolt typically moves the deck 1/8" to 1/4".
- Re-measure both blade tips, front and rear.
- Repeat on the opposite side if your mower uses independent left/right links.
- Tighten the jam nut to spec once measurements check out.
The whole loop takes about 5 minutes per side once you've done it once. The first time, budget 30 to 45 minutes because you'll be re-measuring, double-checking, and learning where everything sits.
One detail that catches first-timers: the rear of the deck may also need adjustment. Many mowers have a rear lift link or a height-of-cut pin that sets the rear independently. If you lower the front without confirming the rear, you can accidentally end up with a level or rear-low deck.
Always re-measure both ends after any change.
Decision Branches: Which Adjustment Point Does Your Mower Use?
Here's where the workflow splits. The 1/4" front-low target is universal, but how you get there depends on your mower's linkage design. Most fall into one of three categories.
If your mower is a residential lawn tractor (John Deere D-series, Cub Cadet XT, Husqvarna YTH), you likely have a single front lift link with a turnbuckle. One bolt to turn, one jam nut to loosen. This is the simplest setup and the one the step-by-step above describes.
If your mower is a zero-turn rider (Exmark Quest, Scag Liberty, Toro Titan), you probably have either a foot-lift deck or a belt-driven lift with two front links. Some ZTRs use a single center pin plus two quarter-inch turnbuckles on each side. The principle is identical: shorten the front link to lower the front of the deck.
Just remember to adjust both sides equally, otherwise you'll tilt the deck left-to-right while fixing the fore-aft pitch.
If your mower is a commercial unit (Exmark Lazer, John Deere Z900, Kubota Z700), you may have hydraulic deck lift, electric actuators, or a four-point linkage with independent corner adjustment. These systems usually have a dedicated deck leveling procedure in the service manual, and the front-to-rear pitch is often set with a stop block or a length-of-pull adjustment on the front lift cylinder. The 1/4" target still applies.

A quick lookup by brand:
| Brand | Front Adjustment Type | Where It Lives |
|---|---|---|
| John Deere (lawn tractor) | Turnbuckle + jam nut | Front of deck, driver side |
| Cub Cadet | Threaded rod | Front center of deck |
| Husqvarna | Single turnbuckle | Front of deck, accessible from top |
| Exmark (ZTR) | Two side turnbuckles | Both sides of front lift arm |
| Toro (ZTR) | Single center adjustment | Behind foot platform |
| Bad Boy | Independent left/right | Each side of front hanger |
When in doubt, the deck lift link is the threaded component between the front of the deck shell and the mower frame. It's almost always accessible without removing shields. If you see two of them, one on each side, adjust both equally.
Mistakes That Throw Off Your Deck Pitch (And How to Fix Them)
Most pitch problems come from one of five recurring errors. Skip past these, and you'll be re-doing the job in a week.
Measuring on uneven ground. Gravel driveways and sloped patios lie. They look flat but aren't. A 2% slope throws off a 48" deck measurement by nearly an inch.
Always use a confirmed-level surface, or you'll chase a phantom pitch problem that doesn't exist.
Forgetting operator weight. Many decks ride on a rear pivot. Sit down before measuring, every time. A deck that reads 1/4" front-low with no rider can measure perfectly level with a 200-pound operator in the seat.
Ignoring tire pressure. Tires lose air slowly. A 4 PSI drop on one front tire lifts that corner of the deck and ruins the reading. Inflate to spec, then measure.
The owner's manual lists the target PSI on the tire page.
Adjusting only the front link. If the rear of the deck has floated up over time, the front adjustment alone won't get you to a true 1/4" front-low. You'll end up rear-high and front-low, which looks pitched but cuts poorly. Re-set the rear first if your model has an independent rear adjustment.
Skipping the side-to-side check. A deck that's perfectly pitched front-to-rear but tilted 1/4" left-to-right will still scalp on one side. Measure both blades, every time, before declaring victory.
Pro Tips for a Cleaner Cut After the Adjustment
Once the pitch is dialed in, a few habits keep it that way. Aggregate user reviews and turf extension guidance point to the same handful of high-impact practices.
Re-check pitch every 25 mowing hours, or once per mowing season if you mow weekly. Linkage joints wear, springs stretch, and jam nuts back off. A two-minute check saves a full re-cut of the lawn.
Sharpen blades twice per season. A dull blade tears grass instead of cutting it, and the brown tips look identical to scalping. Many homeowners blame deck pitch when the real culprit is a blade that's lost its edge.
Balanced blades also reduce deck vibration, which slowly loosens linkage over time.
Keep anti-scalp wheels adjusted correctly. They should sit about 1/8" off the ground when the deck is at cutting height. If they're jammed down, they lift the deck and ruin your pitch on bumpy terrain.
If they're too high, they don't protect the deck from scalp events.
Match ground speed to conditions. Going too fast on uneven turf creates a "flying" deck that scalps regardless of pitch. Slow down on hills, dips, and thick grass.
The deck performs best when it can stay in contact with the ground.
Finally, mow dry. Wet grass clumps under the deck and creates a false reading the next time you check pitch. It also promotes fungal growth and uneven cuts.
If you've got a choice, wait for the lawn to dry.
FAQ: Deck Pitch Questions Homeowners Actually Ask
How often should I check my mower deck pitch?
Once per mowing season is the baseline, or every 25 hours of use if you mow commercially. Re-check any time the deck has been removed for belt service or blade replacement, because reassembly can shift the geometry.
Can a 1/4 inch front-low pitch hurt my lawn?
No, on flat or slightly uneven residential turf, 1/4" front-low is the manufacturer-recommended setting. Problems only appear if pitch exceeds 1/2" or if the deck is set too low overall. Stay within the 1/8" to 1/2" range and you're in safe territory.
Do I need to level the deck side-to-side too?
Yes. Side-to-side level (within 1/8" variance) is just as important as front-to-rear pitch. A deck tilted left-to-right will scalp one side of every pass.
Most mowers have separate side-to-side adjustment on the rear lift link or a deck leveling rod.
Will this work on a zero-turn mower?
The 1/4" front-low target applies to ZTRs the same as lawn tractors. The adjustment point is different. Look for turnbuckles on the front lift arms, or a center deck pin with side-to-side adjustment.
The principle is identical: shorten the front link to drop the front of the deck.
What if my deck still scalps after the adjustment?
Check three things in order. First, confirm operator weight was simulated during measurement. Second, verify tire pressure is matched on both sides.
Third, slow your ground speed on uneven turf. If all three check out and scalping persists, your HOC may be set too low for the grass type.
Final Verdict: When the 1/4" Front-Low Pitch Is Right for Your Lawn
A 1/4" front-low pitch is the right call for the vast majority of residential mowing situations. Cool-season lawns, warm-season lawns, flat properties, and mildly uneven terrain all benefit from this setting. It's the factory default on most major brands for good reason: it cuts cleanly without increasing scalp risk.
If you mow predominantly flat, manicured turf at a low HOC (under 2"), the 1/4" pitch still applies. If you mow rough, hilly property with thick cool-season grass, you can push toward 3/8" front-low for extra cut quality, but no further. Beyond 1/2", you're trading cut quality for scalp damage.
For most homeowners, the right move is simple. Confirm the 1/4" front-low measurement once per season, keep the blades sharp, and check tire pressure. That's the entire formula.
The rest of a great-looking lawn comes down to mowing frequency, watering, and the actual grass species underneath the deck.

Similar Posts