How to Test Lawn Mower Safety Seat Switch with a Multimeter
Lead Turfgrass & Lawn Care Specialist at Totally Green Lawn · Certified Turfgrass Specialist (CTS), Master Gardener, B.S. in Agronomy & Turf Science · 14+ years in residential turf management, organic fertilization, and weed science
You flip the key, the engine cranks, and the second you stand up to check the bagger, the whole thing dies on you. If that's happening, the operator presence seat switch is the prime suspect, and the fastest way to prove it is to test lawn mower safety seat switch with multimeter. Most homeowners can sort this in under ten minutes with a basic digital multimeter and a clear plan.
The seat switch sits inside a bigger safety interlock loop that includes the brake switch, the PTO switch, and the ignition module. Per ANSI/OPEI B71.1 and ISO 5395 standards for consumer turf equipment, the operator presence control (OPC) must cut the engine if the operator leaves the seat with the blades or transmission engaged. So when that loop is broken, the engine shuts down to protect you.
Let's figure out exactly where it's broken.
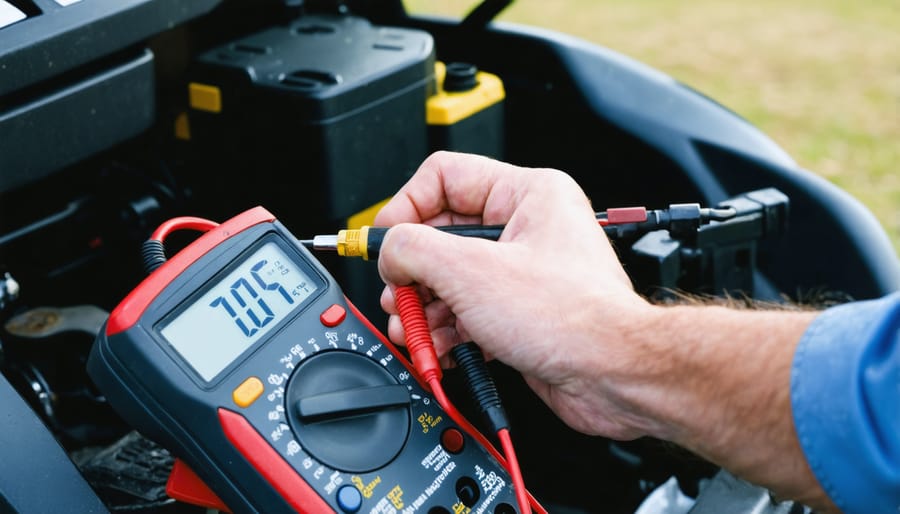
Image source: Bing (Web (fair-use with source credit))
Quick Answer
Set your multimeter to continuity mode. Unplug the seat switch connector. Touch the two multimeter probes to the switch terminals.
With no one in the seat, you should see OL (open loop). With someone in the seat, you should see 0 ohms and hear a beep. If those readings are reversed, the switch is bad.
What the Seat Switch Actually Does (and Why It Kills Your Engine)
The seat switch, sometimes called the operator presence switch, is a simple normally open or normally closed contact that sits under the seat pan. When the operator sits down, a plunger, magnet, or weight mechanism closes (or opens) the circuit. That change tells the mower's safety module: a human is in position, so it's safe to run with the blades engaged.
If the contact is dirty, the plunger is broken, or the wiring is corroded, the module thinks the seat is empty. It kills the engine to comply with the safety standard. The switch itself usually costs $15 to $40 for an aftermarket unit, but the real value of testing is avoiding a wild goose chase through the ignition coil, solenoid, or PTO clutch.
Here's the logic in plain terms:
- Mower starts fine, dies when you stand up: seat switch or its wiring is the first place to look.
- Mower won't crank at all, even with the brake pressed: the interlock loop has a break, and the seat switch is one of the suspects.
- Mower runs only when the seat switch is bypassed: the switch or its harness is the confirmed problem, and bypassing it permanently is dangerous and not compliant with the original safety design.
Most modern riding and zero-turn mowers built after the early 2000s use a 2-wire or 4-wire seat switch. The 2-wire version is the most common in residential machines. Older or commercial units sometimes use a magnetic reed switch, which works the same way electrically but has no moving plunger.
Prep Before You Touch a Wire: Tools, Safety, and Mower Setup
Before you grab the multimeter, get the mower into a safe state. A riding mower can weigh 400 to 600 pounds, and a bump start on a hill is a real risk.
Park on a flat, level surface like a garage floor or paved driveway. Engage the parking brake. Disengage the PTO (the blades should not be spinning).
Turn the key to the off position and pull it out of the ignition.
Pull the spark plug wire off the plug and ground it against the engine block. This kills any chance of a crank during your test. If your mower has a battery disconnect, use it.
Otherwise, pop the negative terminal off the battery.
What you need on the bench:
- A digital multimeter with a working continuity (beep) mode and a resistance (ohms) setting.
- A pair of safety glasses.
- A small flashlight or headlamp.
- A clean rag for wiping connectors.
- Your mower's service manual or a printed wiring diagram if you have one.
- Optional: a pick or small flat-blade screwdriver for releasing connector tabs.
Set the multimeter to continuity mode. The dial usually points to a sound wave or diode symbol. Touch the two probes together to confirm the beep works.
If it doesn't, swap the battery in the multimeter before you go further.
Find the Seat Switch on Your Specific Mower
The seat switch is almost always under the seat pan, mounted to the seat bracket or the floor pan directly below where your weight lands. On most residential mowers, you lift the seat and look for a small plastic or metal module with two wires coming out of it. On zero-turn mowers, it can be a flat pad-style switch under the seat, or a pin switch near the seat pivot.
Here's where to look by brand:
- John Deere 100 series: under the seat, on the seat pan bracket. Two spade connectors, normally open.
- Cub Cadet XT series: under the seat, mounted to a metal plate. 2-wire, normally open.
- Husqvarna riding mowers: under the seat, near the front edge. Often a plunger-type switch.
- Troy-Bilt, MTD, Craftsman, Yard Machines: under the seat pan, sometimes hidden under a plastic cover. 2-wire, normally open.
- Toro TimeCutter and SS series: under the seat, rear area. 2-wire, often a magnetic reed design.
- Commercial zero-turns (Exmark, Scag, Bad Boy, Ferris): usually a flat pad or weight sensor under the seat. 4-wire on some models.
Flip the seat up or remove it if your model allows. Look for a switch with a small plunger on top, or a flat pad that gets compressed when you sit. Follow the two wires down to the harness connector.
That's the plug you'll separate for testing.
If you can't find it, check the operator's manual for the "interlock system" or "OPC" diagram. Most manufacturer service manuals show the switch in the electrical schematic. The switch is usually labeled SW-SEAT or OPC on the wiring diagram.
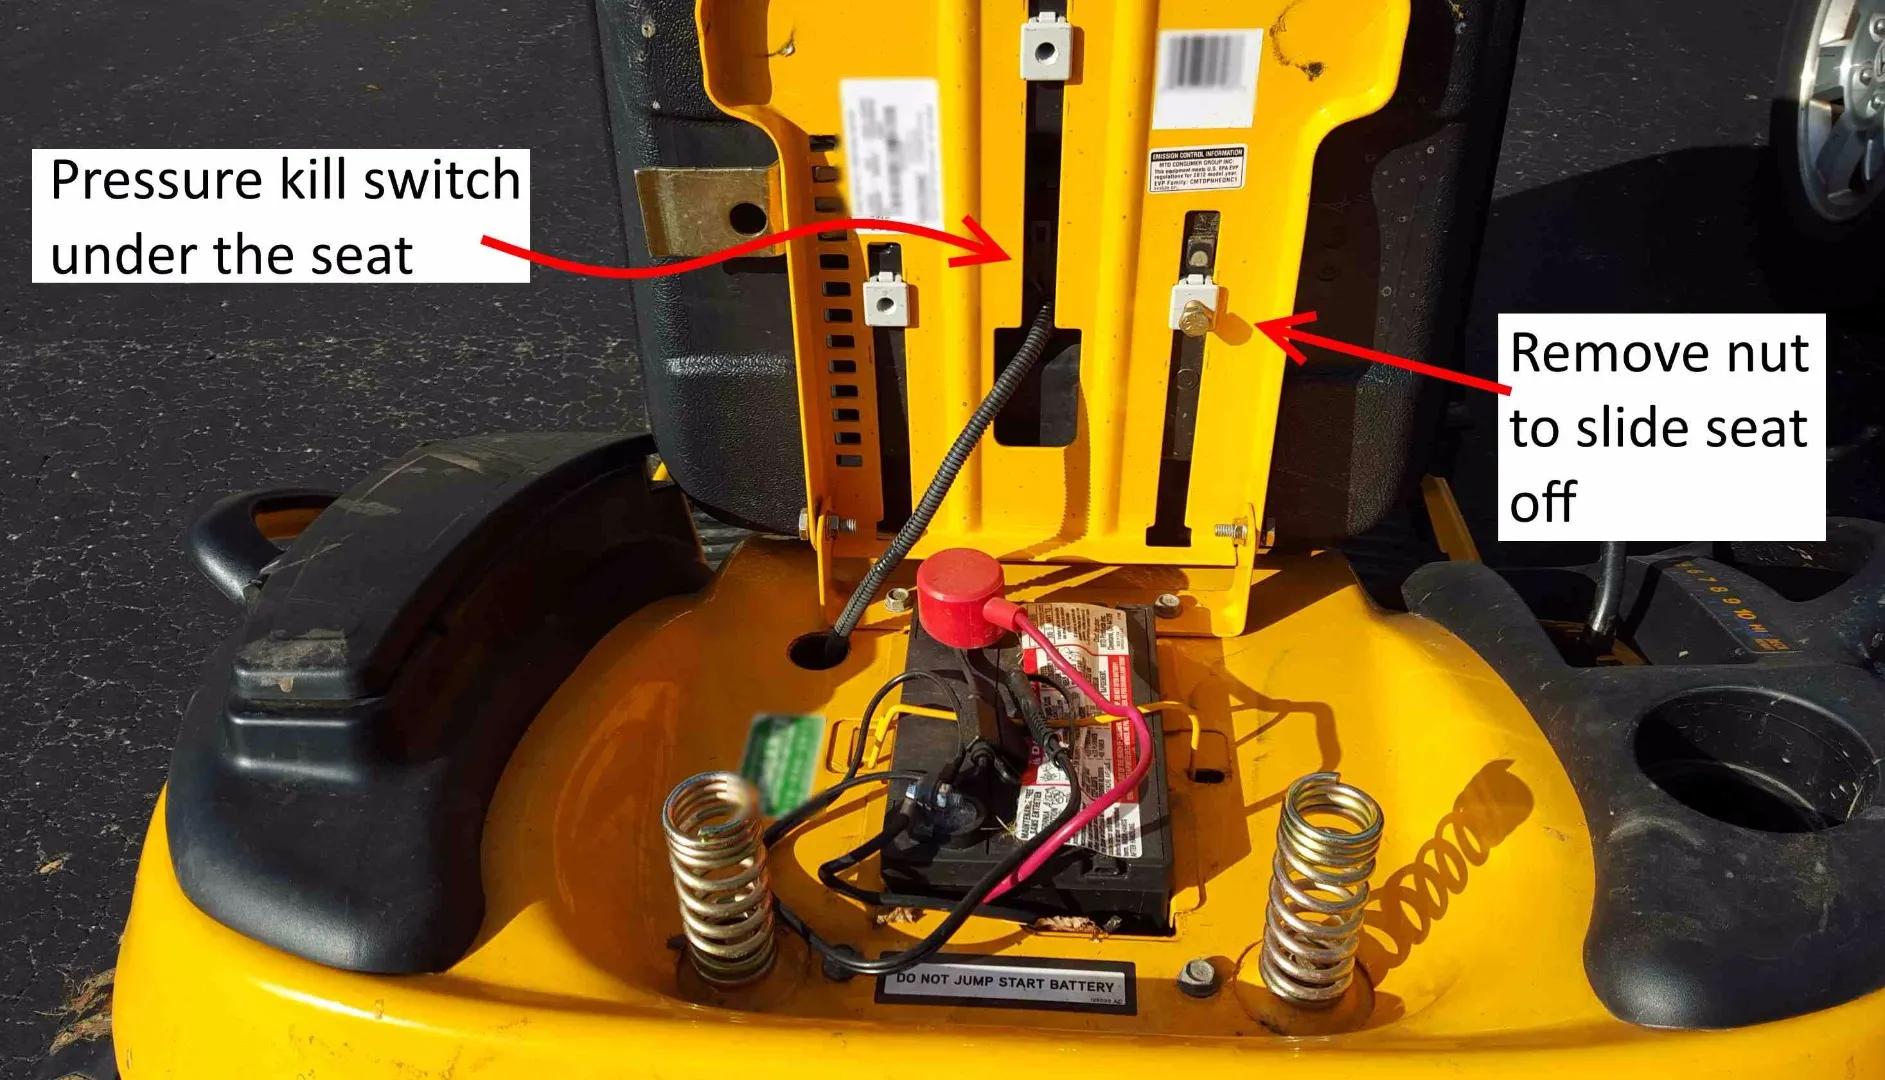
Image source: Bing (Web (fair-use with source credit))
A few telltale signs the switch itself is the failure and not the wiring:
- The seat pan rocks side to side when you sit. That can mean the mounting screws are loose, and the plunger isn't making solid contact.
- You can see green or white corrosion on the switch terminals.
- The plunger is missing, broken, or doesn't spring back up when you lift off the seat.
The Actual Test: Continuity, Resistance, and Voltage Readings
Now to the part that actually answers the question. There are two halves to the test: the switch itself, and the harness feeding it. You want to confirm both before you buy a replacement.
Testing the switch out of the circuit
Unplug the connector at the seat switch. You're now testing the switch alone, with no power on it. This is the safer and more reliable test.
Set your multimeter to continuity mode. Touch one probe to each of the two metal terminals on the switch body. Don't touch the metal probe tips with your fingers, as your body resistance can throw off the reading.
Now perform the test in both states:
- Seat unoccupied (plunger up, or no weight on the pad): if your switch is normally open (the most common type), the multimeter should read OL or "1" on the left side of the display, and it should not beep. That means infinite resistance, which is correct.
- Seat occupied (push the plunger down with your thumb, or press the pad): the reading should drop to 0.0 to 0.5 ohms, and the multimeter should beep steadily. That's continuity, which is correct.
If the readings are reversed, the switch is bad. Replace it.
If you have a normally closed switch (less common, but used on some John Deere and Kubota models), the readings are flipped: 0 ohms with the seat empty, and OL when pressed. Check your service manual to confirm which type you have.
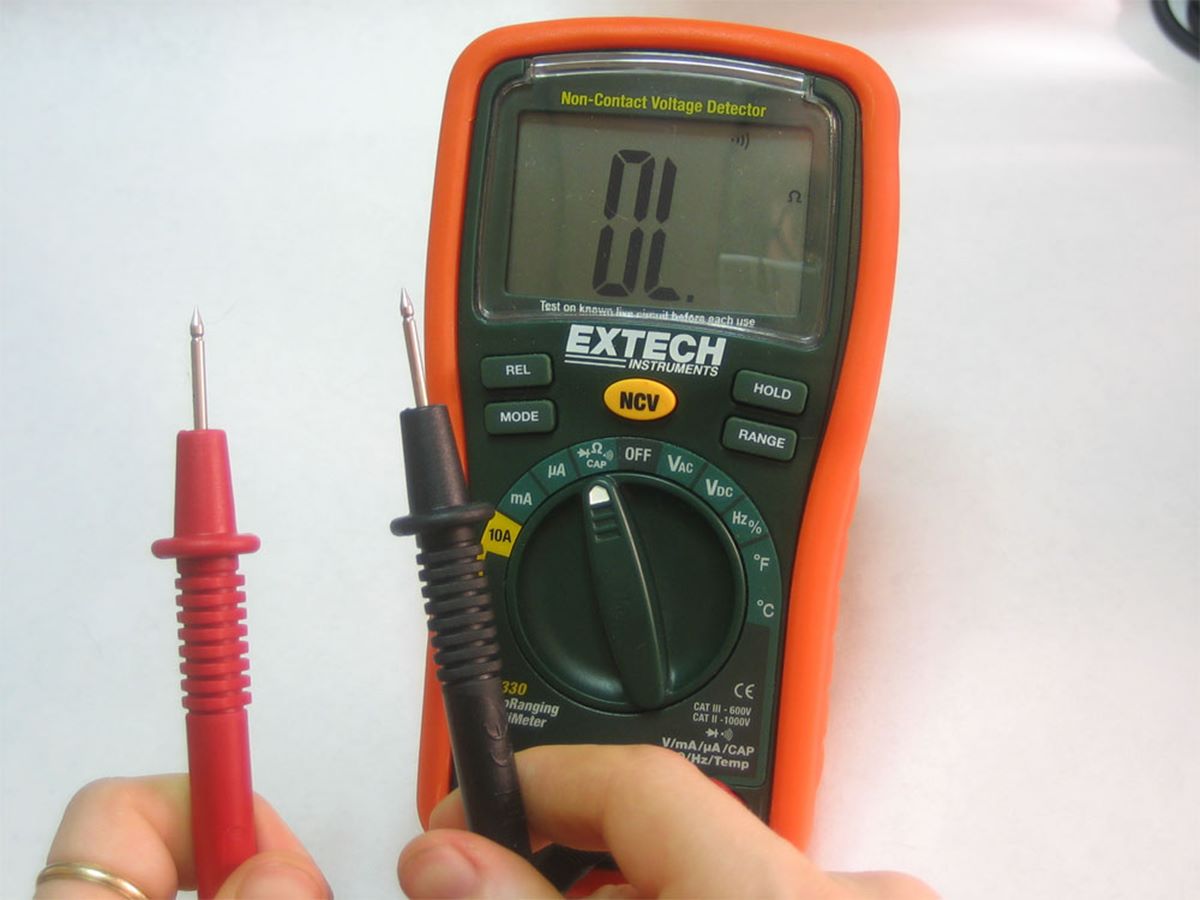
Image source: Bing (Web (fair-use with source credit))
Reading the values
A good reading is sharp and consistent. A bad reading is fuzzy, and that's where most DIYers get confused.
What the numbers actually mean:
- 0.0 to 0.5 ohms: solid contact. Switch is good.
- 1.0 to 5.0 ohms: weak contact. Switch is failing or has corrosion. Clean it first, retest, and if it still reads high, replace.
- OL with seat occupied: switch is open when it should be closed. Replace.
- 0.0 ohms with seat empty: switch is shorted closed. Replace.
- Reading bounces around or beeps intermittently: loose connection, broken wire, or dying switch.
If your multimeter has a MIN/MAX or hold function, you can watch the reading while you wiggle the switch. A flaky switch will show a jumpy reading. A good switch holds steady.
Testing the harness side
Now plug the switch connector back in (or leave it unplugged, depending on what you want to test next) and check the harness side. This step tells you if the safety module is sending the right signal to the switch.
Reconnect the battery if you disconnected it, but keep the spark plug wire off. Turn the key to the "on" position (not start). Set your multimeter to DC volts, 20V range.
Back-probe the harness side of the connector. One of the two wires should show roughly 12 volts DC, or close to battery voltage. The other wire is the ground return through the safety module.
If you see 12V on one side, the module is awake and trying to read the switch.
If you see 0V on both wires, the safety module isn't powering the circuit. That points to a different problem, like a failed safety module, a bad brake switch upstream, or a blown fuse. The seat switch isn't your problem in that case.
What to look for on the harness side:
- 12V on one wire, ground on the other: harness is good, and the problem is the switch or the connector.
- 0V on both wires: problem is upstream, not the seat switch.
- Voltage drops below 10V when you sit on the seat: weak connection, corroded pins, or undersized wiring.
- Reading flickers with the engine off and the key on: bad ground or loose connector.
A clean reading on both the switch and the harness tells you the seat switch circuit is working as designed. If the mower still dies when you stand up, the problem is downstream, and you should look at the safety module or the ignition interlock relay next.
The bench test shortcut
If the switch is hard to reach with the seat on, remove it entirely. Most seat switches are held by one or two bolts or by a clip. Once it's out, you can bench test it with your thumb on the plunger.
Bench testing is faster and more reliable because you're not fighting the seat pan or the wiring harness. A 2-wire switch should toggle cleanly between OL and 0 ohms with thumb pressure. If it doesn't, it's done.
Common Mistakes and Misdiagnoses That Cost You Money
Most seat switch headaches are not the switch at all. They're the things around it, and skipping those steps is where money and weekends disappear.
Replacing the switch before testing the connector
Corroded or loose pins cause more no-starts than dead switches. Pull the connector apart and look at the metal inside. Green fuzz, white powder, or a pushed-back pin means the connector is your real problem.
A shot of contact cleaner and a small brush can save you a $30 part.
Bypassing the switch as a "test"
We've seen forum posts that suggest jumpering the two wires to "see if the switch is the problem." That works for diagnosis, but leaving it jumped is a serious safety violation. The interlock exists because mowers have killed people, including children and bystanders, when the operator fell off. Per CPSC incident data, ride-on mowers cause roughly 80,000 emergency room visits each year, and a meaningful share involve operator presence interlocks that were defeated or failed.
Use a jumper only long enough to confirm the failure, then unplug it and fix the root cause.
Mistaking the brake switch for the seat switch
The brake switch sits under the floor pan, near the brake pedal. It has the same job in the interlock loop. If your mower won't crank with the brake pressed, test the brake switch the same way before you start pulling the seat apart.
A lot of "seat switch" replacements on YouTube are actually brake switch fixes.
Ignoring the safety module
If the switch tests good and the harness has 12V, the safety module itself may be the failure. Modules are usually $60 to $150, and they sit under the dash or near the battery. Don't throw one in without testing the upstream switches first.
That's an expensive guess.
Trusting a "universal" switch without checking the spec
Aftermarket switches look the same. They aren't. Plunger travel, mounting hole spacing, and current rating vary.
A switch that's rated for 5 amps won't last in a 10-amp circuit. Match the part number from the manufacturer, or at least the current rating and travel distance, before you swap it in.
Decision Guide: Replace It, Clean It, or Call a Tech?
Here's the decision tree our research keeps landing on for this specific test.
| Your Reading | What It Means | Next Move |
|---|---|---|
| 0 Ω seated, OL empty (NO switch) | Switch is good | Test harness side and brake switch |
| OL seated, 0 Ω empty | Switch is wired or specced wrong | Check service manual for switch type |
| Reads 1 to 5 Ω seated | Weak contact | Clean, retest, replace if it returns |
| Beeps intermittently | Failing contacts | Replace |
| 12V present on harness, switch fails | Confirmed bad switch | Replace ($15 to $40) |
| 0V on both harness wires | Upstream failure | Test brake switch, fuses, safety module |
| 12V on harness, switch passes, mower still dies | Module or ground issue | Call a tech |
If the switch itself fails the test, replacement is the right move. It's a $20 part and a 15-minute job for most mowers. One bolt, one connector, done.
If the switch passes but the mower still dies when you stand up, the problem is downstream. That's when a small engine tech earns their $90 service call. They've got module bypass tools and dealer-level wiring diagrams that most homeowners don't.
Frequently Asked Questions
Can I test the seat switch without removing it?
Yes. You can back-probe the connector while it's still plugged in, but you'll get a parallel reading through the safety module. Unplug the connector and test the switch side alone for a clean result.
The harness side still needs the key on to read voltage.
What if my multimeter doesn't have a continuity beep?
Use the resistance (ohms) setting instead. 0 to 0.5 Ω is a closed contact. OL or a "1" on the left side of the display is open. You'll be reading the same circuit, just without the audible beep.
How much does a seat switch cost?
Aftermarket switches run $15 to $40 as of 2026. OEM switches from the dealer run $25 to $80 depending on brand. Universal switches exist, but match the mounting and rating before you buy one.
Will a bad seat switch keep a mower from starting?
Yes, on most modern mowers. The seat switch is part of the interlock loop. If the safety module sees an open circuit where it expects a closed one, it won't allow the engine to crank or will kill it within a second of starting.
Is it safe to mow with a bypassed seat switch?
No. The operator presence control is a primary safety system. Bypassing it puts the operator and anyone nearby at risk of blade contact if the operator falls or steps off.
It also voids the mower's compliance with ANSI/OPEI B71.1.
How long does a seat switch usually last?
Aggregate user reports suggest 5 to 10 years for residential mowers. Commercial units see 2 to 4 years. The plunger mechanism and internal contacts wear out, and corrosion speeds things along if the mower is stored outside.

Similar Posts