How to Test a Riding Mower Starter Solenoid with a
Lead Turfgrass & Lawn Care Specialist at Totally Green Lawn · Certified Turfgrass Specialist (CTS), Master Gardener, B.S. in Agronomy & Turf Science · 14+ years in residential turf management, organic fertilization, and weed science
You turn the key, hear a single tired click, and nothing happens. Your riding mower sits there like a dead brick. Before you order a new starter or haul the machine to a shop, there's a 30-second test you can run with a flathead screwdriver.
It tells you whether the solenoid is the actual culprit, or just the messenger for a bad battery, a corroded cable, or a dead starter.
In our research on small-engine electrical diagnostics, manufacturer service bulletins (including those from Briggs & Stratton and John Deere) confirm that a screwdriver bypass is the fastest field test for a 4-post starter solenoid. Most riding mower solenoids pull 100 to 200 amps during engagement, and they're built to be momentarily shorted across the two large posts for diagnostic purposes. Below is exactly how to do it, what to listen for, and the mistakes that'll send you chasing the wrong part.
Quick Answer
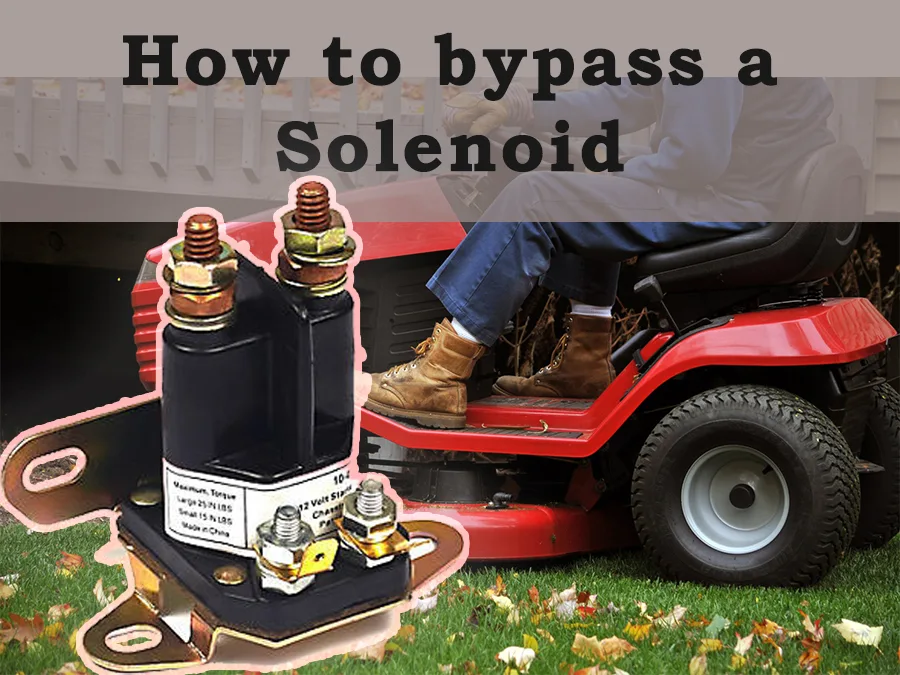
To test a riding mower starter solenoid with a screwdriver, park on level ground with the brake set. Locate the solenoid's two large terminal posts. Touch a metal screwdriver shaft across both posts for one second.
A healthy solenoid clicks loudly and the starter cranks the engine. No crank means the solenoid is bad, or the starter is seized.
What the Screwdriver Test Actually Tells You
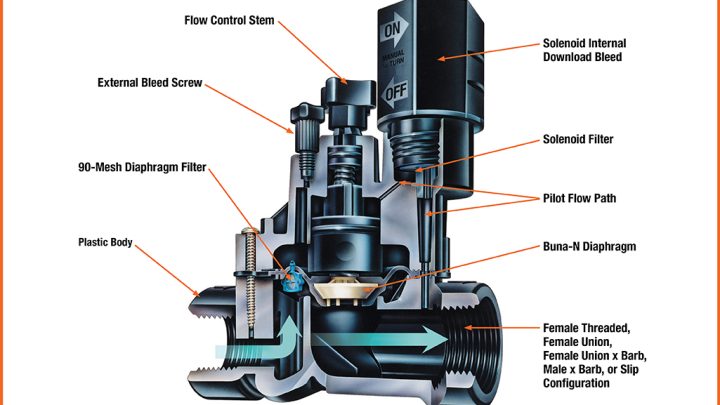
The starter solenoid is basically a heavy-duty switch. When you turn the key, a small current from the ignition switch energizes a coil inside the solenoid. That coil pulls a copper contact plate down, which closes the circuit between your battery and the starter motor.
The big cables and the big amp draw never touch the key switch. They route through the solenoid instead.
The screwdriver test bypasses the entire control side. Instead of letting the ignition switch send a small "wake up" signal to the solenoid coil, you directly bridge the two large posts with a conductive metal tool. That tells 12 volts from the battery to jump straight to the starter motor.
If the starter spins, your solenoid is the weak link. If nothing happens at all, the problem is downstream (bad starter, bad battery, or bad cables).
Here's the thing most guides skip: the test also tells you about the battery. A healthy battery at rest reads 12.4 to 12.7 volts. If it drops below 12.2 volts, it may not have the cold cranking amps to actually spin the starter, even through a perfectly good solenoid.
So a failed test doesn't automatically mean a bad solenoid. It just means you need to keep digging.
Getting Set Up: Tools, Safety, and Finding the Solenoid
You only need three things for this test. A flathead screwdriver with a metal shaft, ideally 6 to 10 millimeters wide. A pair of safety glasses, because batteries off-gas hydrogen and sparks happen.
And a basic understanding of where the solenoid lives on your specific mower.
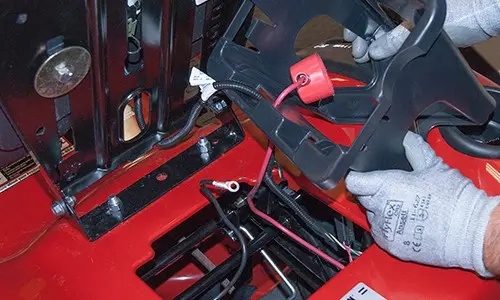
Most riding mower solenoids are mounted on the frame rail near the battery, often under the seat or behind the front grille. On John Deere models, it's typically a black cube on the right side of the frame. On Cub Cadet and MTD mowers, you'll usually find it near the battery tray.
On Husqvarna and Craftsman riding mowers, it can be tucked under the dash panel or down by the steering column.
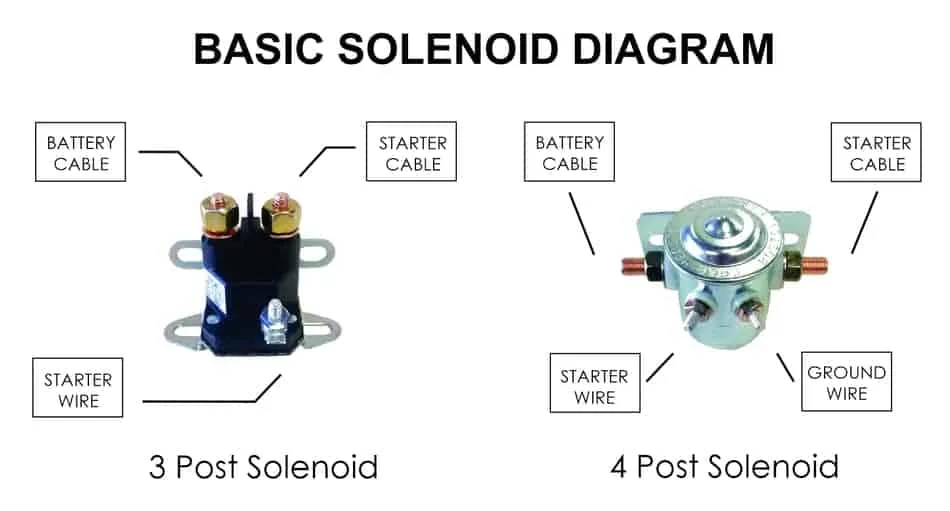
The solenoid has two distinct terminal sizes. Two large posts (usually 5/16" or 3/8" in diameter) carry the heavy current. One large post has a thick cable running to the battery's positive terminal.
The other large post has a thick cable going to the starter motor. Then there are two small terminals (sometimes just one on 3-post designs) that handle the low-current control side from the ignition switch.
| Terminal Type | Size | Purpose |
|---|---|---|
| Large post (battery side) | 5/16" or 3/8" | Direct +12V feed from battery |
| Large post (starter side) | 5/16" or 3/8" | Output to starter motor |
| Small terminal (switched) | 1/4" spade | Trigger signal from ignition |
| Small terminal (ground) | 1/4" spade | Coil return path |
Before you touch anything, do these prep steps. Park on a flat surface. Engage the parking brake fully.
Make sure the PTO (power take-off) switch is off so the blades aren't engaged. Put the transmission in neutral. Remove the key from the ignition.
Then put your safety glasses on.
The Step-by-Step Screwdriver Bypass Test
With everything prepped and your eyes protected, here's the actual test sequence. This takes about 10 seconds once you've found the solenoid.
Step 1: Confirm the key is off and you're in neutral. The engine should not be able to crank even if the test works. Double-check the parking brake.
Step 2: Identify the two large posts. Look for the two beefiest terminals. One has a thick red or positive cable coming from the battery. The other has a thick cable (often also red, sometimes yellow) running down toward the starter motor at the base of the engine.
Step 3: Grip the screwdriver by the insulated handle. Make sure your hand and fingers are nowhere near the metal shaft. Hold it like a screwdriver, not a letter opener.
Step 4: Touch the screwdriver shaft across both large posts simultaneously. You want a quick, firm tap. Don't drag it slowly. Don't hold it there for more than 1 to 2 seconds.
The moment you complete the circuit, you'll get one of three responses.
Step 5: Listen carefully and watch for results. The solenoid should make a loud, solid click. The starter should engage and crank the engine. If both happen, the solenoid itself is bad (because it's not closing the circuit on its own), but everything downstream works.
Step 6: Pull the screwdriver away cleanly. Don't let it rest on the posts. Don't bridge them for more than a flash. You're sending 100+ amps through a tool not designed for sustained load.
One important note: never bridge the two small terminals. Those carry low-current control signals, and shorting them will burn the wiring harness or fry the ignition switch. Only ever touch the two large posts with your screwdriver.
Reading the Results: Clicks, Silence, and What Each Means
What happens in that one-second tap tells you almost everything you need to know. Here's how to interpret each possible outcome.
Strong click + engine cranks: This means your battery, cables, starter motor, and engine are all healthy. The solenoid has internal corrosion, a weak coil, or a worn contact plate. Replace the solenoid.
They're $15 to $60 for aftermarket, and the swap is a 15-minute job with basic hand tools.
Strong click + no crank: The solenoid is engaging, but the starter motor isn't spinning. The issue is either a dead starter, severely discharged battery, or massive voltage drop in the cables. Test the battery voltage next.
If it's above 12.4 volts, suspect the starter.
Weak click or rapid clicking + no crank: Classic dead battery. The solenoid tries to engage but doesn't have enough current to hold it closed. Charge the battery or jump it.
As of 2026, most AGM batteries for riding mowers run $90 to $180, while traditional flooded cells stay around $50 to $100.
No click, no crank, no spark: Either the battery is completely dead, the main fuse is blown, or a safety switch is open (seat switch, brake switch, or PTO switch). These safety interlocks cut the control signal before it ever reaches the solenoid.
Loud click from the solenoid but no power at the starter post: Internal contact failure. The coil pulls the plunger, but the copper plate is burned or pitted and won't pass current. Replace the solenoid.
Don't bother cleaning the internals on a sealed unit.
Multiple clicks, then nothing, then one big click: Voltage drop under load, usually from corroded battery terminals or a bad ground strap from the battery negative to the frame. Clean the terminals with a wire brush, retighten, and retest.
Common Mistakes That Lead to a Wrong Diagnosis
Most bad solenoid swaps come from one of three errors. Skipping the battery check, bridging the wrong terminals, or holding the screwdriver across the posts for too long.
Battery voltage gets overlooked constantly. A solenoid needs at least 9.6 volts at its small trigger terminal to pull the plunger closed. If your battery is at 11.8 volts at rest, the screwdriver test might still spin the starter.
But the regular key-on start won't work because the voltage sags further under load. Always confirm battery health before condemning the solenoid.
Bridging the small ignition terminals is a classic mistake and an expensive one. Those terminals handle milliamps, not amps. Shorting them with a screwdriver welds the contacts, blows the ignition switch, and sometimes takes out the entire wiring harness.
If you see a spark bigger than a camera flash, you hit the wrong posts.
Holding the screwdriver in place too long causes arcing. The contact plate inside the solenoid can weld itself to the posts. Now you've created a new problem: a solenoid stuck in the closed position.
Tap, don't rest. One second maximum.
| Mistake | What Happens | Fix |
|---|---|---|
| Skipping battery voltage check | Replace good solenoid, problem returns | Test battery first (12.4V+ rest) |
| Bridging small terminals | Blows ignition switch, burns wires | Only bridge the two LARGE posts |
| Holding screwdriver too long | Welds internal contacts, new failure | 1 second tap, then pull away |
| Testing with engine hot | False readings, burn risk | Let components cool first |
| Ignoring safety switches | Blames solenoid for open interlock | Check seat, brake, PTO switches |
When It's Not the Solenoid: Other Things to Check First
The solenoid is the messenger about 40% of the time, but the actual failure is upstream. Before you spend $30 on a replacement, run these quick checks in order.
Start with the battery terminals. Corrosion on the positive or negative post adds resistance. Even a thin green oxide layer can drop 2 to 3 volts under load.
Disconnect the cables, scrub the posts and clamps with a wire brush, and retighten.
Next, check the ground strap. The negative battery cable should run to a clean, bare metal spot on the engine block or frame. If it's corroded, loose, or painted over, the starter won't get full current.
Sand the contact point shiny and retest.
Then verify the safety switches. Modern riding mowers have interlocks on the seat, brake, and PTO. If any one of them is open, the control signal never reaches the solenoid.
The operator's manual from Briggs & Stratton walks through the specific switch locations for most residential models.
If all of those check out and the screwdriver test still produces nothing, suspect the starter motor itself. A seized starter will draw current but not spin. You can confirm by trying to turn the engine by hand at the blade bolt.
If it won't budge, the engine is mechanically locked, and the starter can't do its job regardless of what the solenoid does.
Frequently Asked Questions
Can you test a solenoid without a multimeter?
Yes, the screwdriver bypass test is the standard field method. Touch the metal shaft across the two large terminals. Listen for a click and watch for the starter to crank.
It gives you a go or no-go answer in seconds.
Will a bad solenoid click or do nothing?
A bad solenoid usually does one of two things. It either clicks loudly with no crank, or it stays completely silent. Silence points to no power reaching the coil.
A click with no crank points to internal contact failure inside the solenoid body.
How do you start a riding mower with a bad solenoid?
Bridge the two large posts with a screwdriver for one second to manually engage the starter. Then drive the mower to a service shop or replace the solenoid before parking it again. This is a temporary fix, not a daily driver.
What size screwdriver do you need to jump a solenoid?
A standard flathead with a shaft about 6 to 10 millimeters wide works on most post diameters. The shaft needs to touch both large posts at the same time. Anything smaller won't bridge the gap.
Anything bigger risks touching the housing.
Is it safe to jump a starter solenoid with a screwdriver?
Yes, if you follow the safety rules. Wear eye protection, keep your hand on the insulated handle, only bridge the two large posts, and don't hold contact for more than a second. Never do this near spilled fuel or with the engine running.

Similar Posts